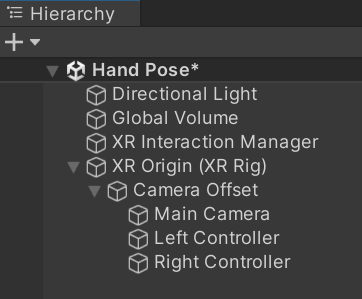
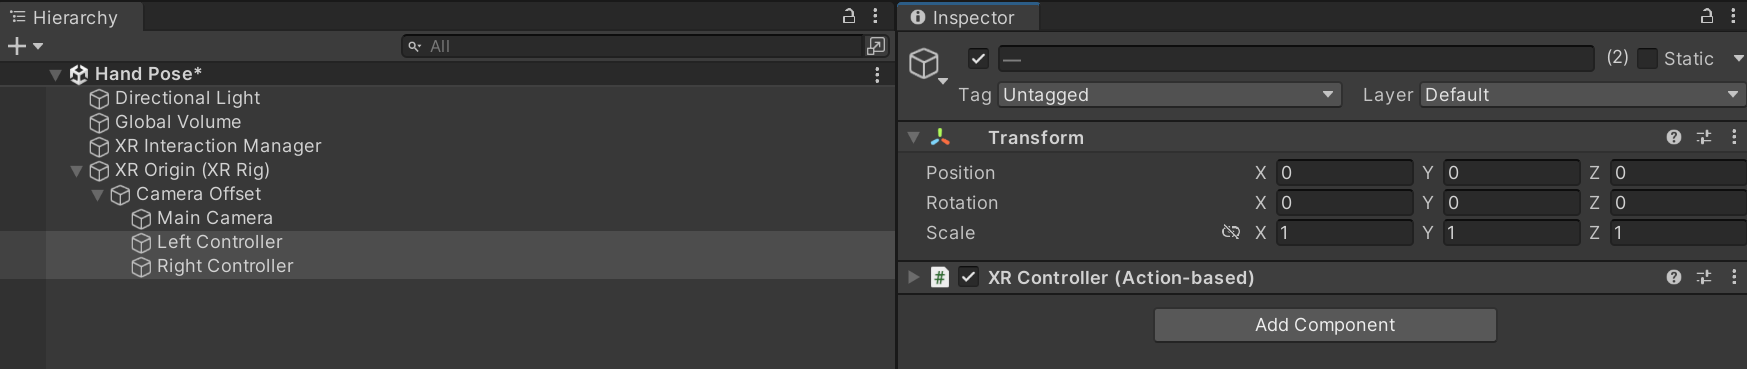
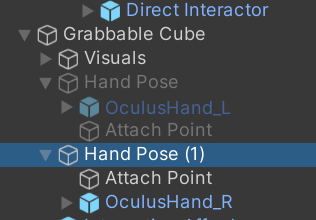
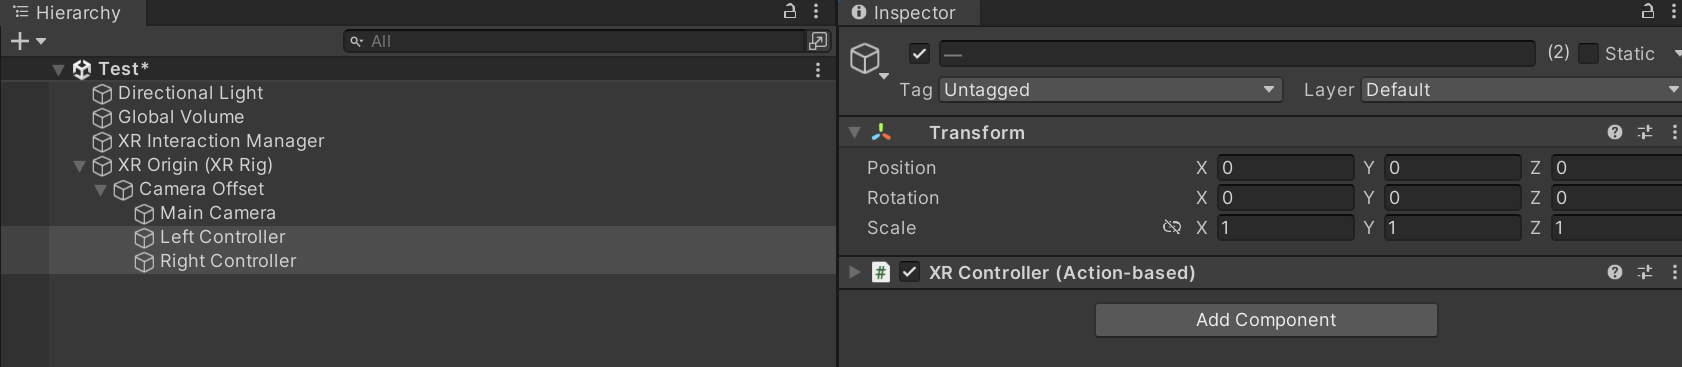
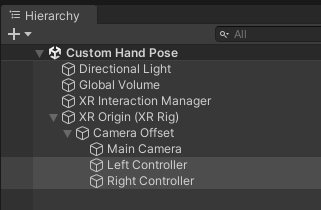
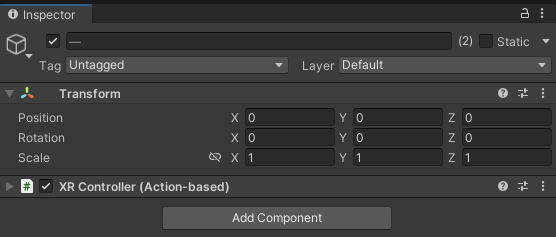
Left/Right Controller를 선택후 XR Controller를 제외한 나머지 컴포넌트를 제거 한다
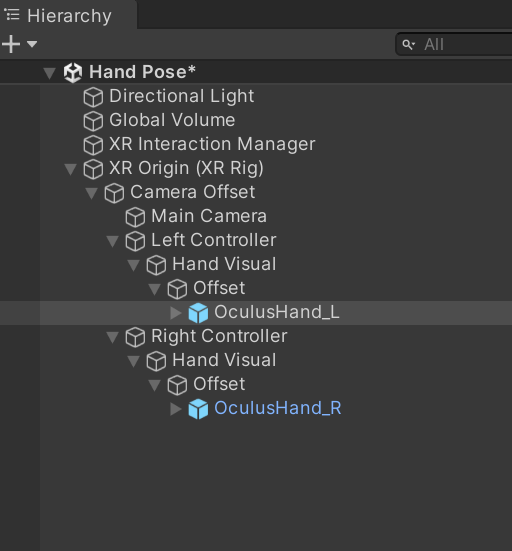
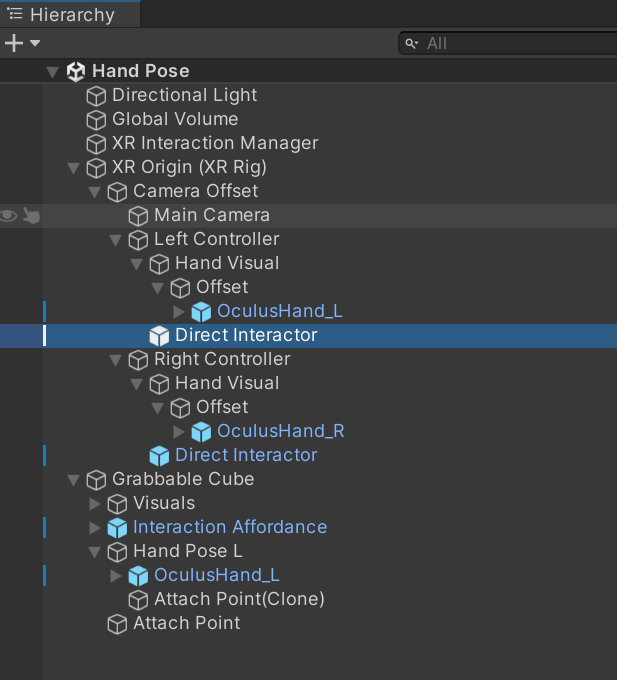
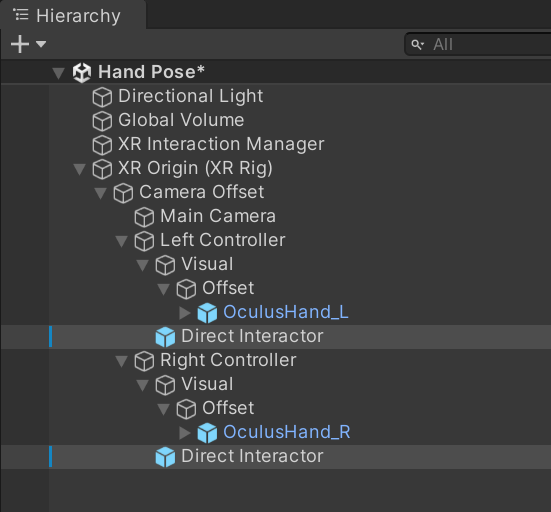
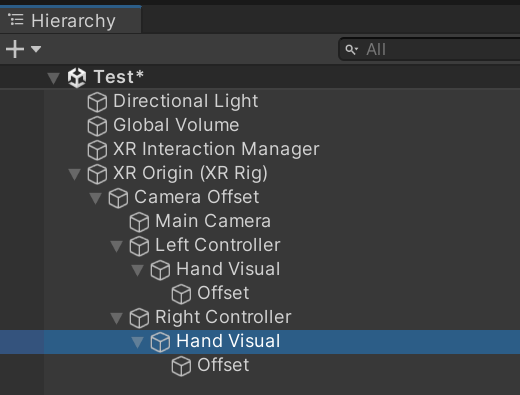
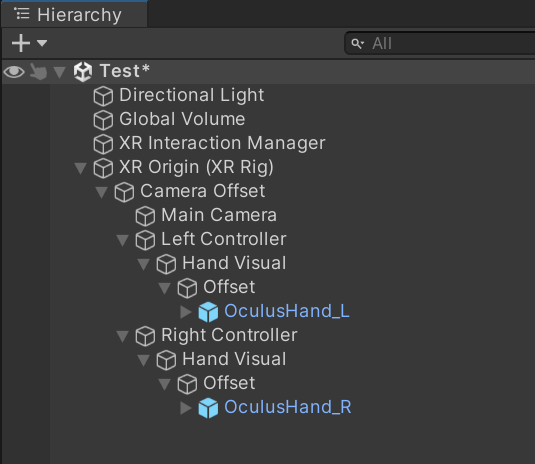
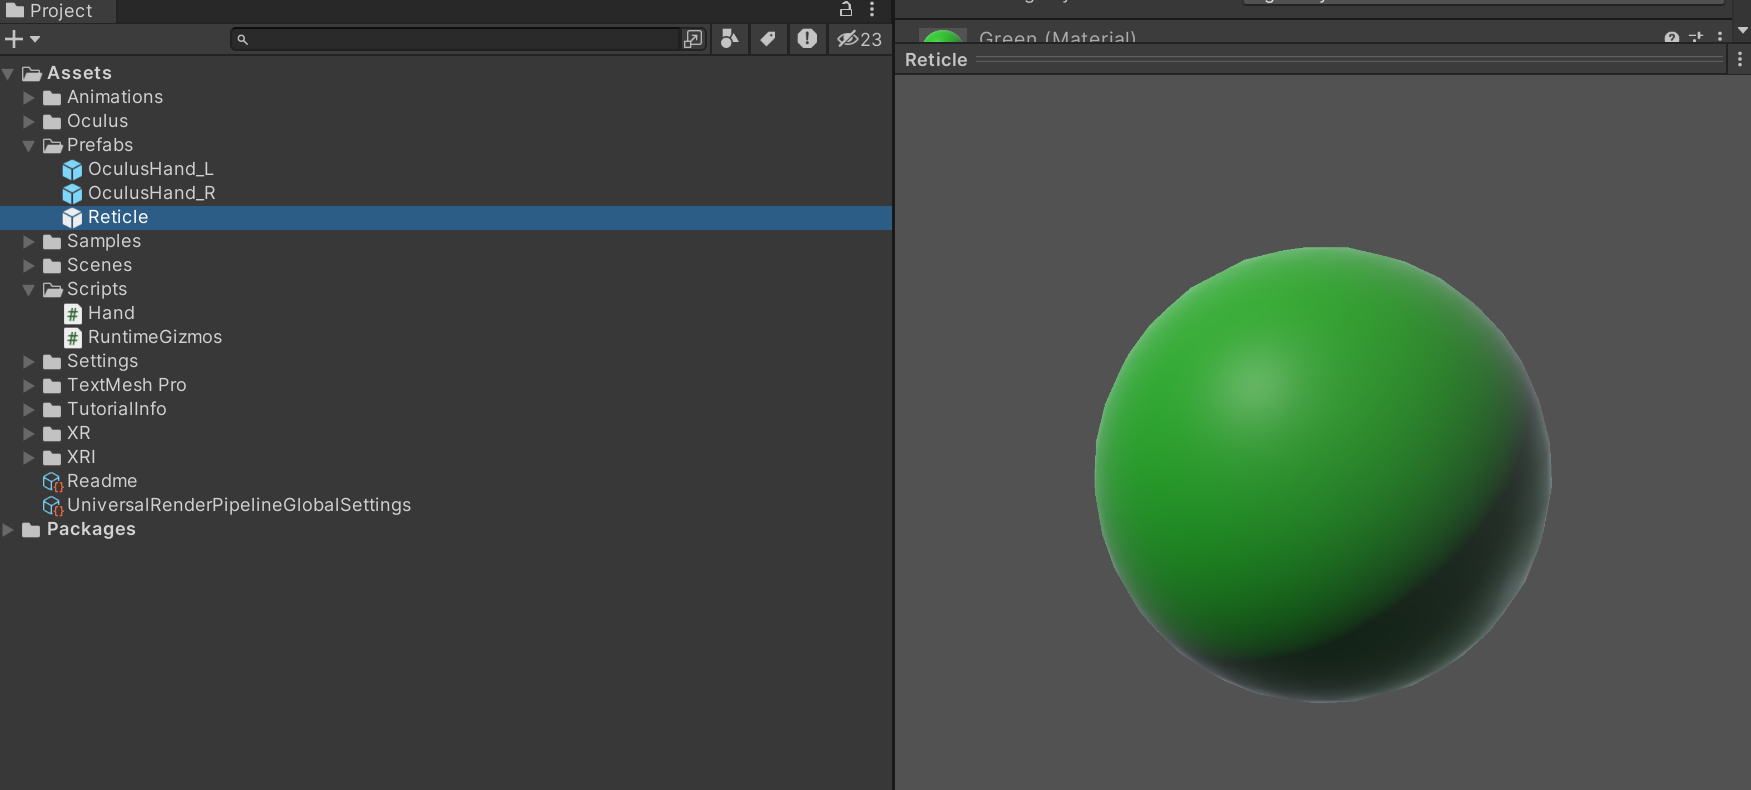
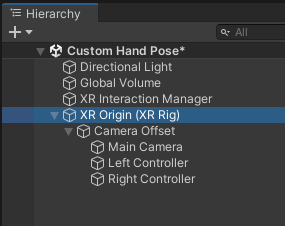
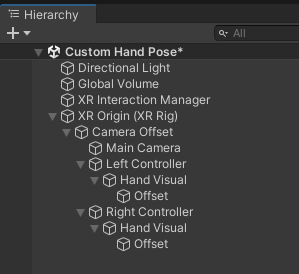
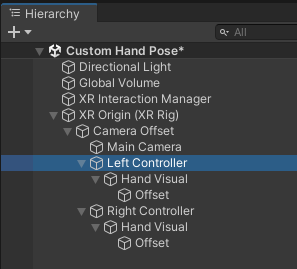
다음과 같은 구조로 만들고 핸드 프리팹을 넣어 준다
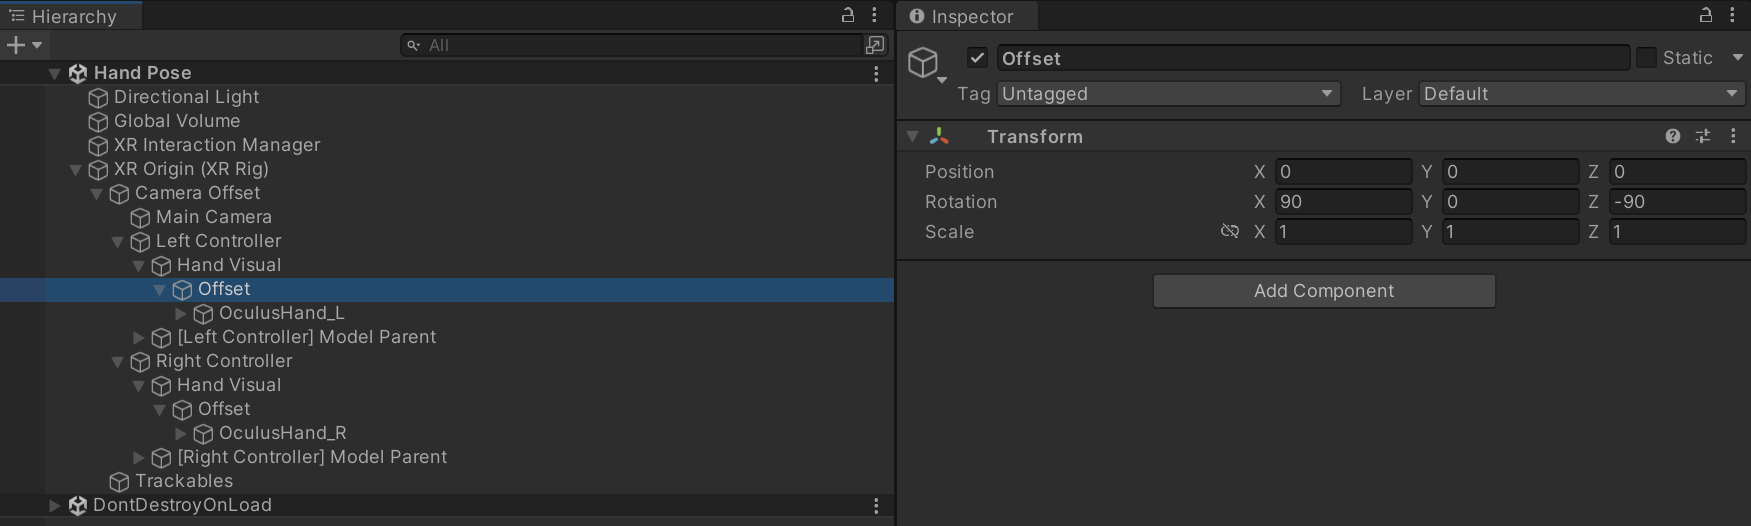
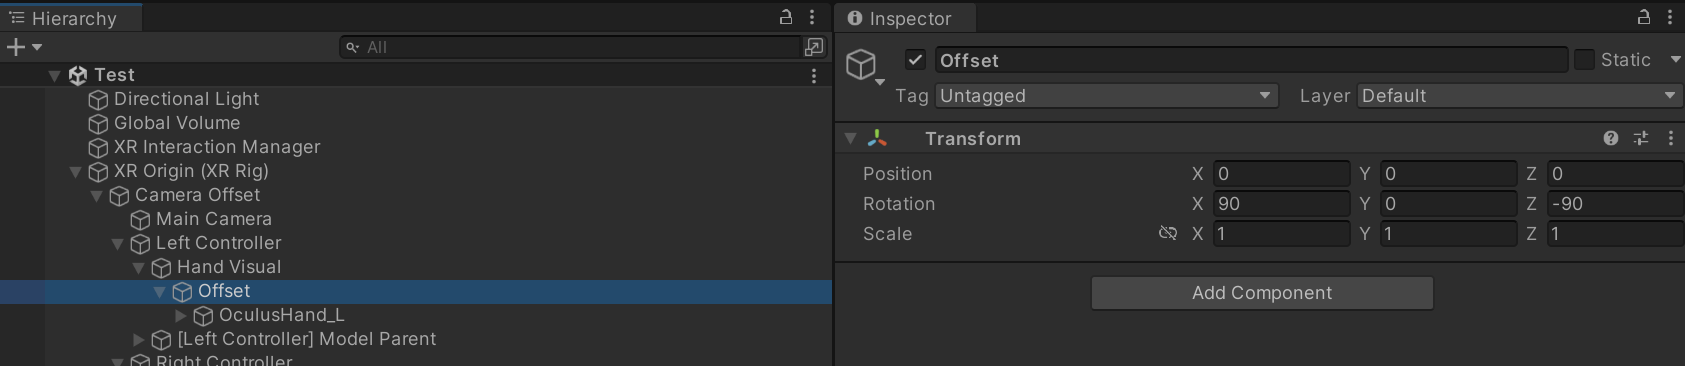
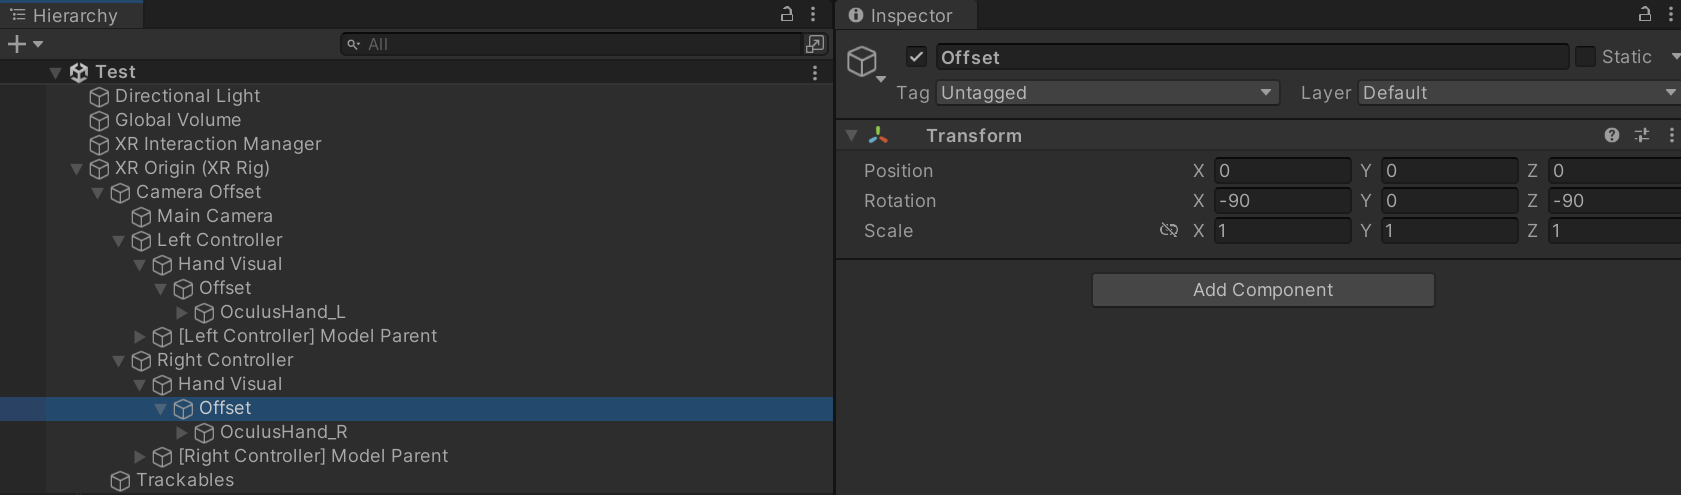
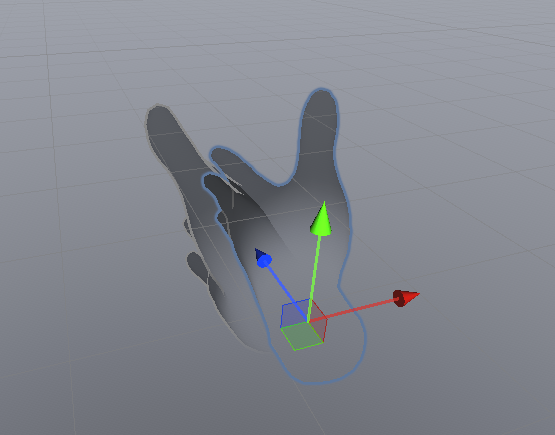
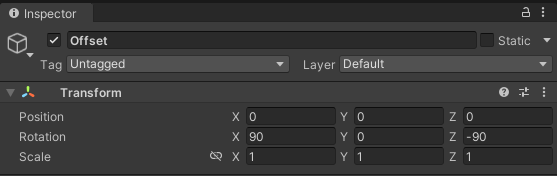
Left Controller / Hand Visual / Offset을 선택후 Rotation 90, 0, -90으로 설정 한다
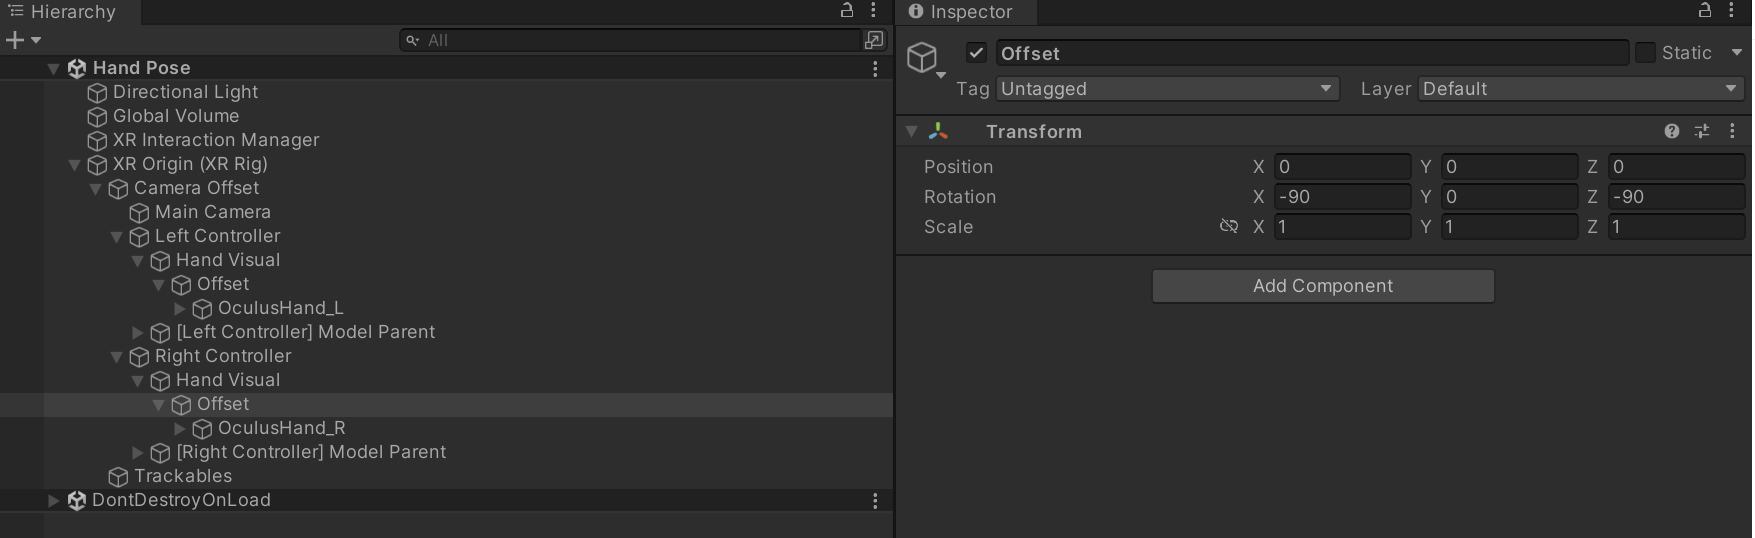
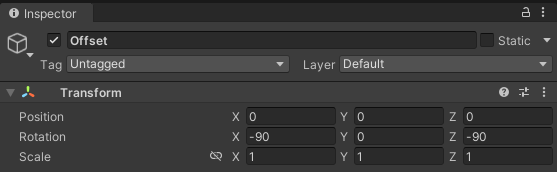
Right Controller / Hand Visual / Offset을 선택후 Rotation -90, 0, -90으로 설정 한다
실행후 결과를 확인 한다
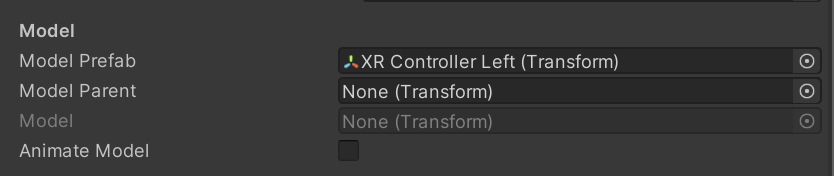
Left/Right Controller를 선택후 XR Controller의 Model Prefab을 None으로 설정 한다
실행후 결과를 확인 한다
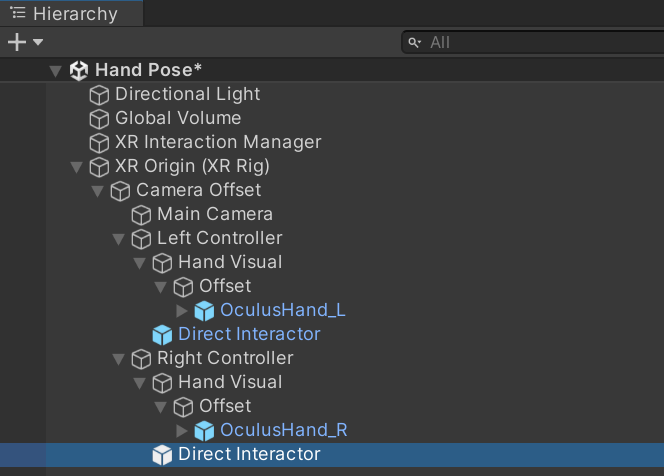
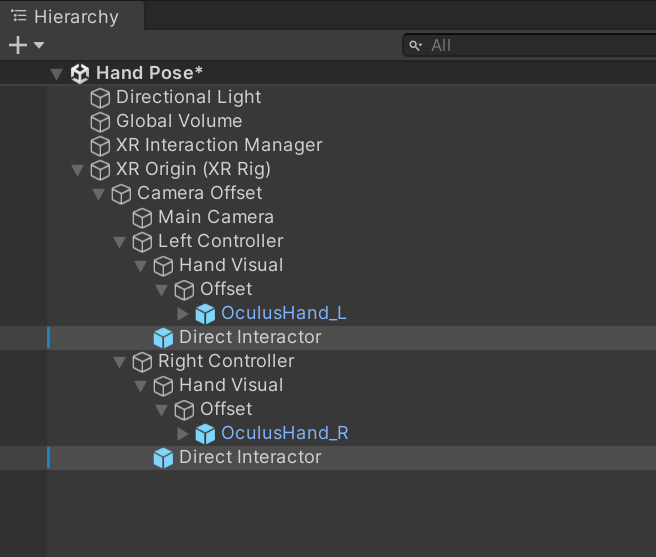
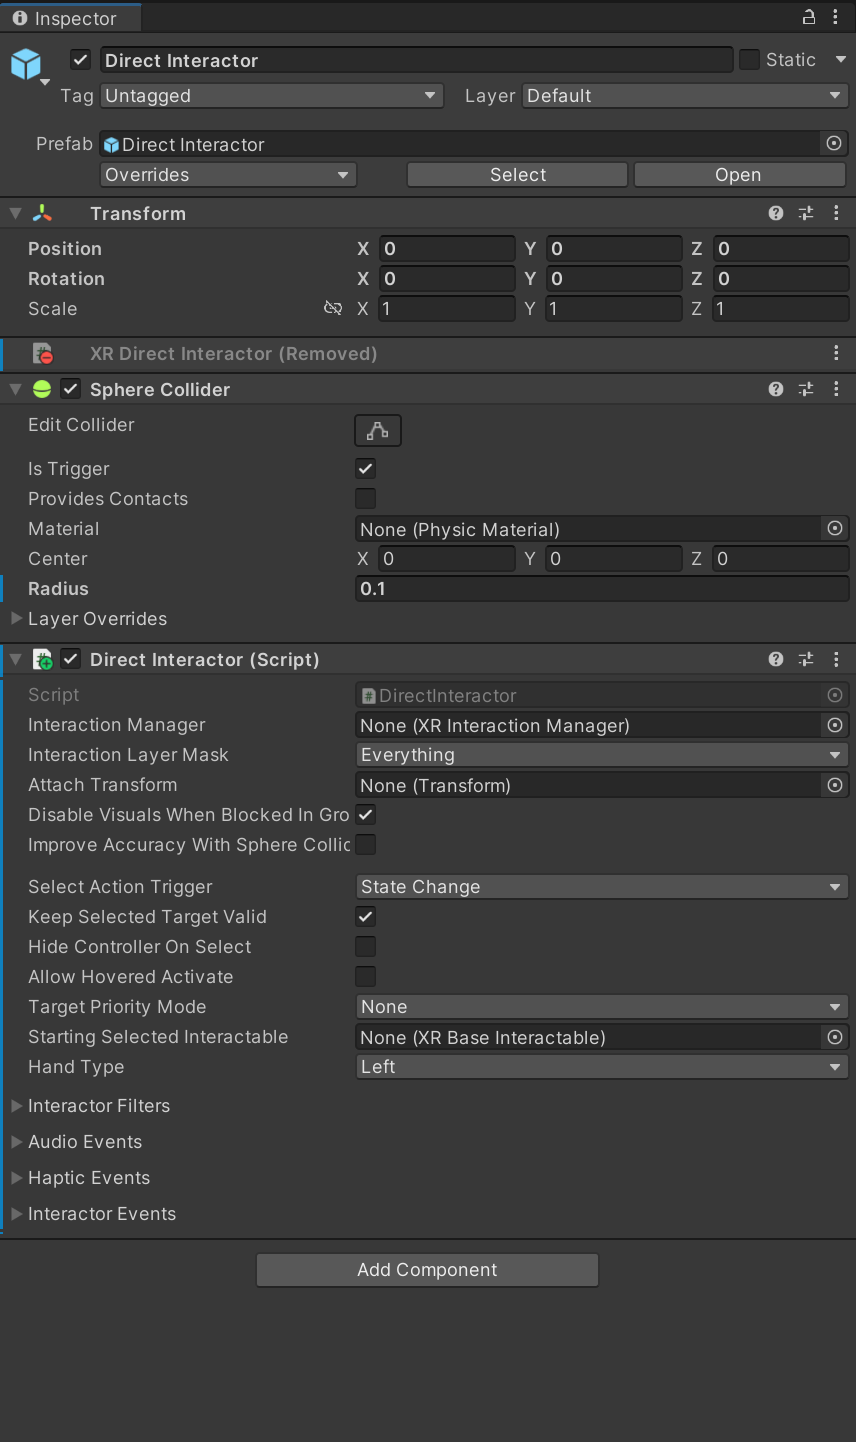
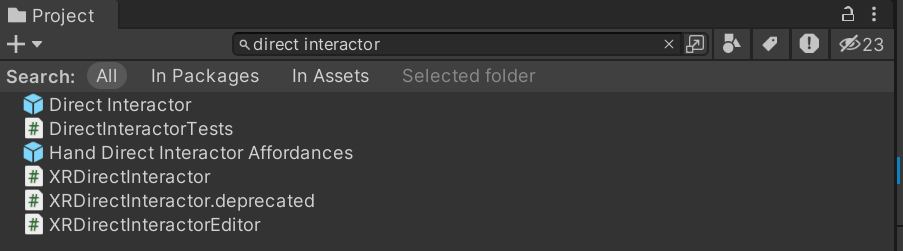
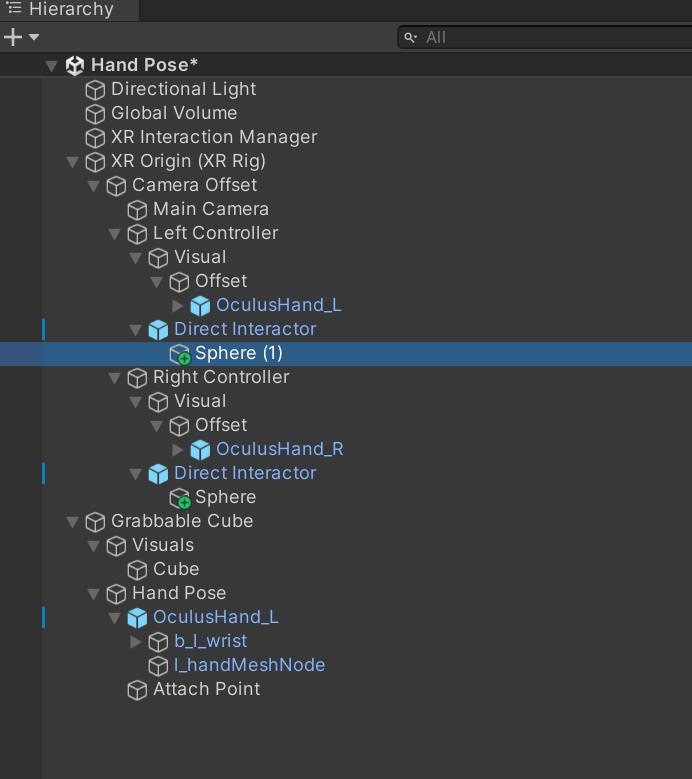
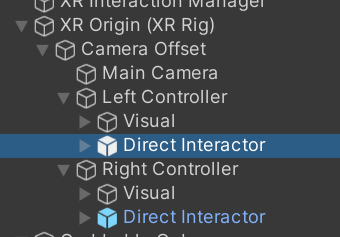
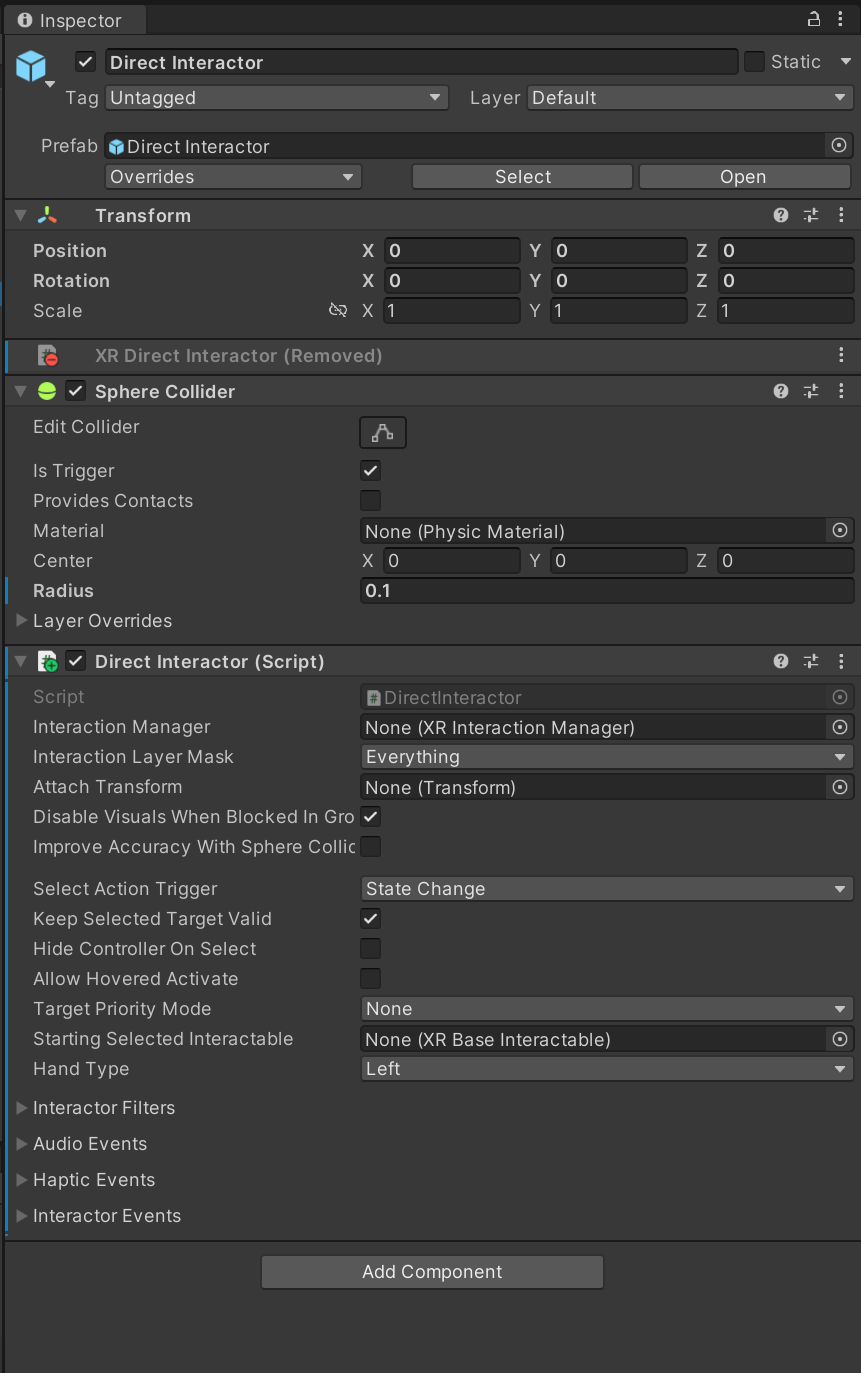
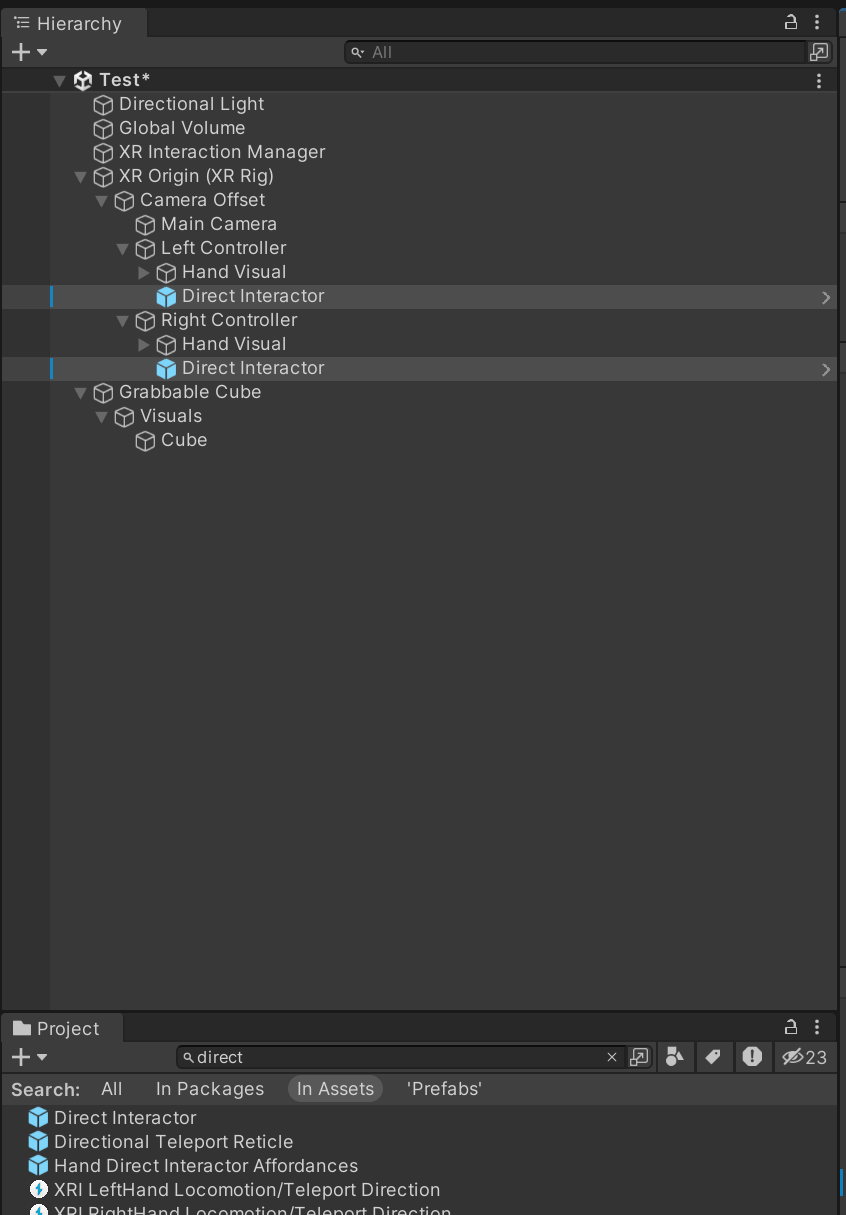
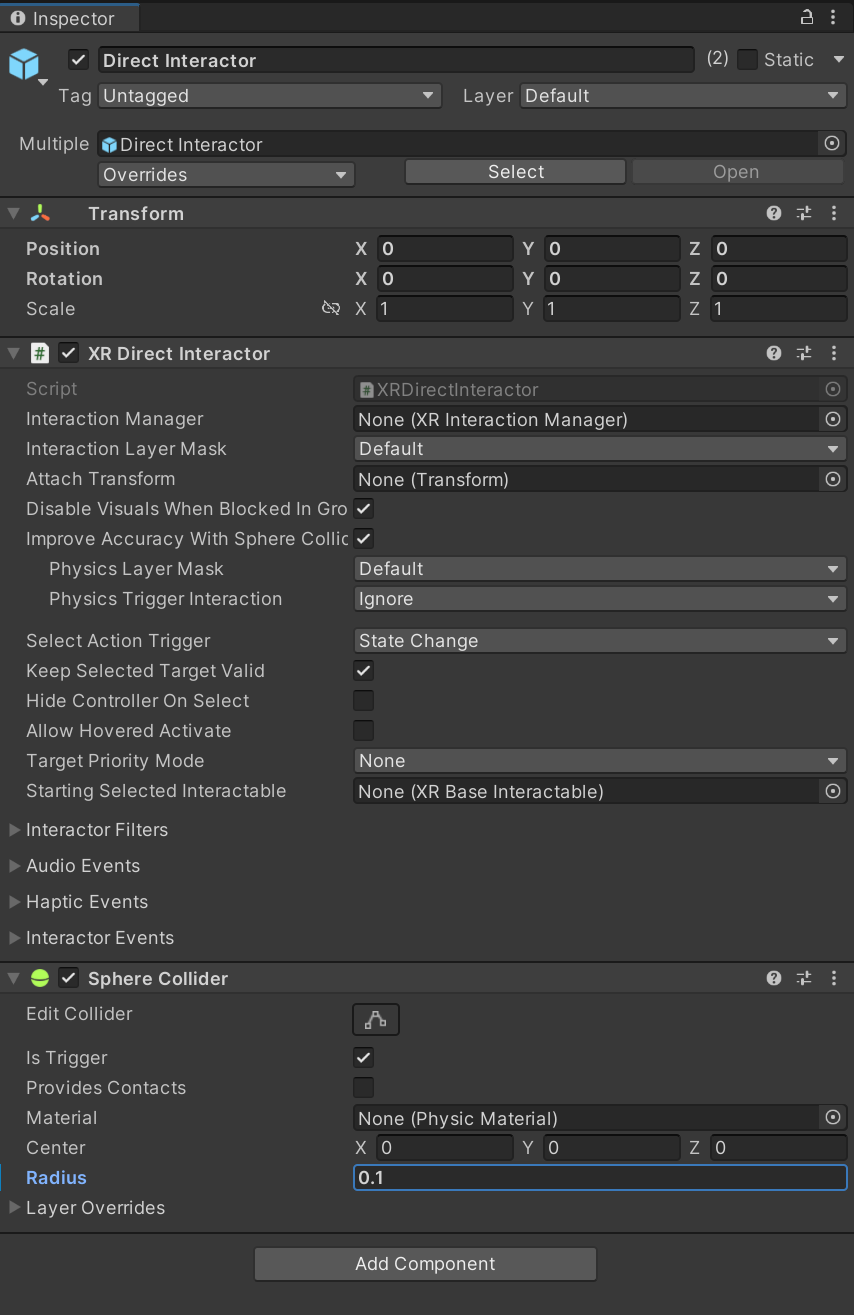
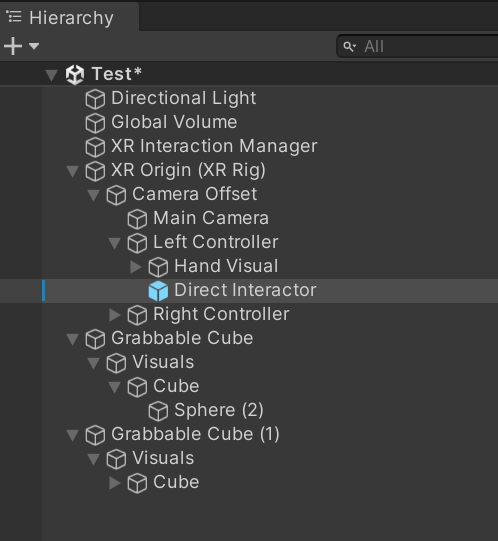
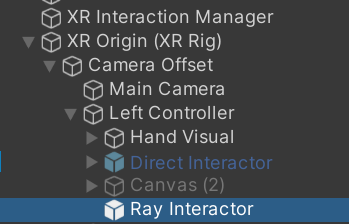
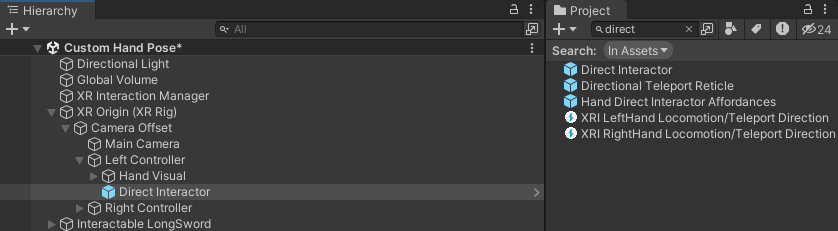
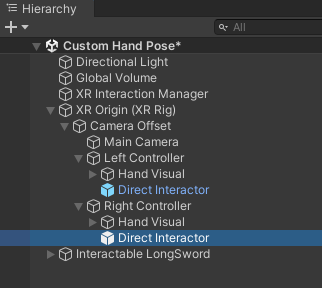
프로젝트 창에서 Direct Interactor를 검색해 프리팹을 Left, Right Controller자식으로 넣어준다
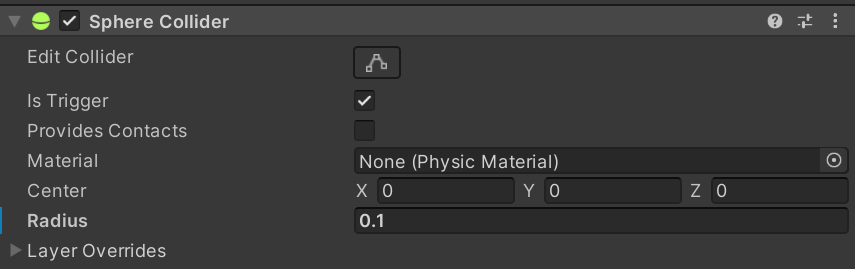
Direct Controller를 선택해 Sphere Collider의 Radius값을 0.1로 설정 한다
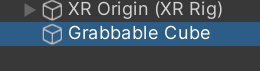
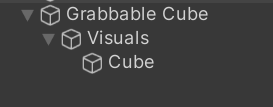
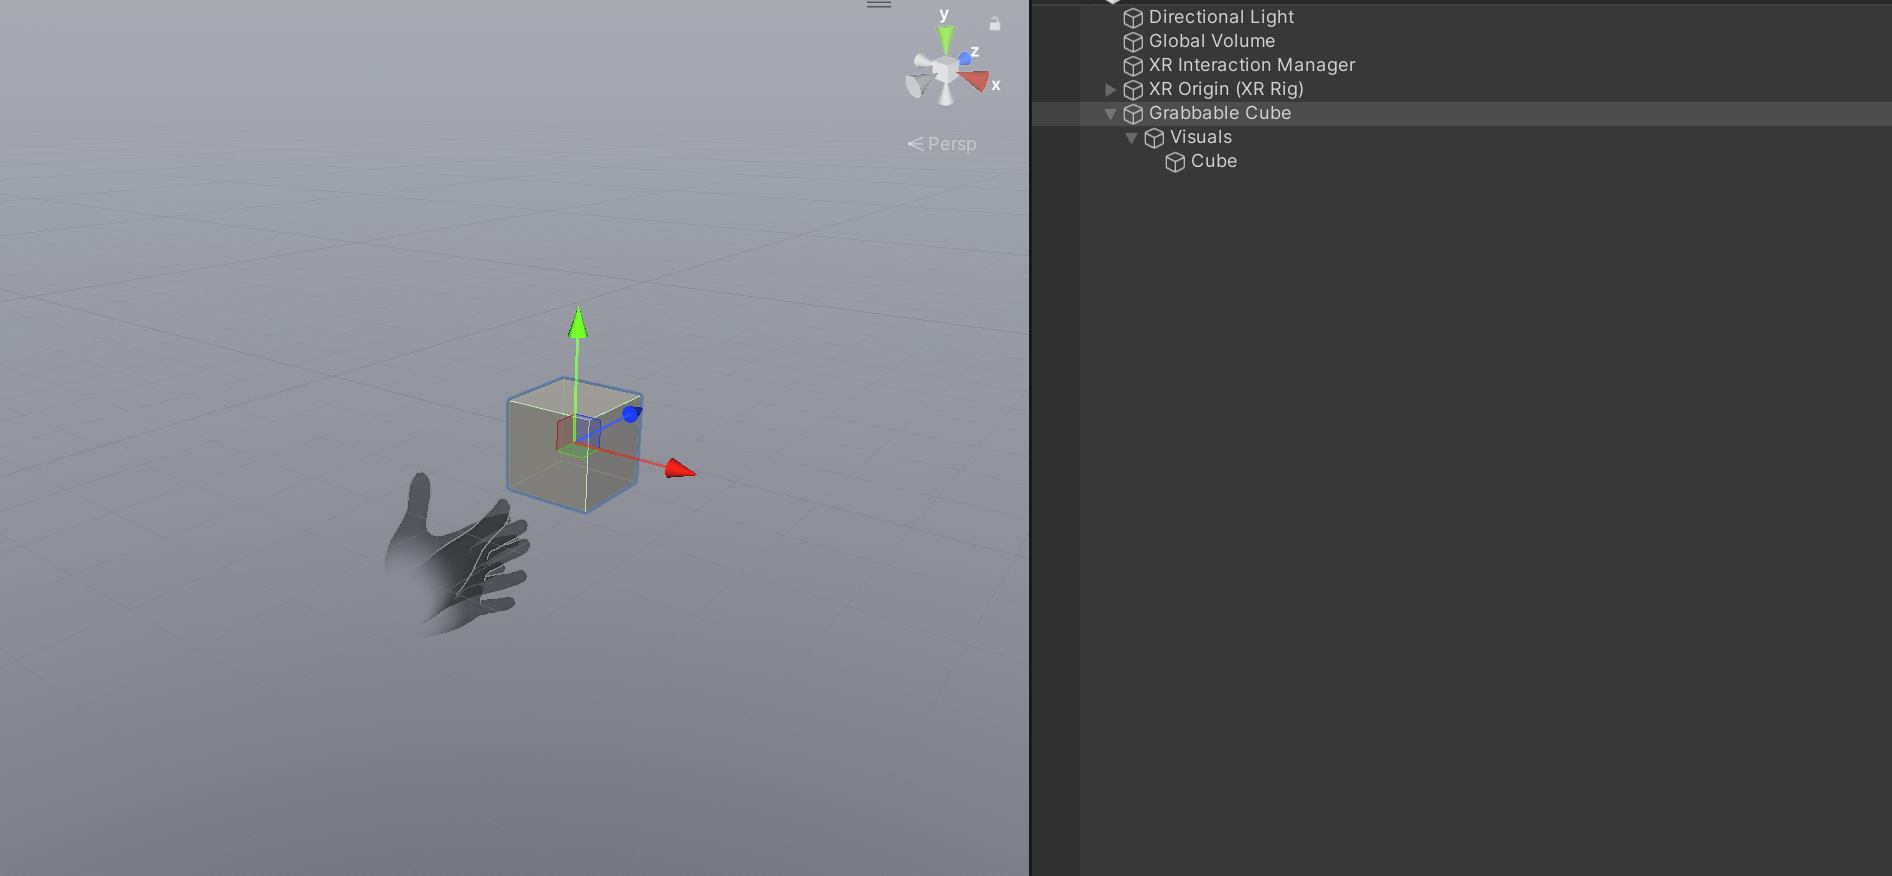
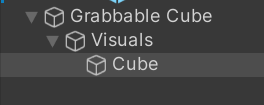
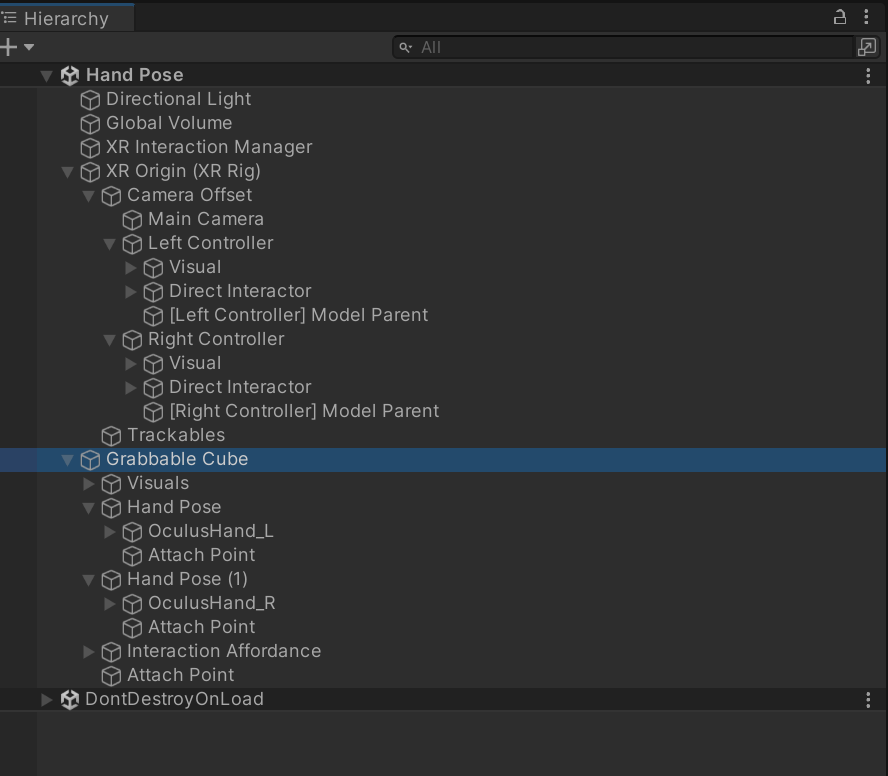
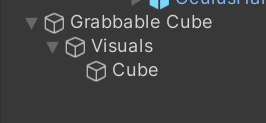
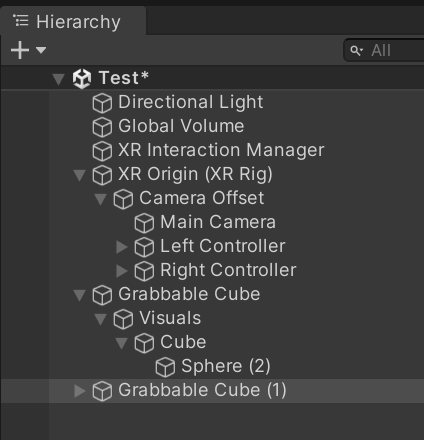
빈 오브젝트 (Grabbable Cube)를 만들고
자식으로 빈오브젝트 Visuals를 만들고 그 자식으로 Cube를 생성한다
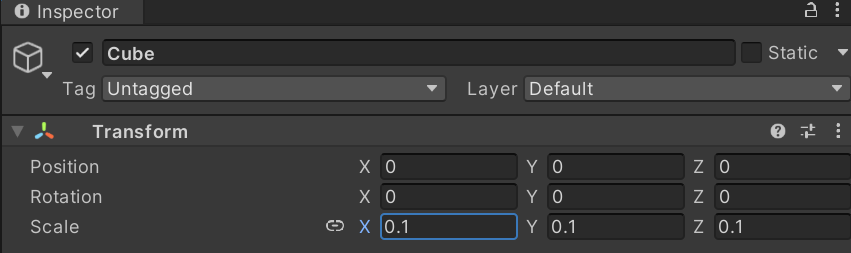
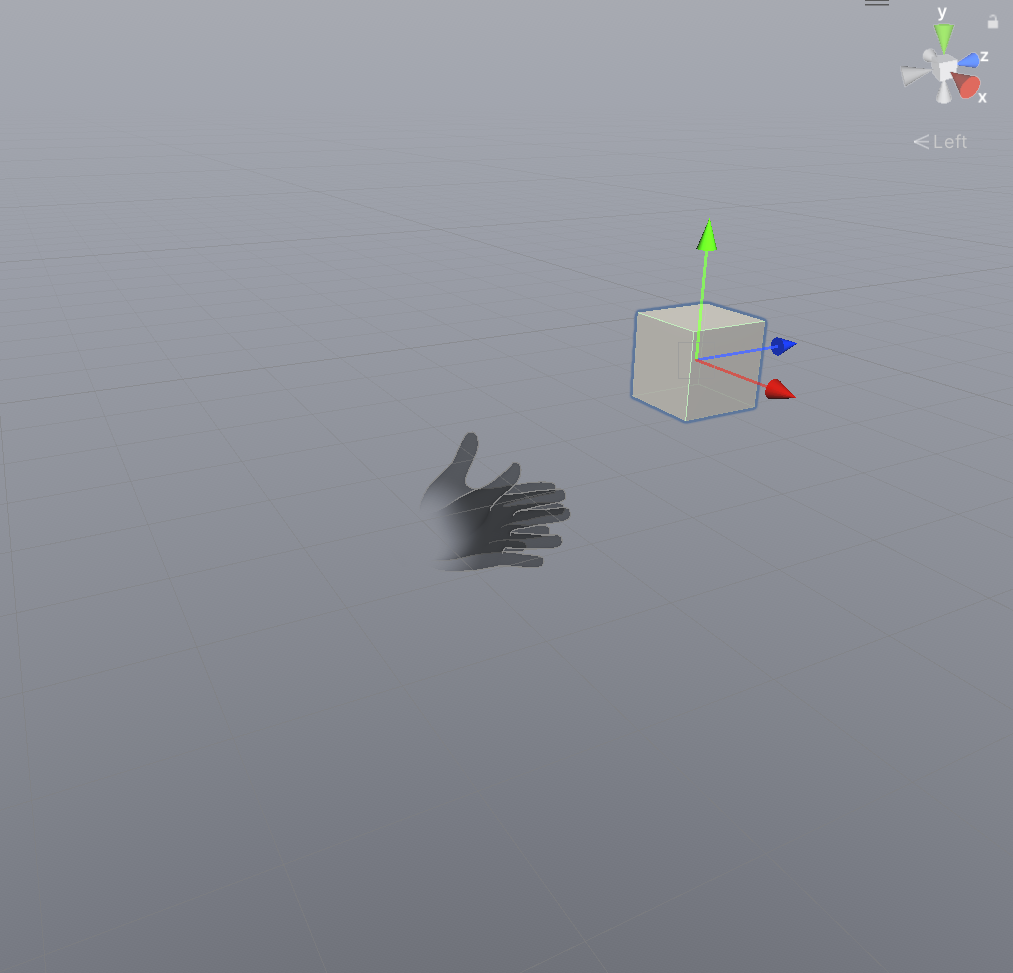
큐브의 크기를 0.1로 만들어 주고
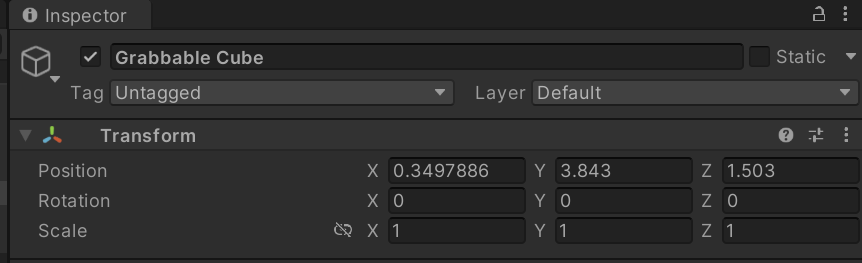
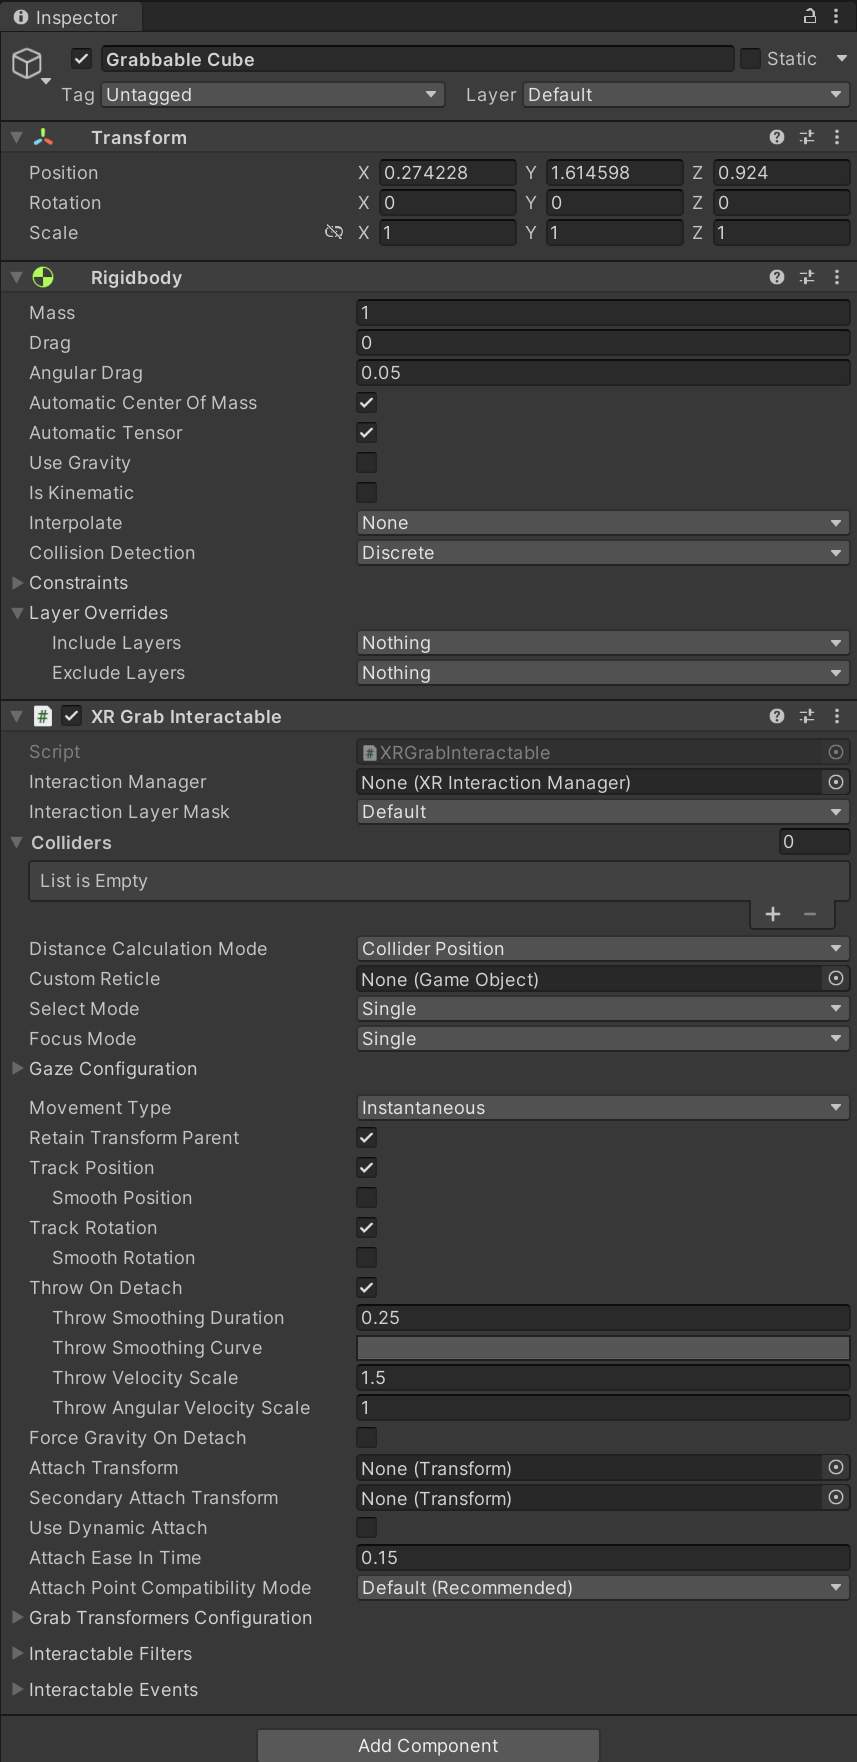
Grabbable Cube를 선택해 위치를 조절 한다
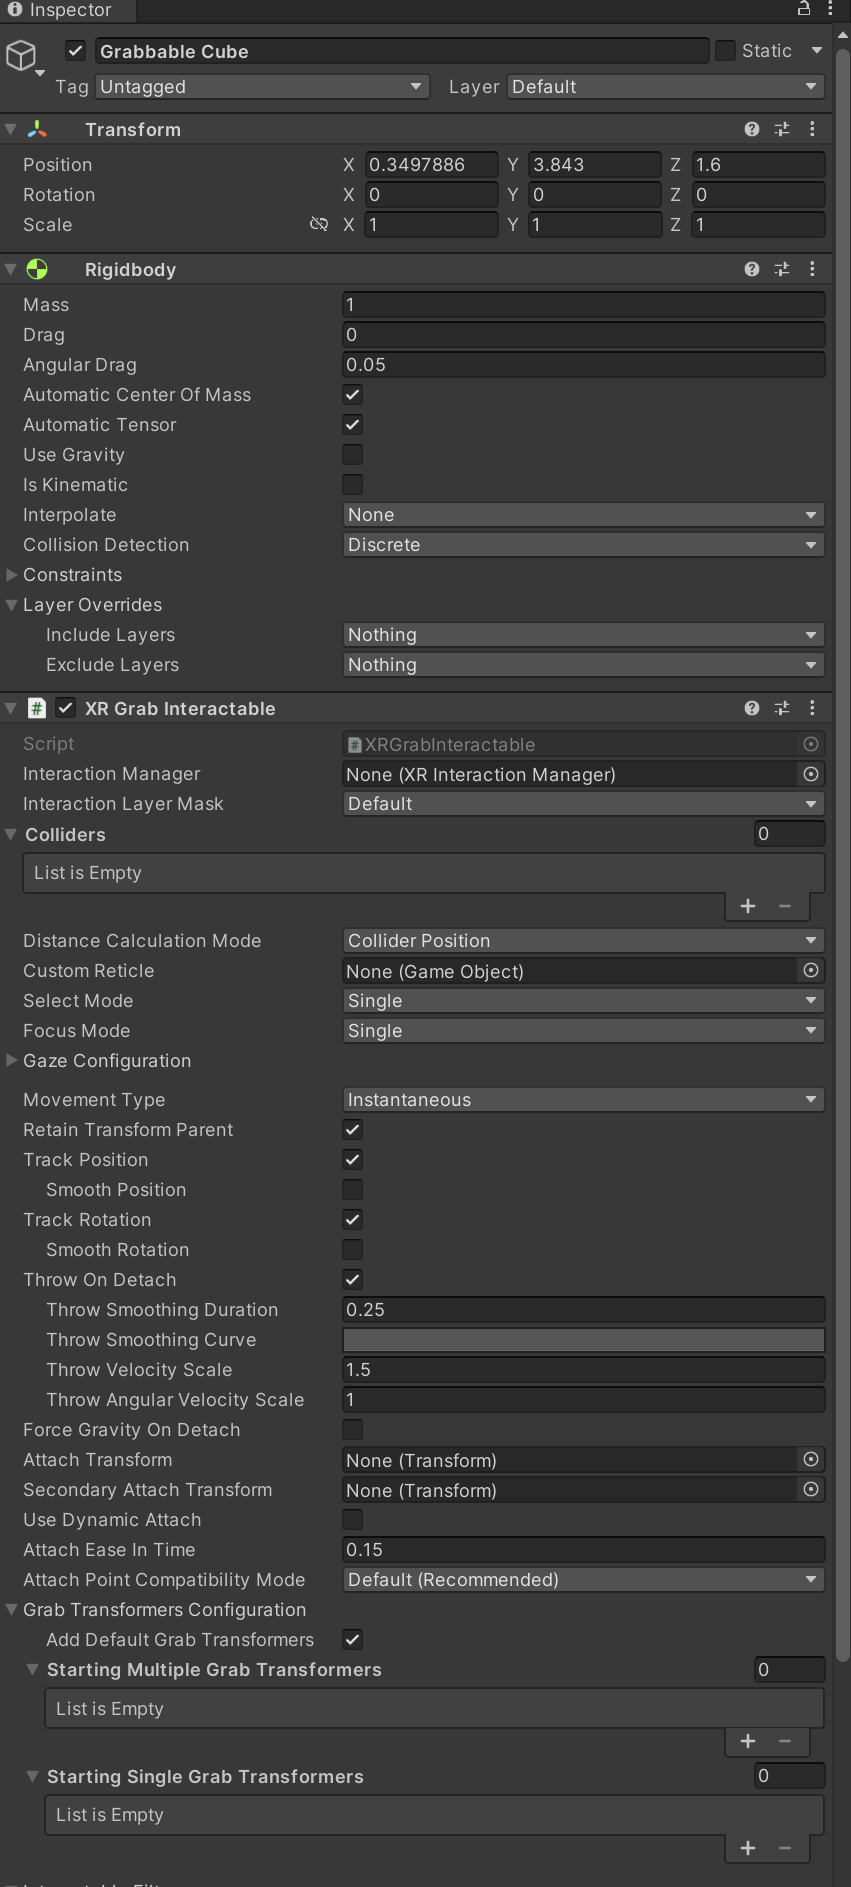
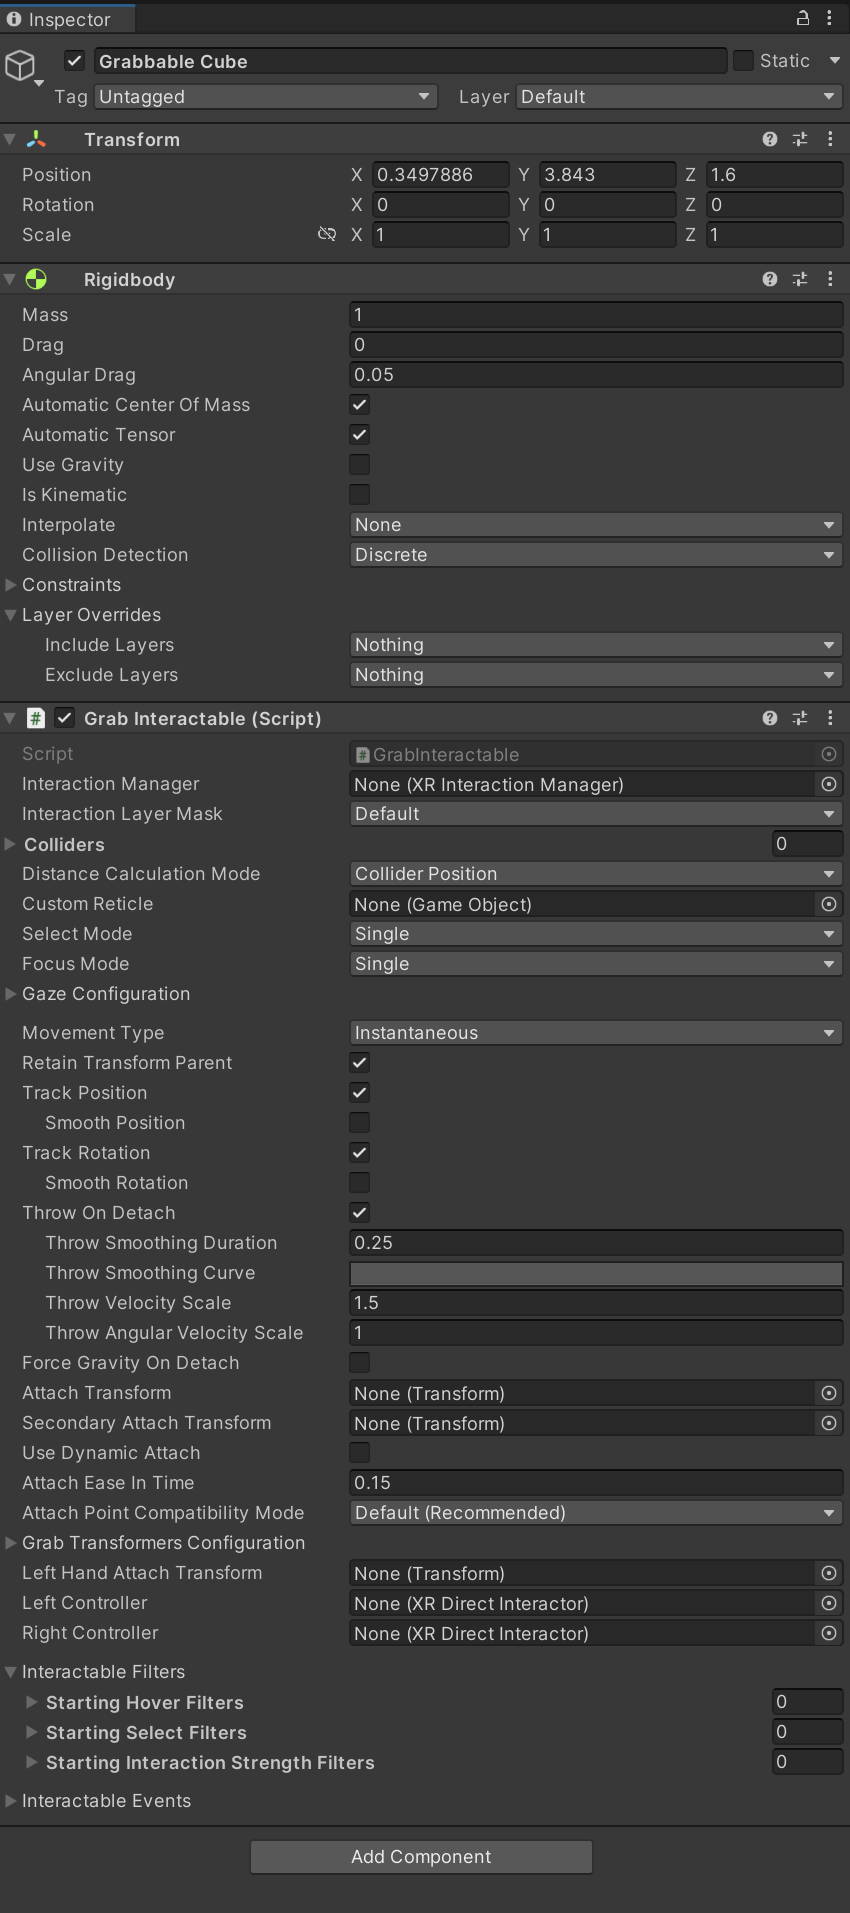
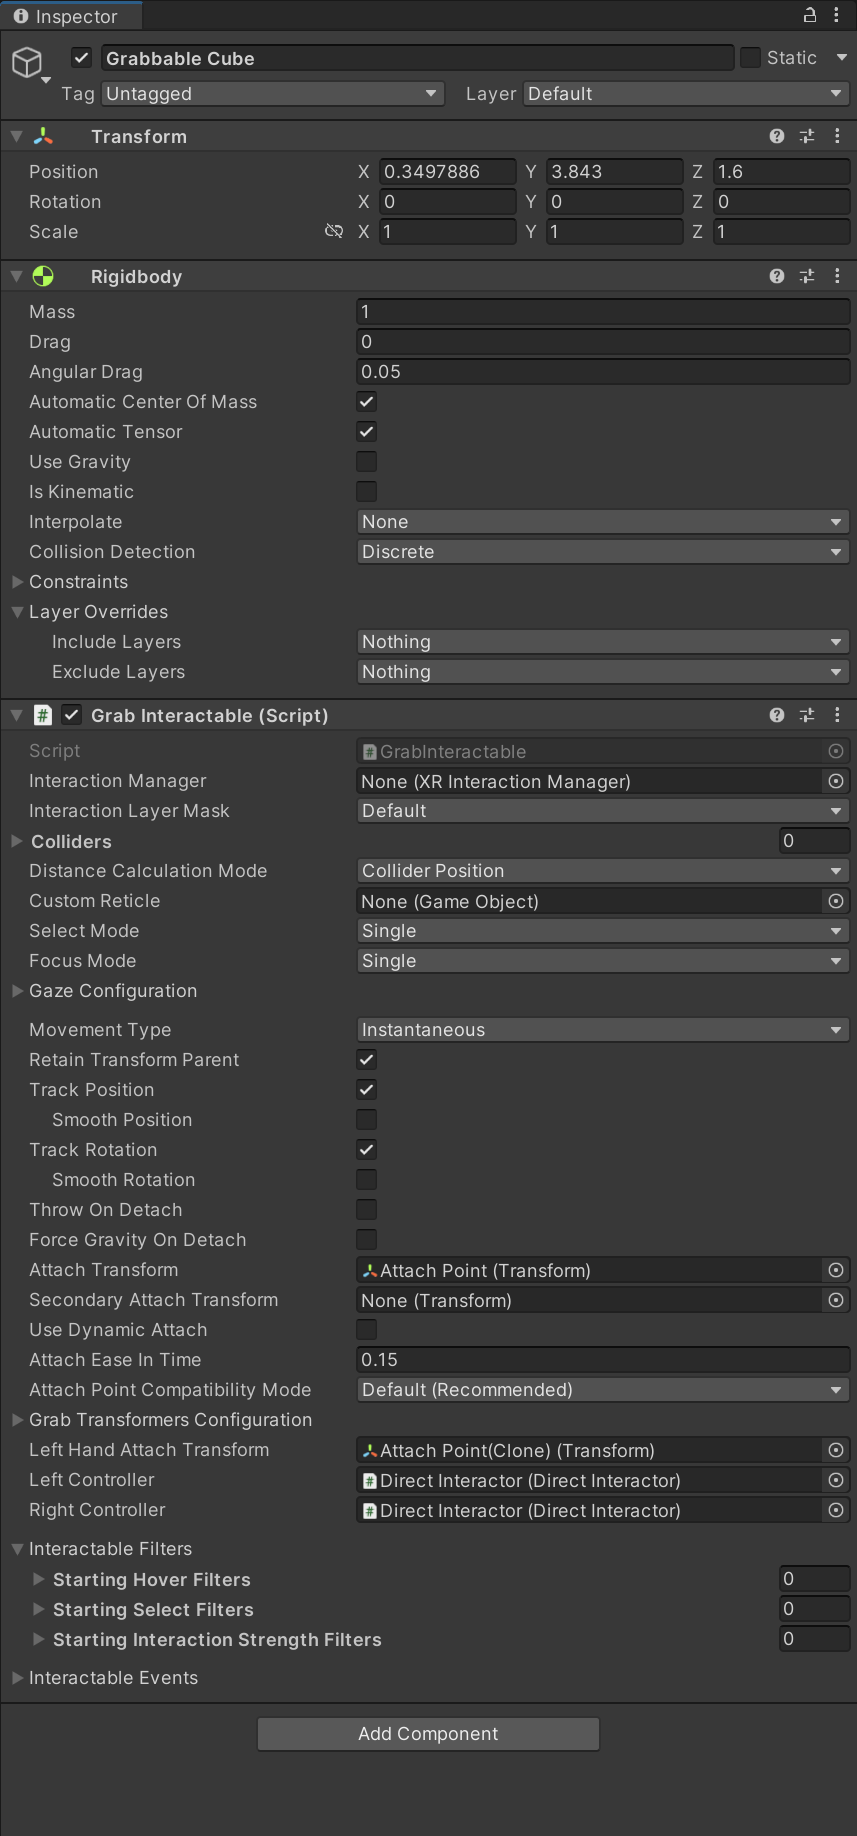
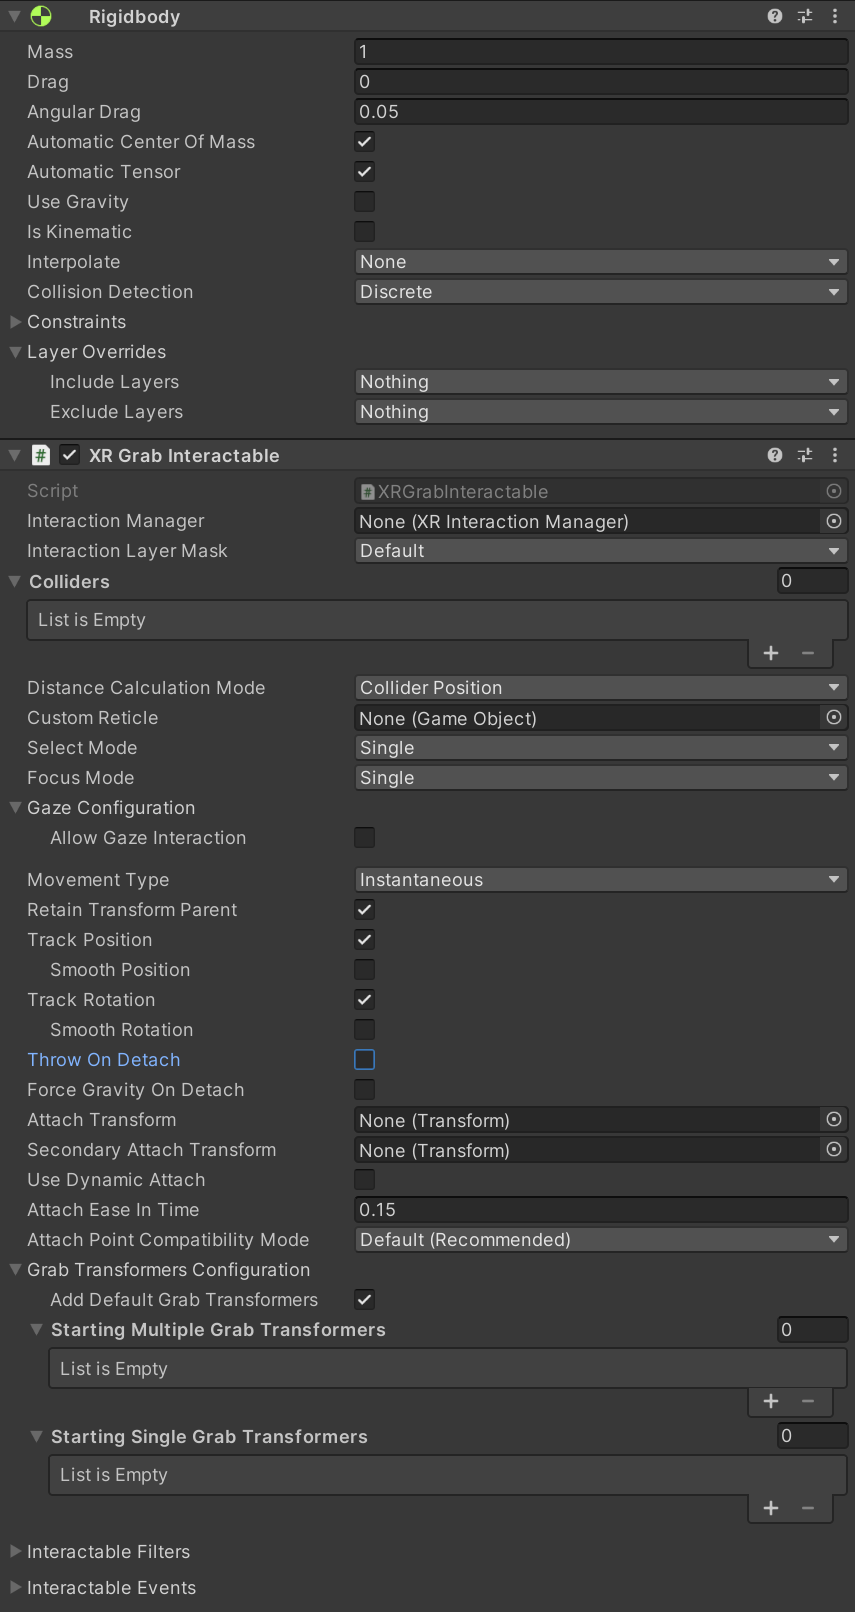
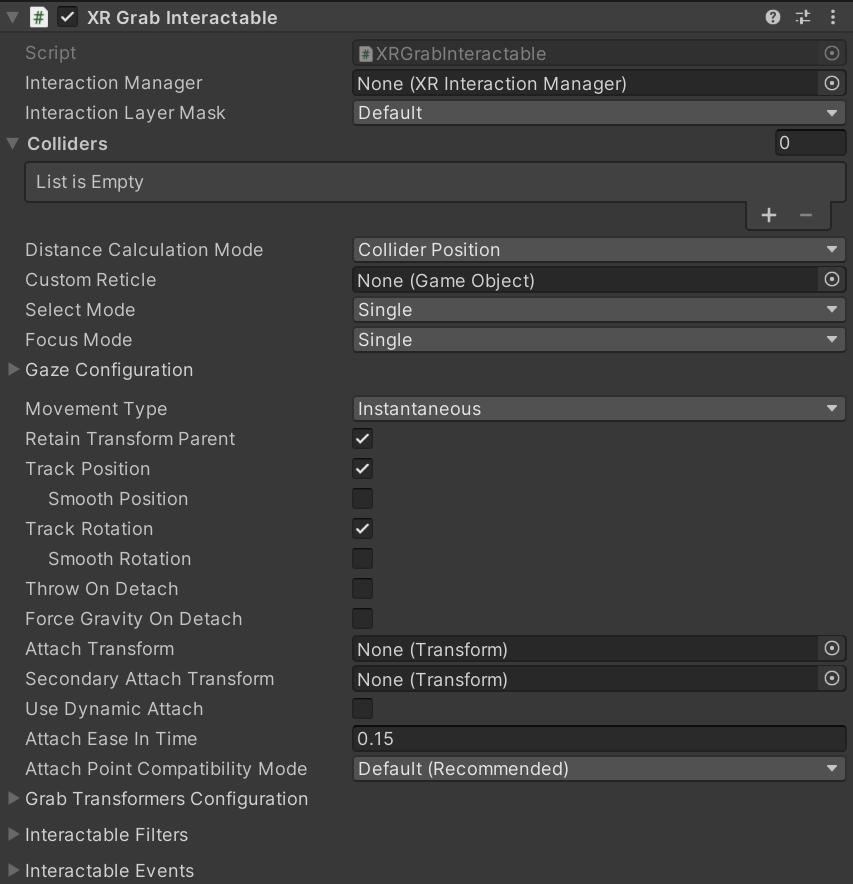
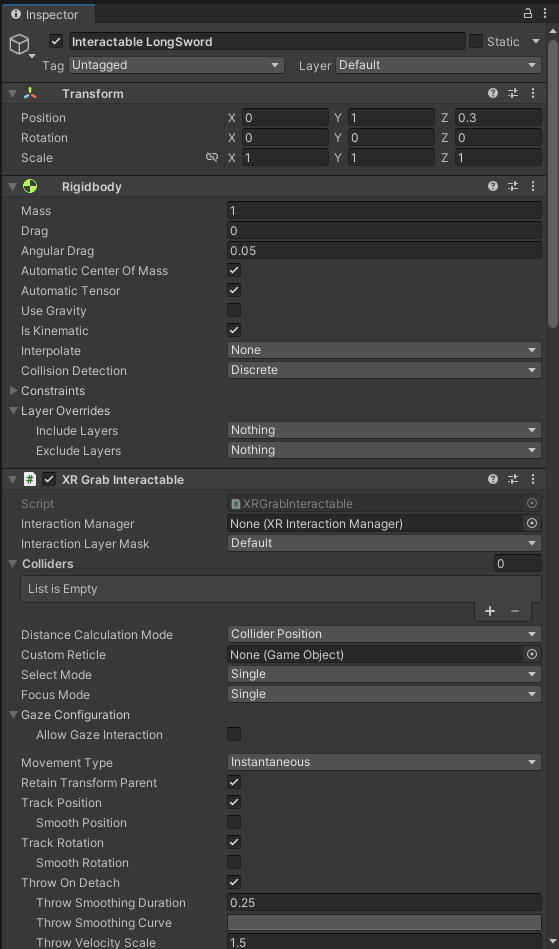
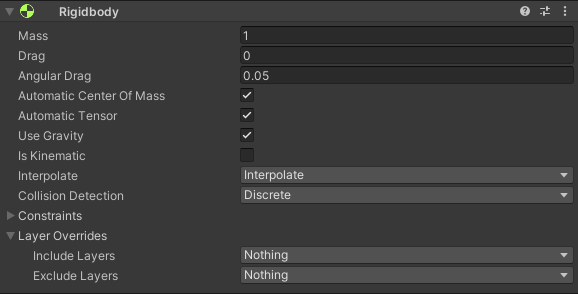
Grabbable Cube를 선택하고 Rigidbody, XR Grab Interactable을 부착 한다 Use Gravity는 체크 해제 하고 Throw on Detach도 체크 해제 하자
실행후 결과를 확인하고
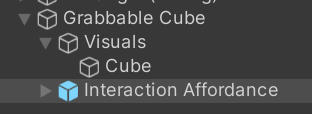
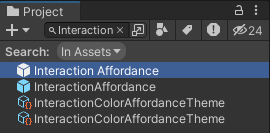
프로젝트 창에서 Interaction Affordance를 검색해 Grabbable Cube자식으로 넣어 주고
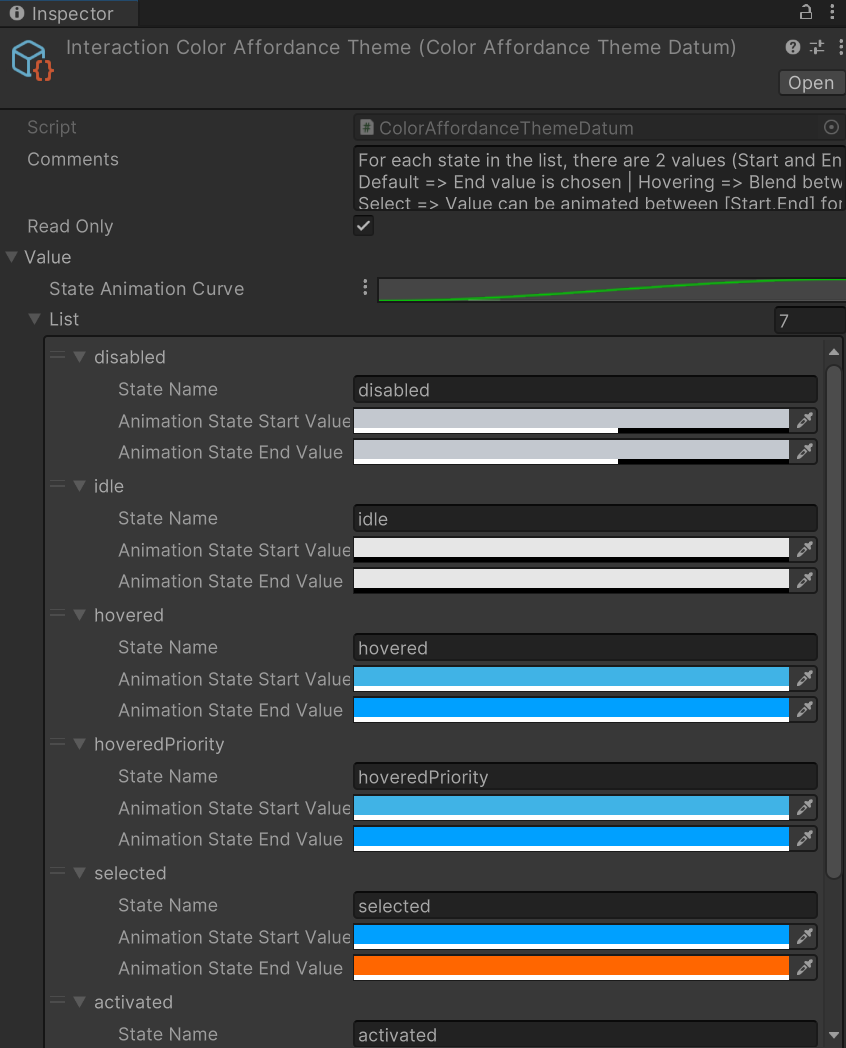
Interaction Affordance 자식으로 있는 Color Affordance 를 선택해 Renderer프로퍼티에 Cube를 넣어 준다
Color Affordance Theme를 살펴 보면 각 상태에 따라 컬러를 변경해준다
실행해 결과를 확인 하자
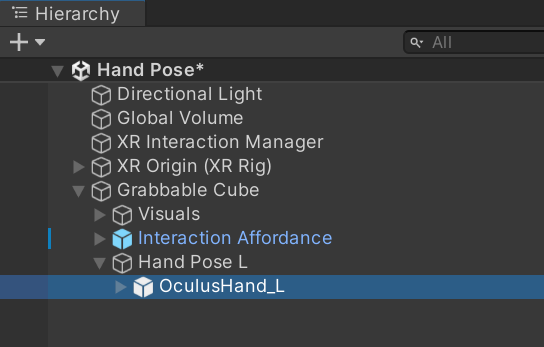
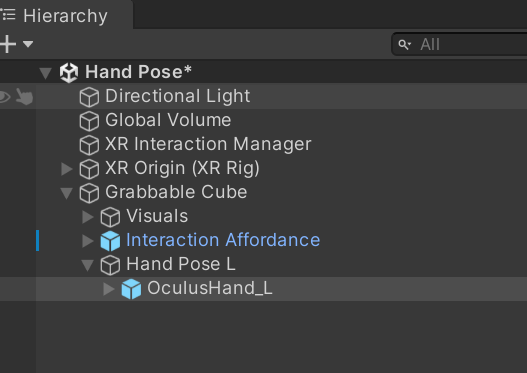
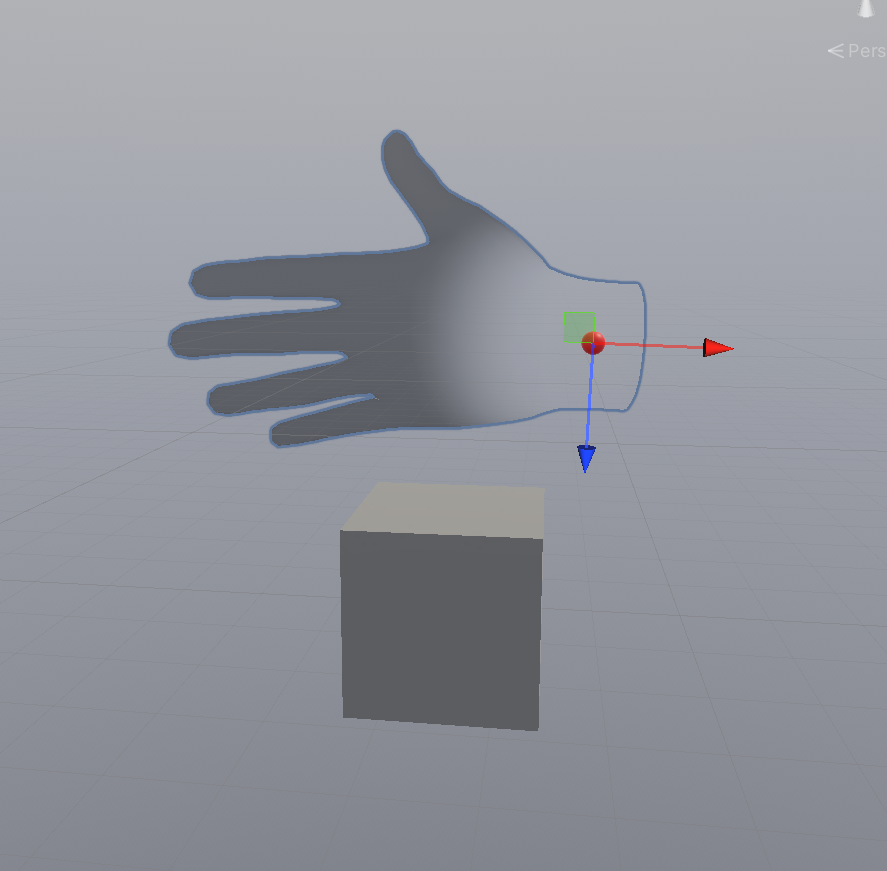
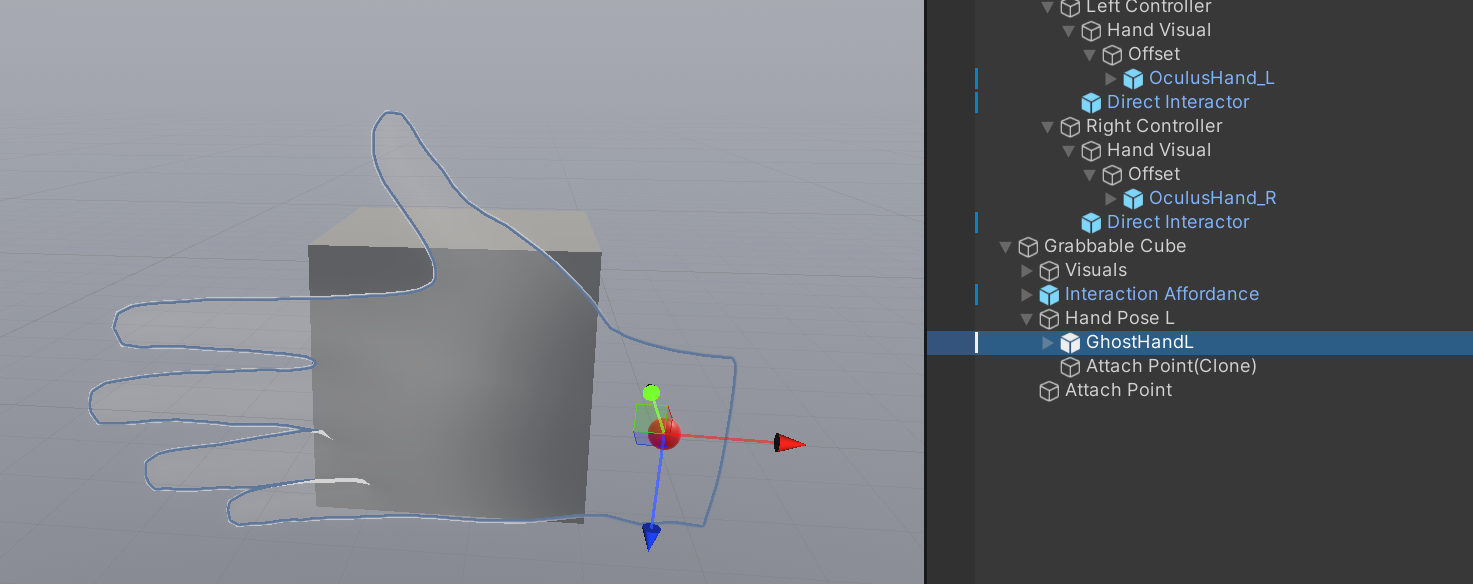
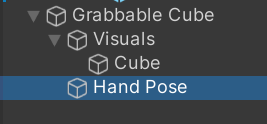
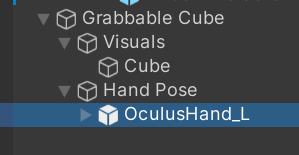
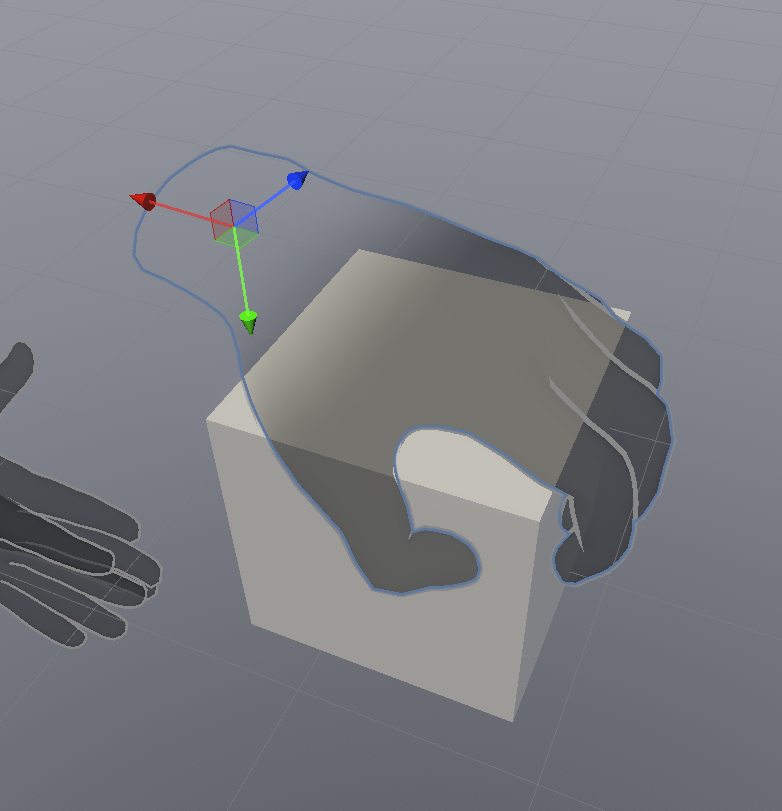
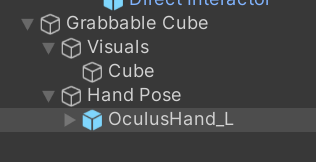
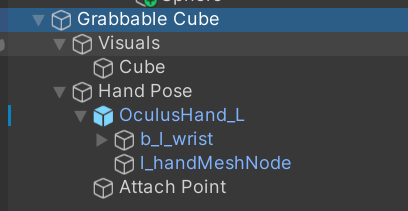
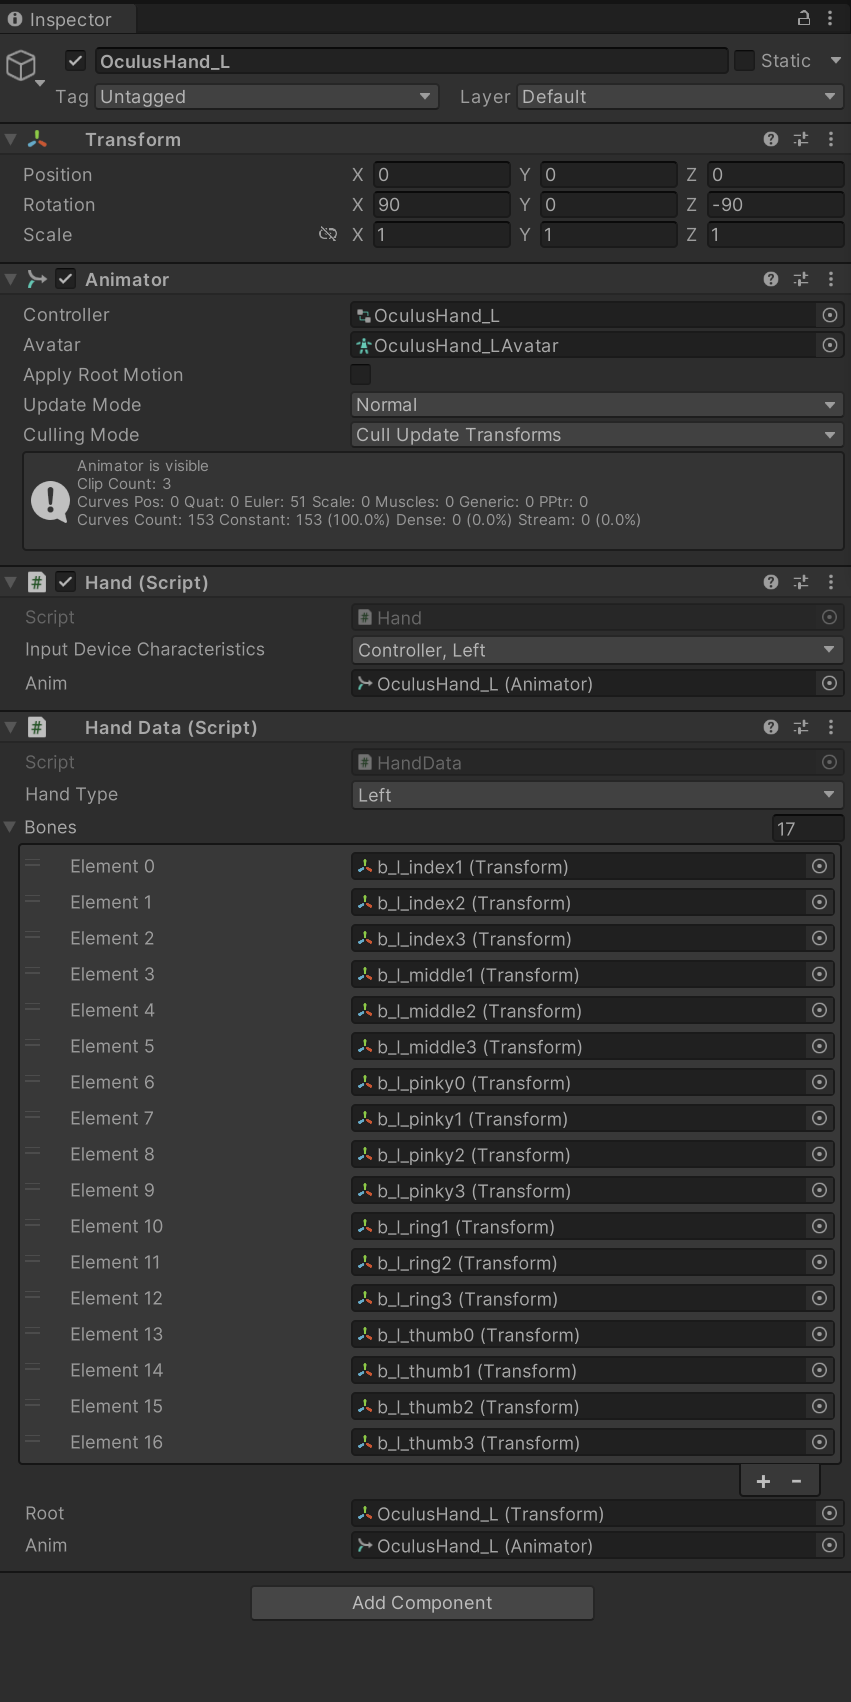
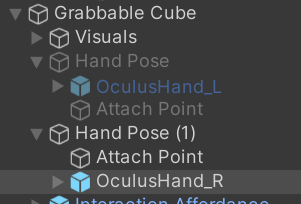
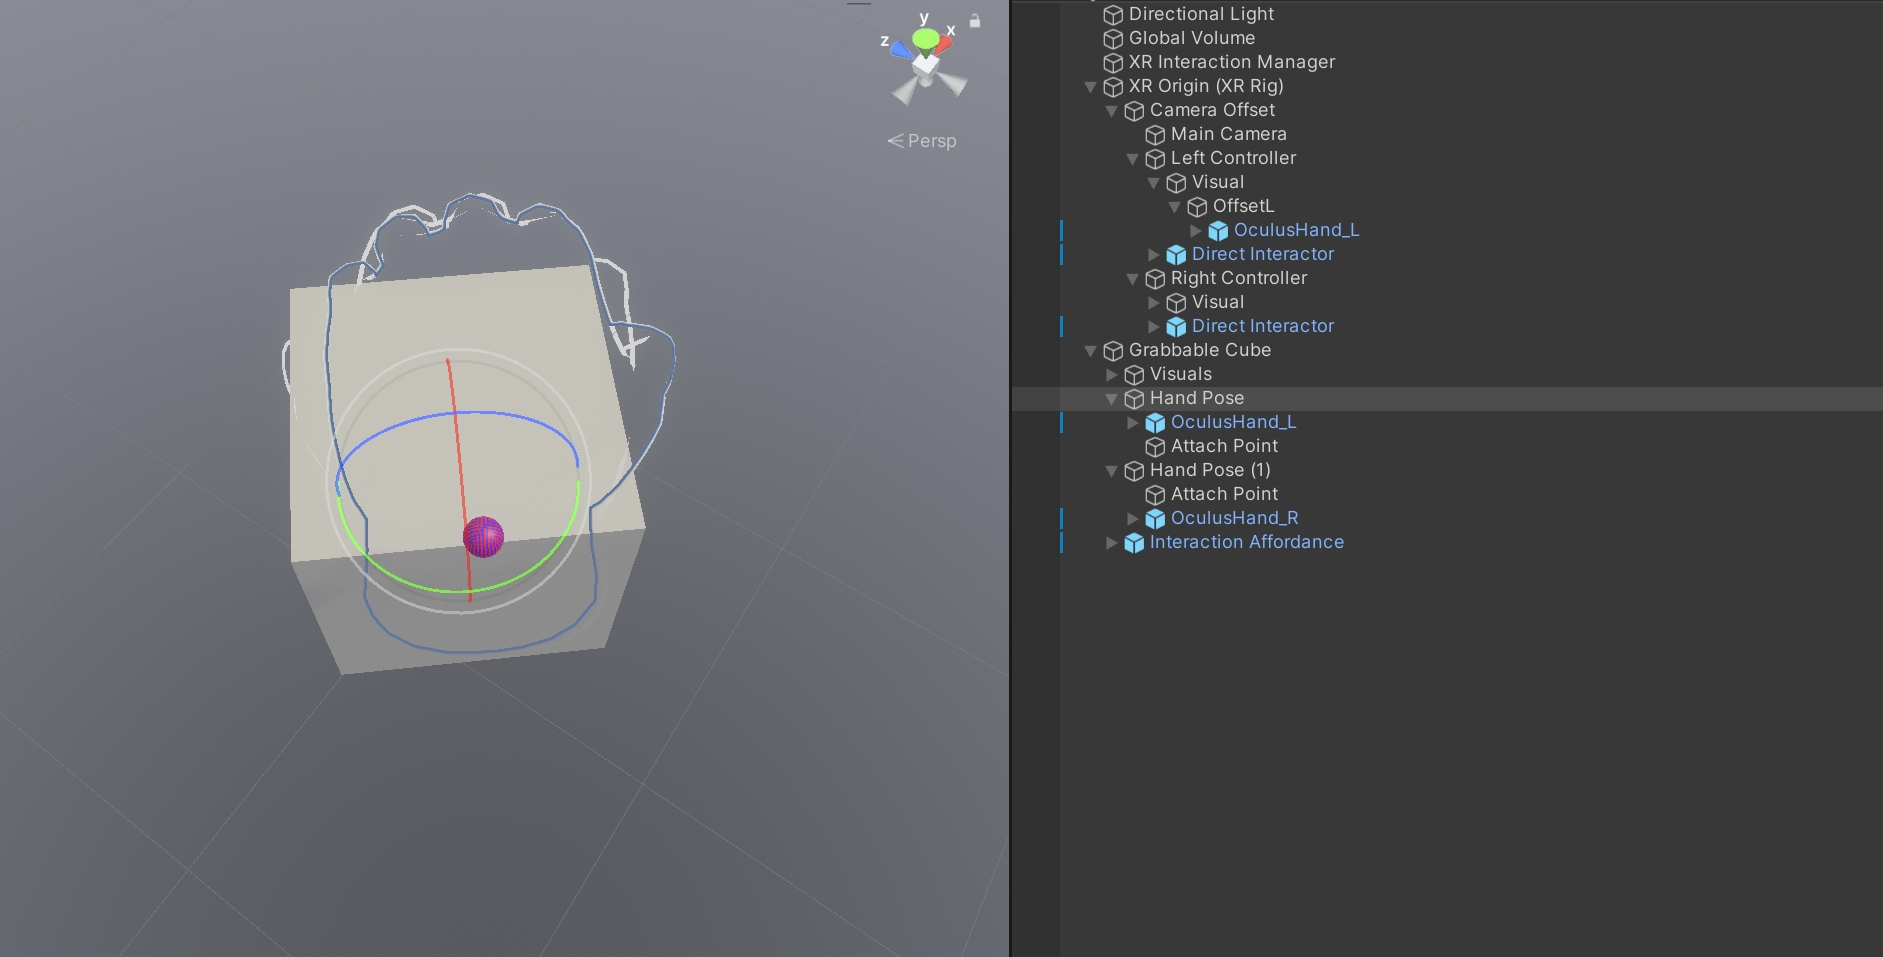
Grabbable Cube를 선택 하고 빈 오브젝트 (Hand Pose)를 만들어 주고 Left/Right Controller에서 사용했던 프리팹과 동일한 프리팹을 넣어 준다
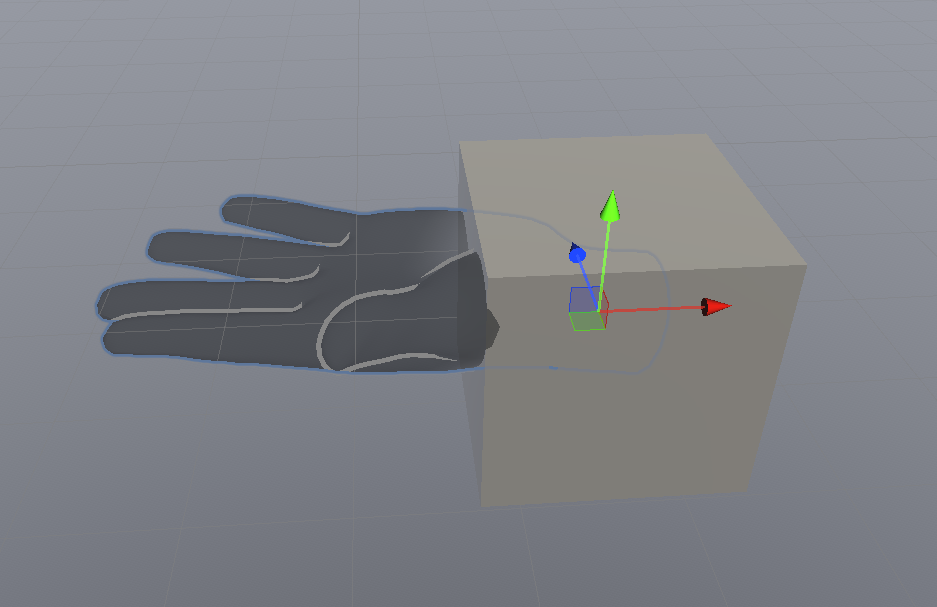
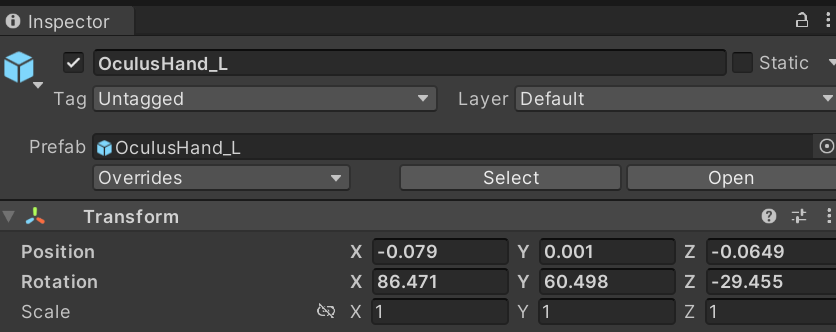
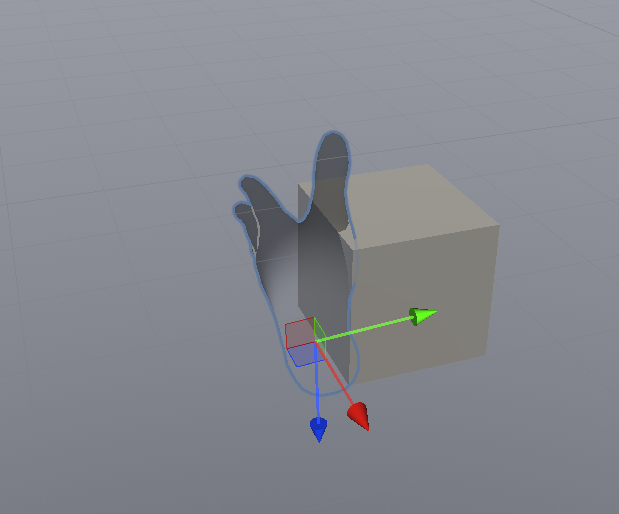
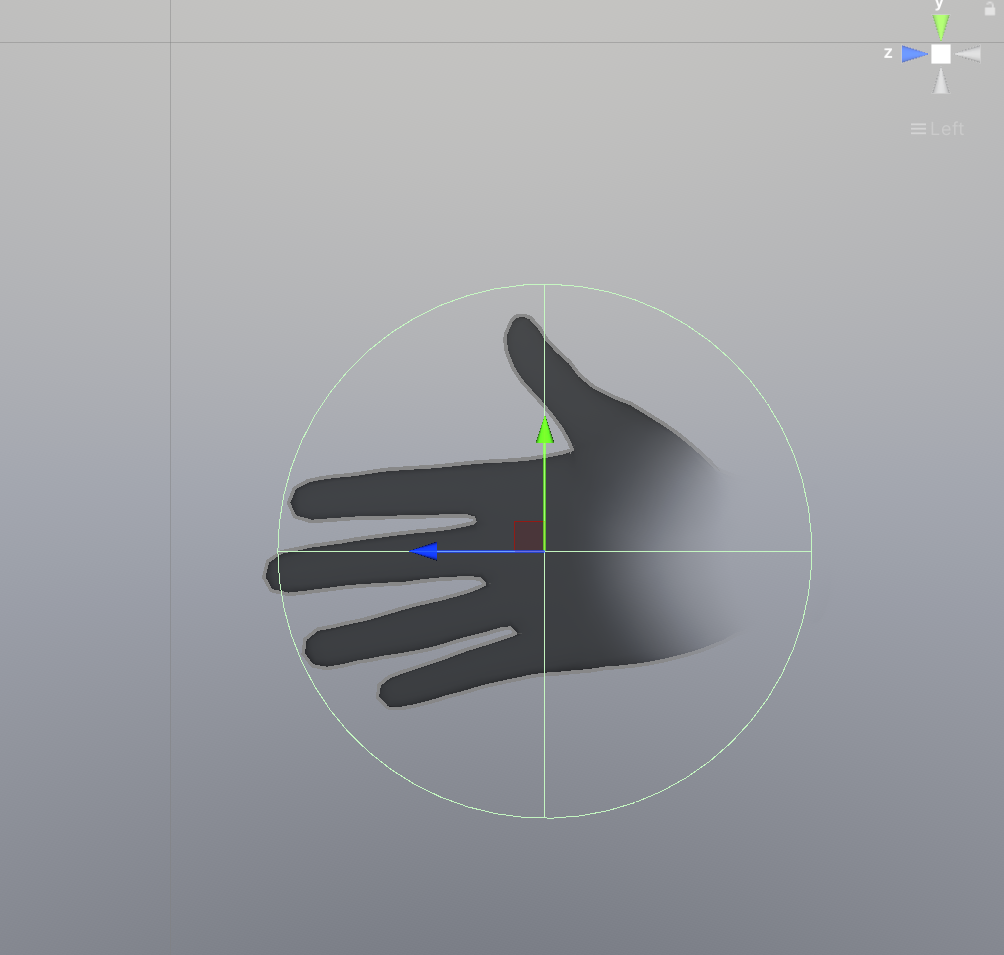
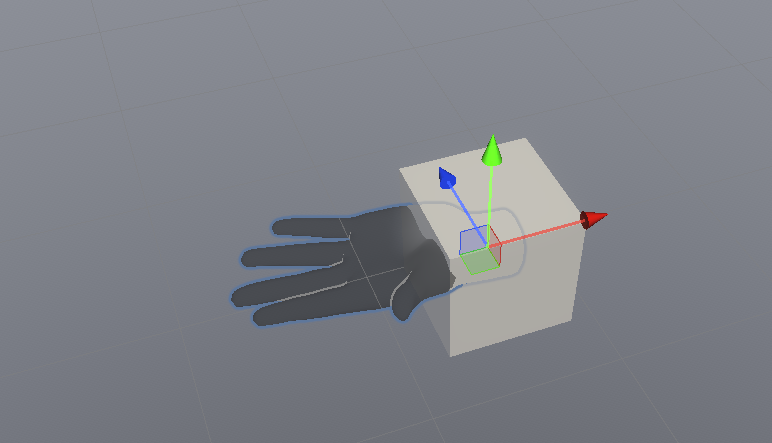
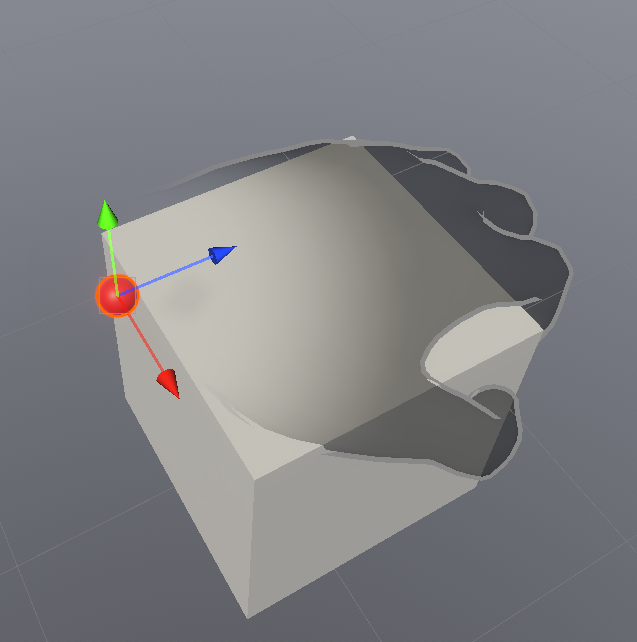
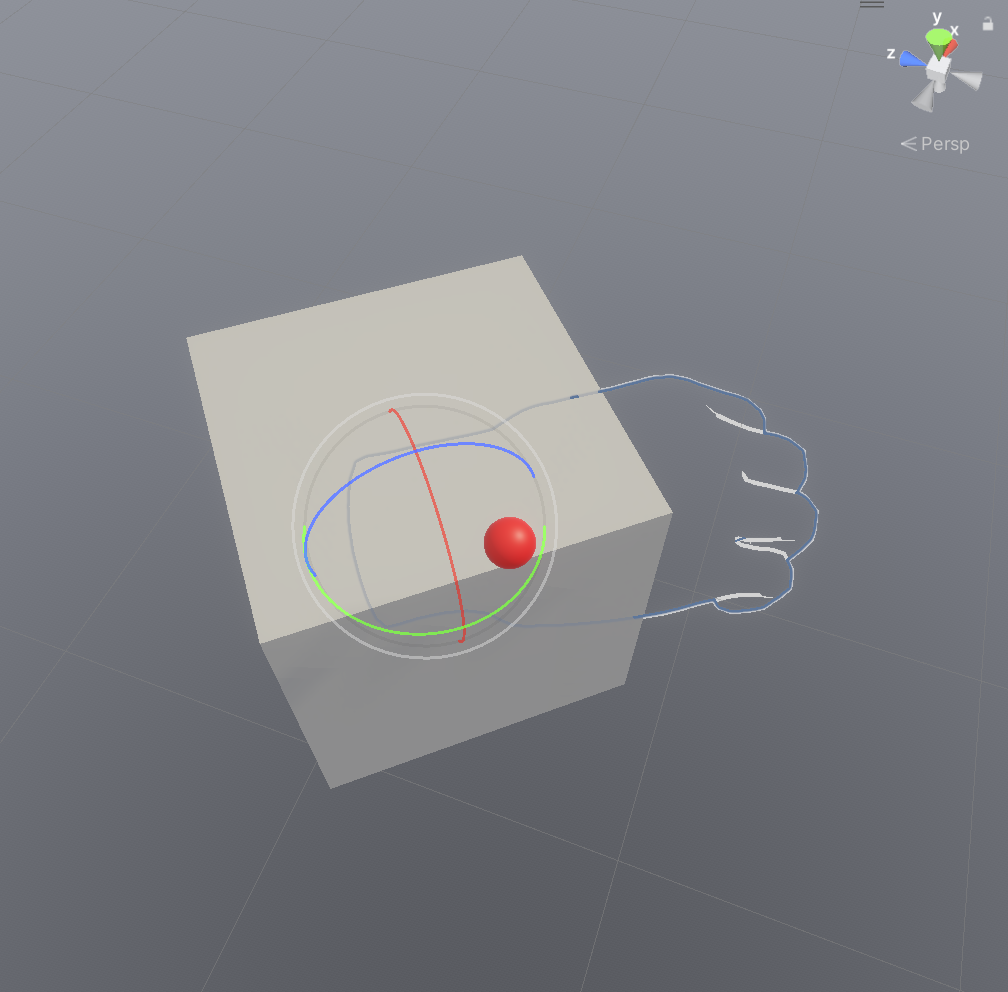
이제 핸드를 선택하고 위치를 적당히 잡아 준다
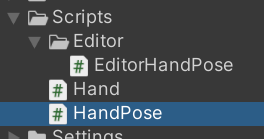
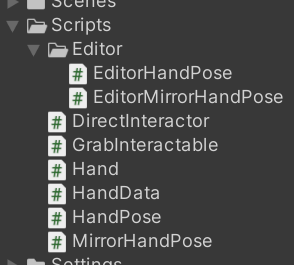
HandPose 스크립트와 Editor폴더를 만들고 EditorHandPose스크립트를 만든다
다음과 같이 작성하고
using System.Collections;
using System.Collections.Generic;
using UnityEngine;

public class HandPose : MonoBehaviour
{
    [SerializeField] private GameObject attachPointPrefab;
    [SerializeField] private Transform wrist;

    public void CreateAttachPoint()
    {
        var point = Instantiate(attachPointPrefab, this.transform);
        point.transform.localPosition =this.transform.InverseTransformPoint(wrist.position);
    }
}
using UnityEngine;
using UnityEditor;

[CustomEditor(typeof(HandPose))]
public class EditorHandPose : Editor
{
    public override void OnInspectorGUI()
    {
        base.OnInspectorGUI();

        HandPose script = (HandPose)target;

        if (GUILayout.Button("Create Attach Point"))
        {
            script.CreateAttachPoint();
        }
    }
}
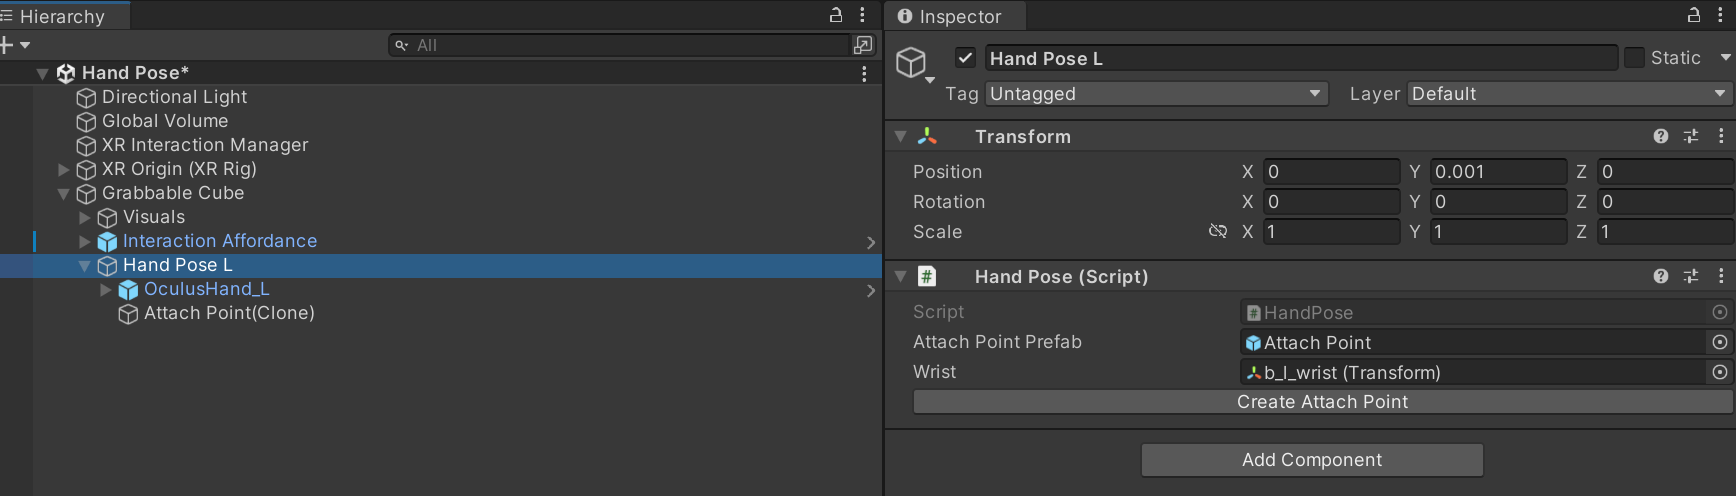
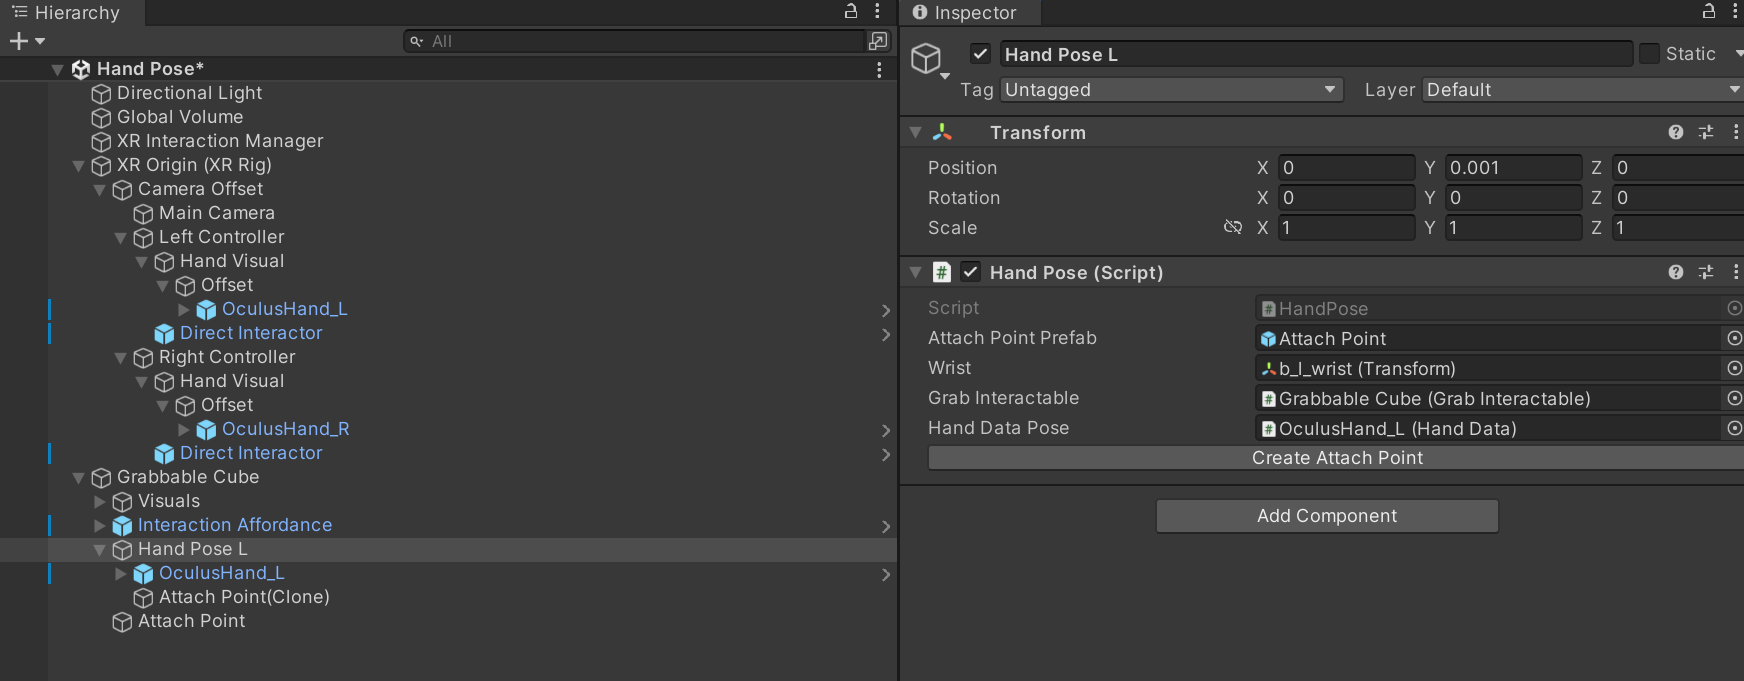
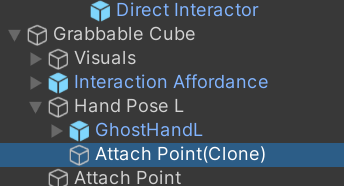
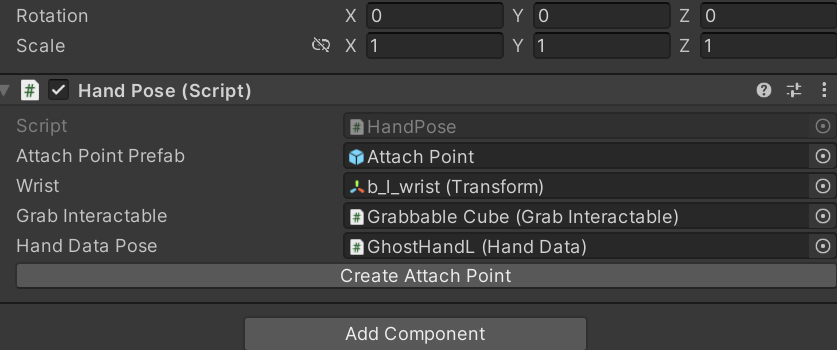
Hand Pose L 을 선택해 Hand Pose컴포넌트를 부착 한다
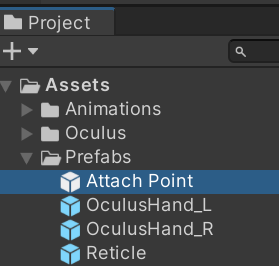
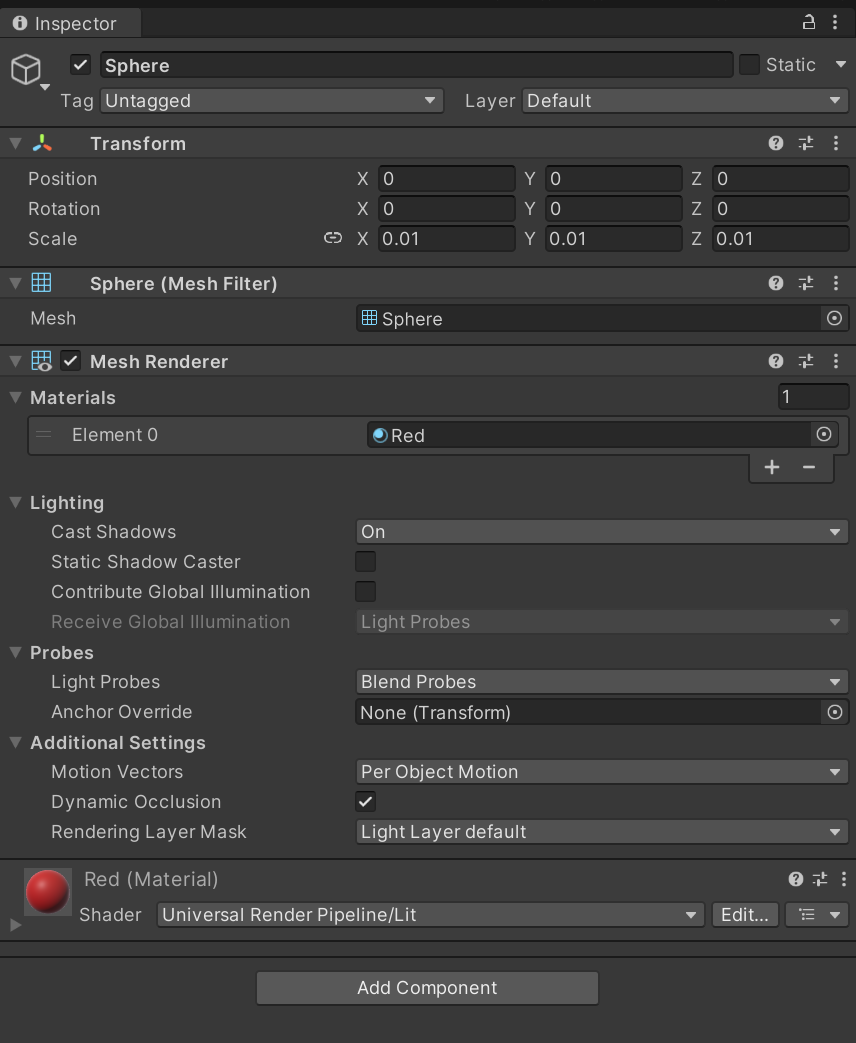
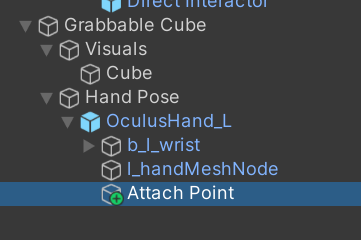
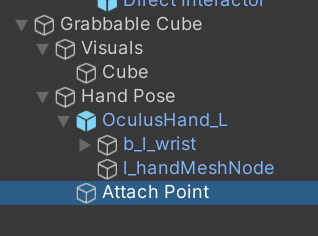
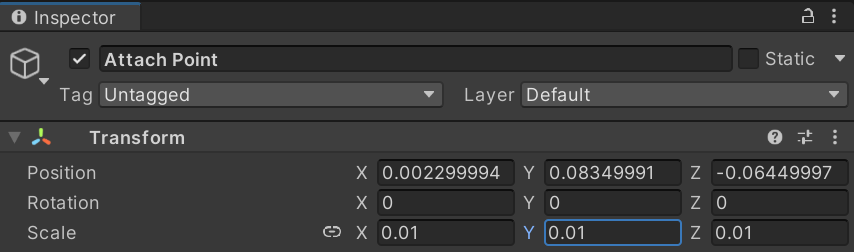
계층뷰에서 Sphere를 하나 생성하고 크기를 0.01로 설정한후 콜라이더를 제거 하고 이름을 AttachPoint로 변경후 프리팹으로 만들어 준다
Hand Pose L 을 선택후 프로퍼티를 할당한다
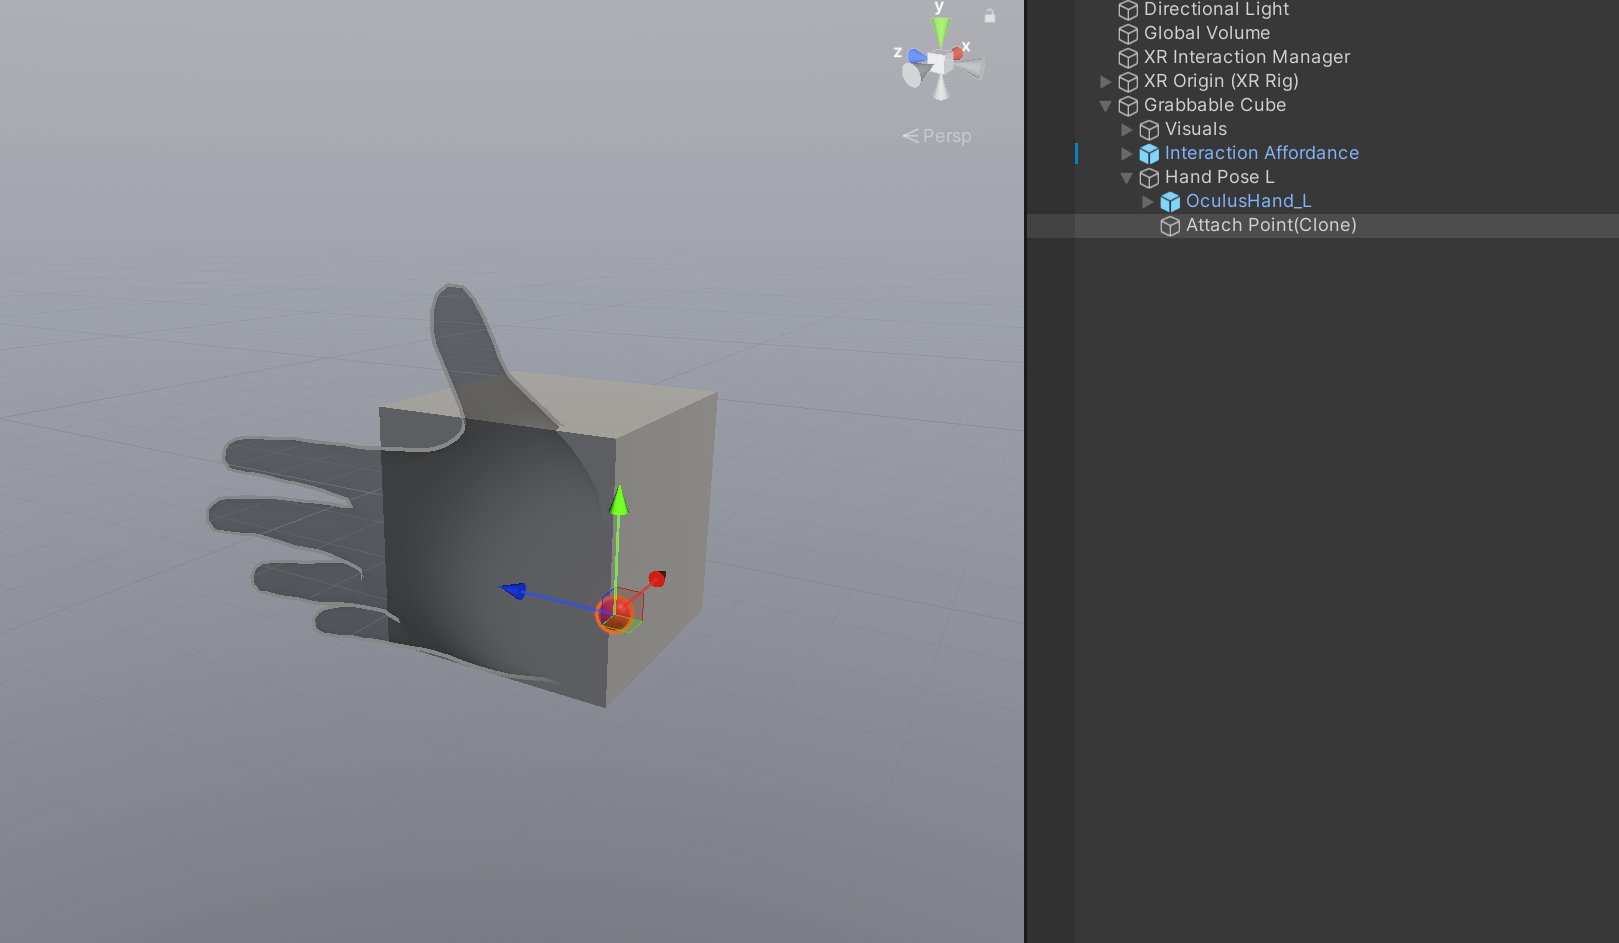
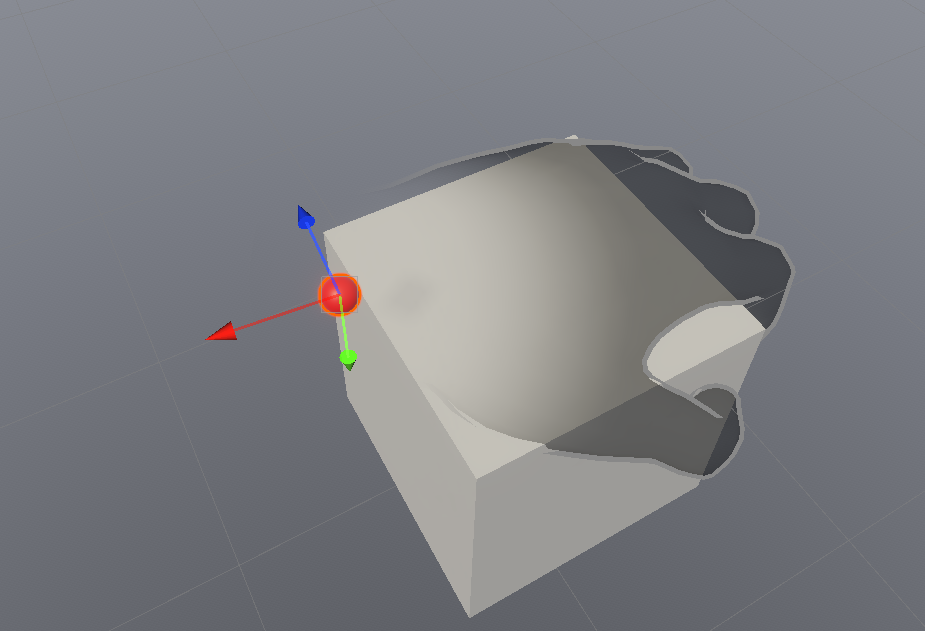
이제 Create Attach Point버튼을 누르면 b_l_wrist위치에 Attach Point오브젝트가 생성된다
HandData 스크립트를 생성후 다음과 같이 작성한다
using System.Collections;
using System.Collections.Generic;
using UnityEngine;

public class HandData : MonoBehaviour
{
    public enum  HandType
    {
        Left, Right
    }

    public HandType handType;
    public Transform[] bones;
    public Transform root;
    public Animator anim;

}
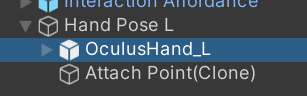
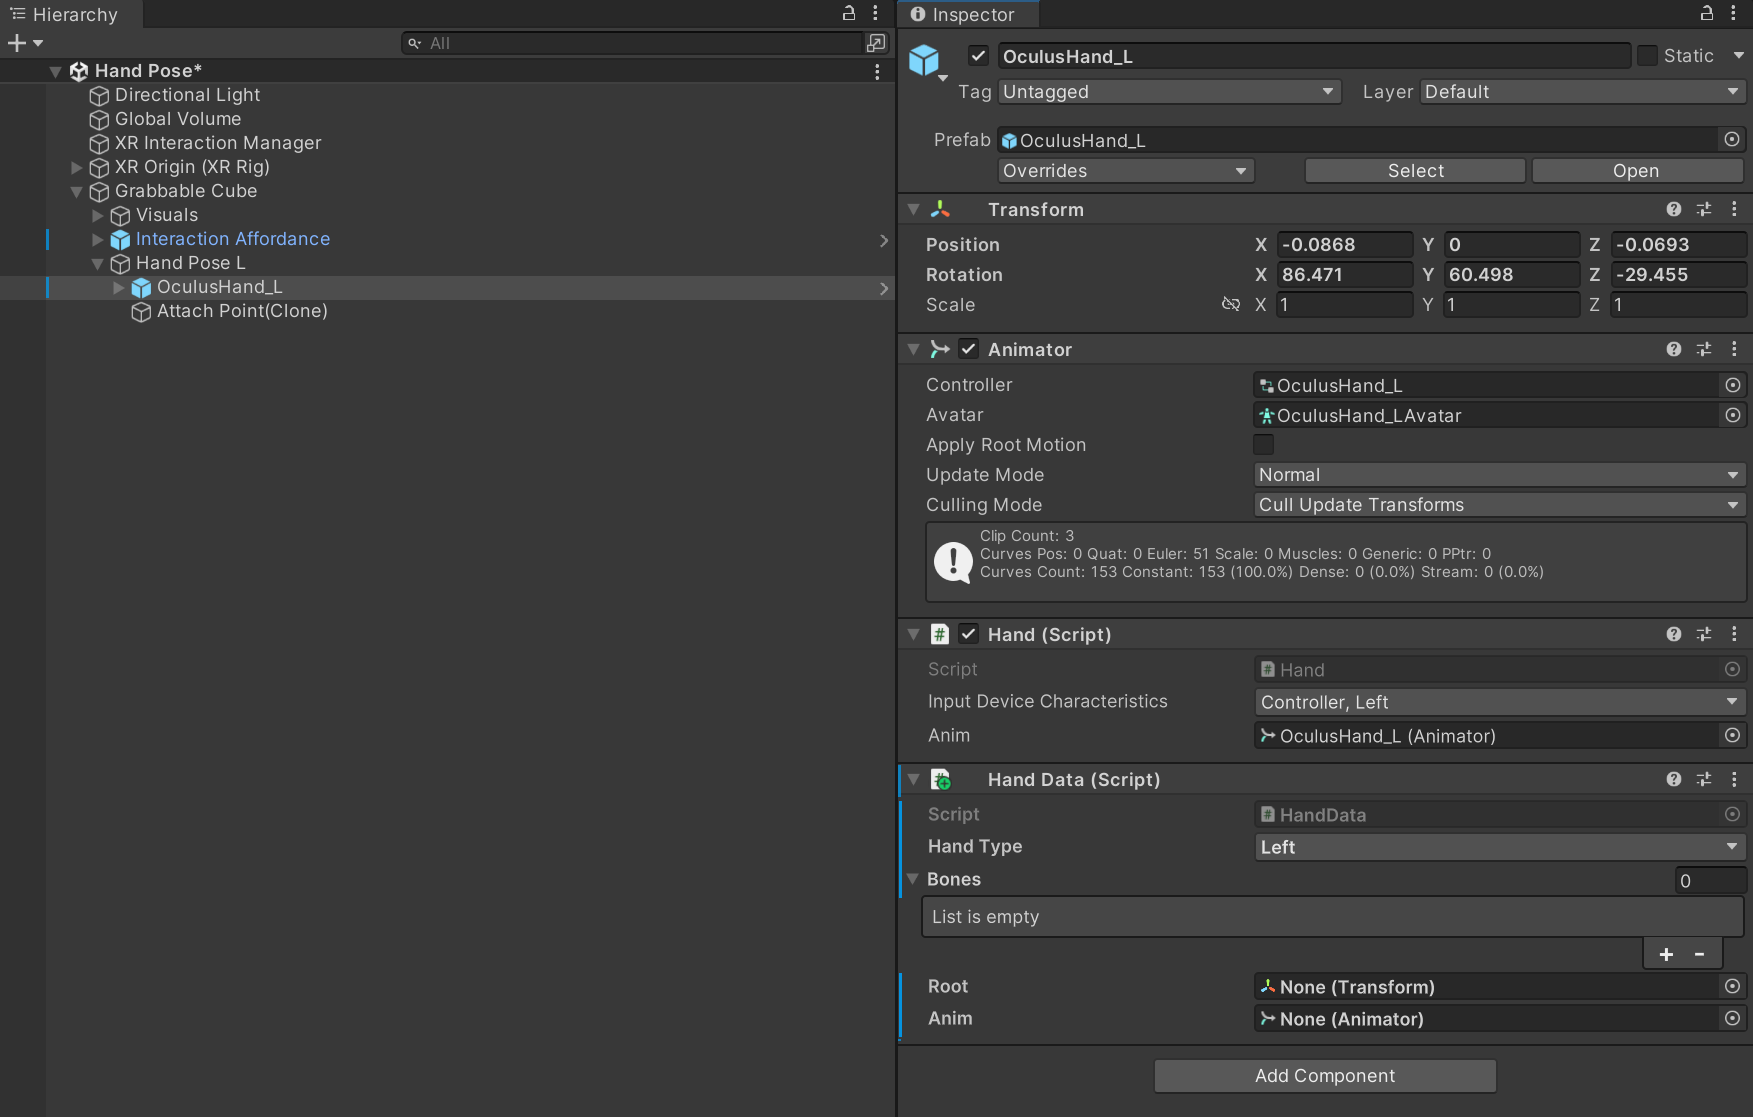
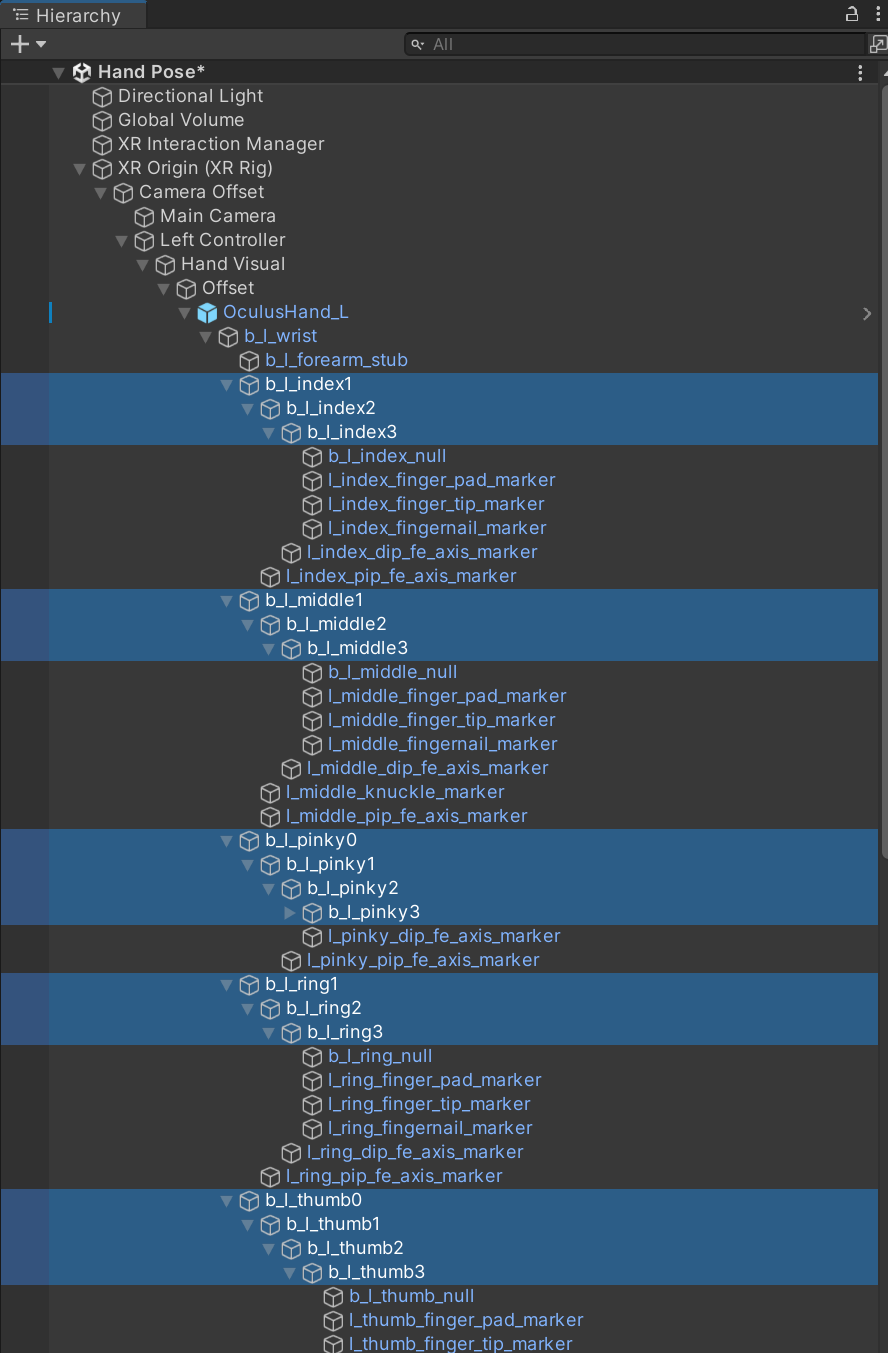
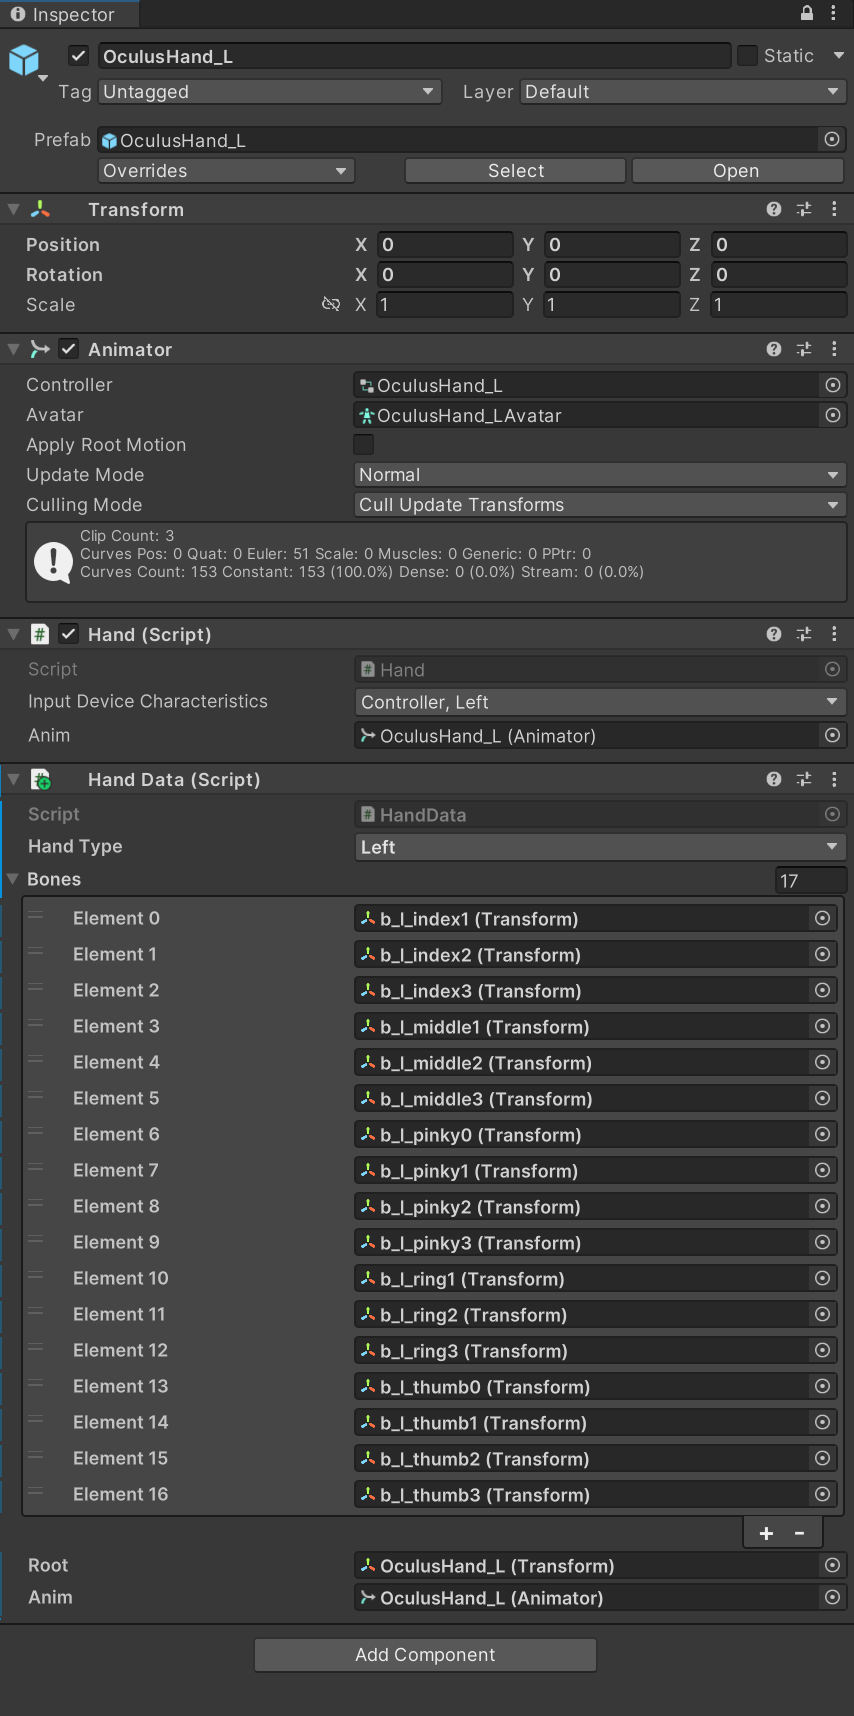
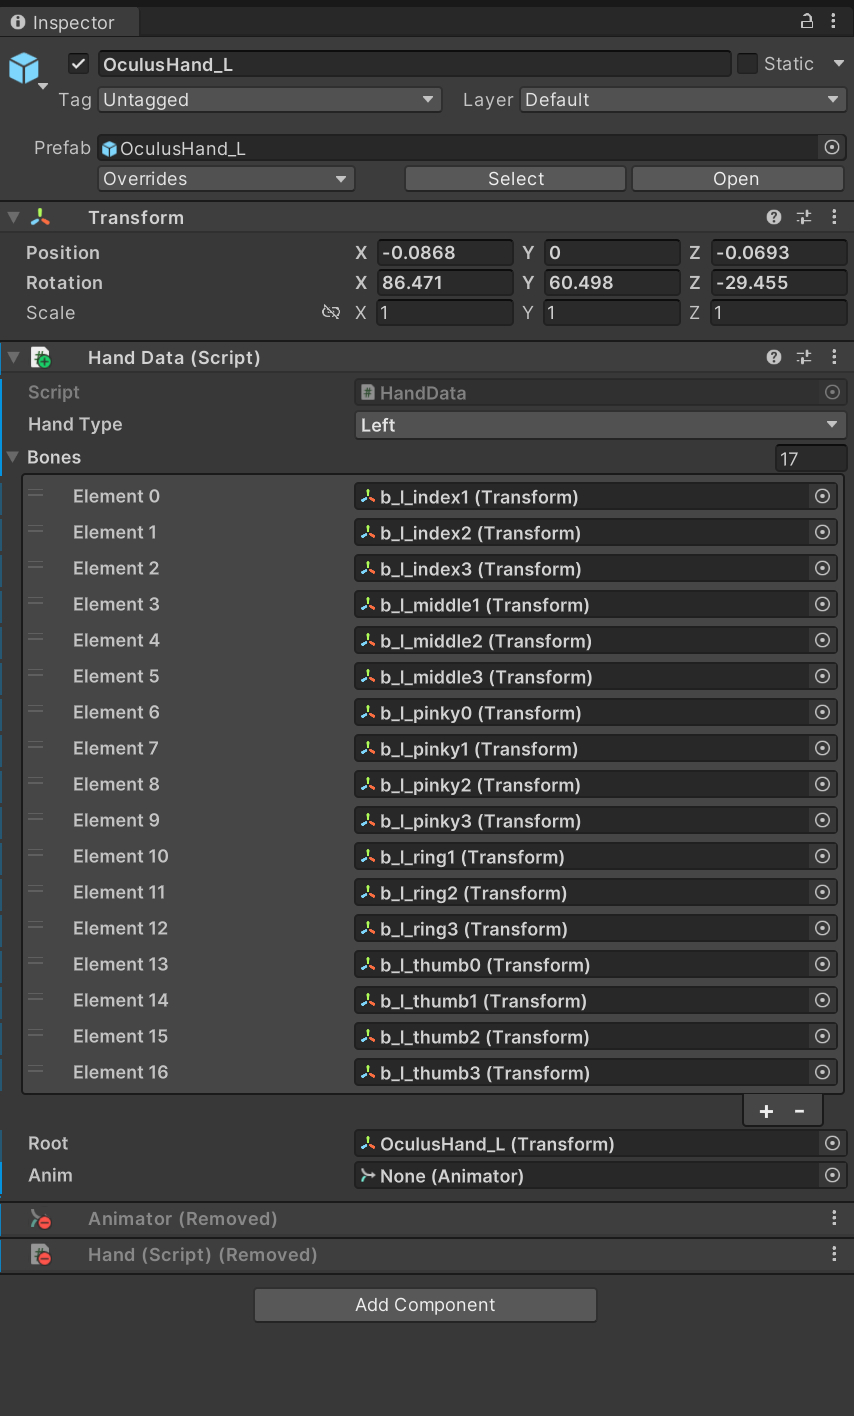
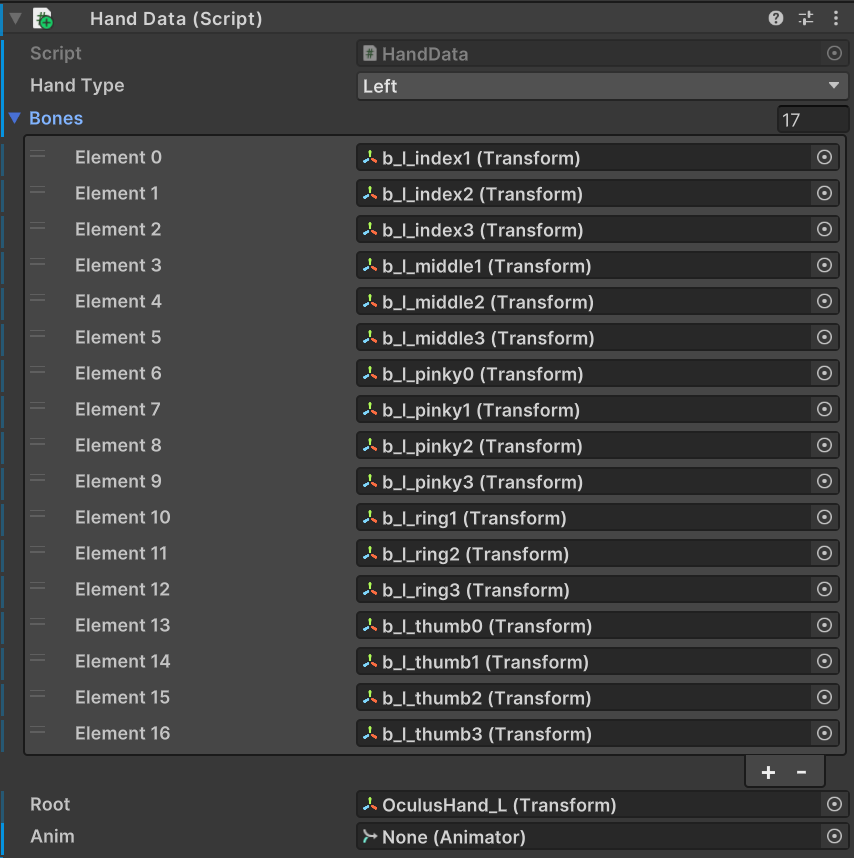
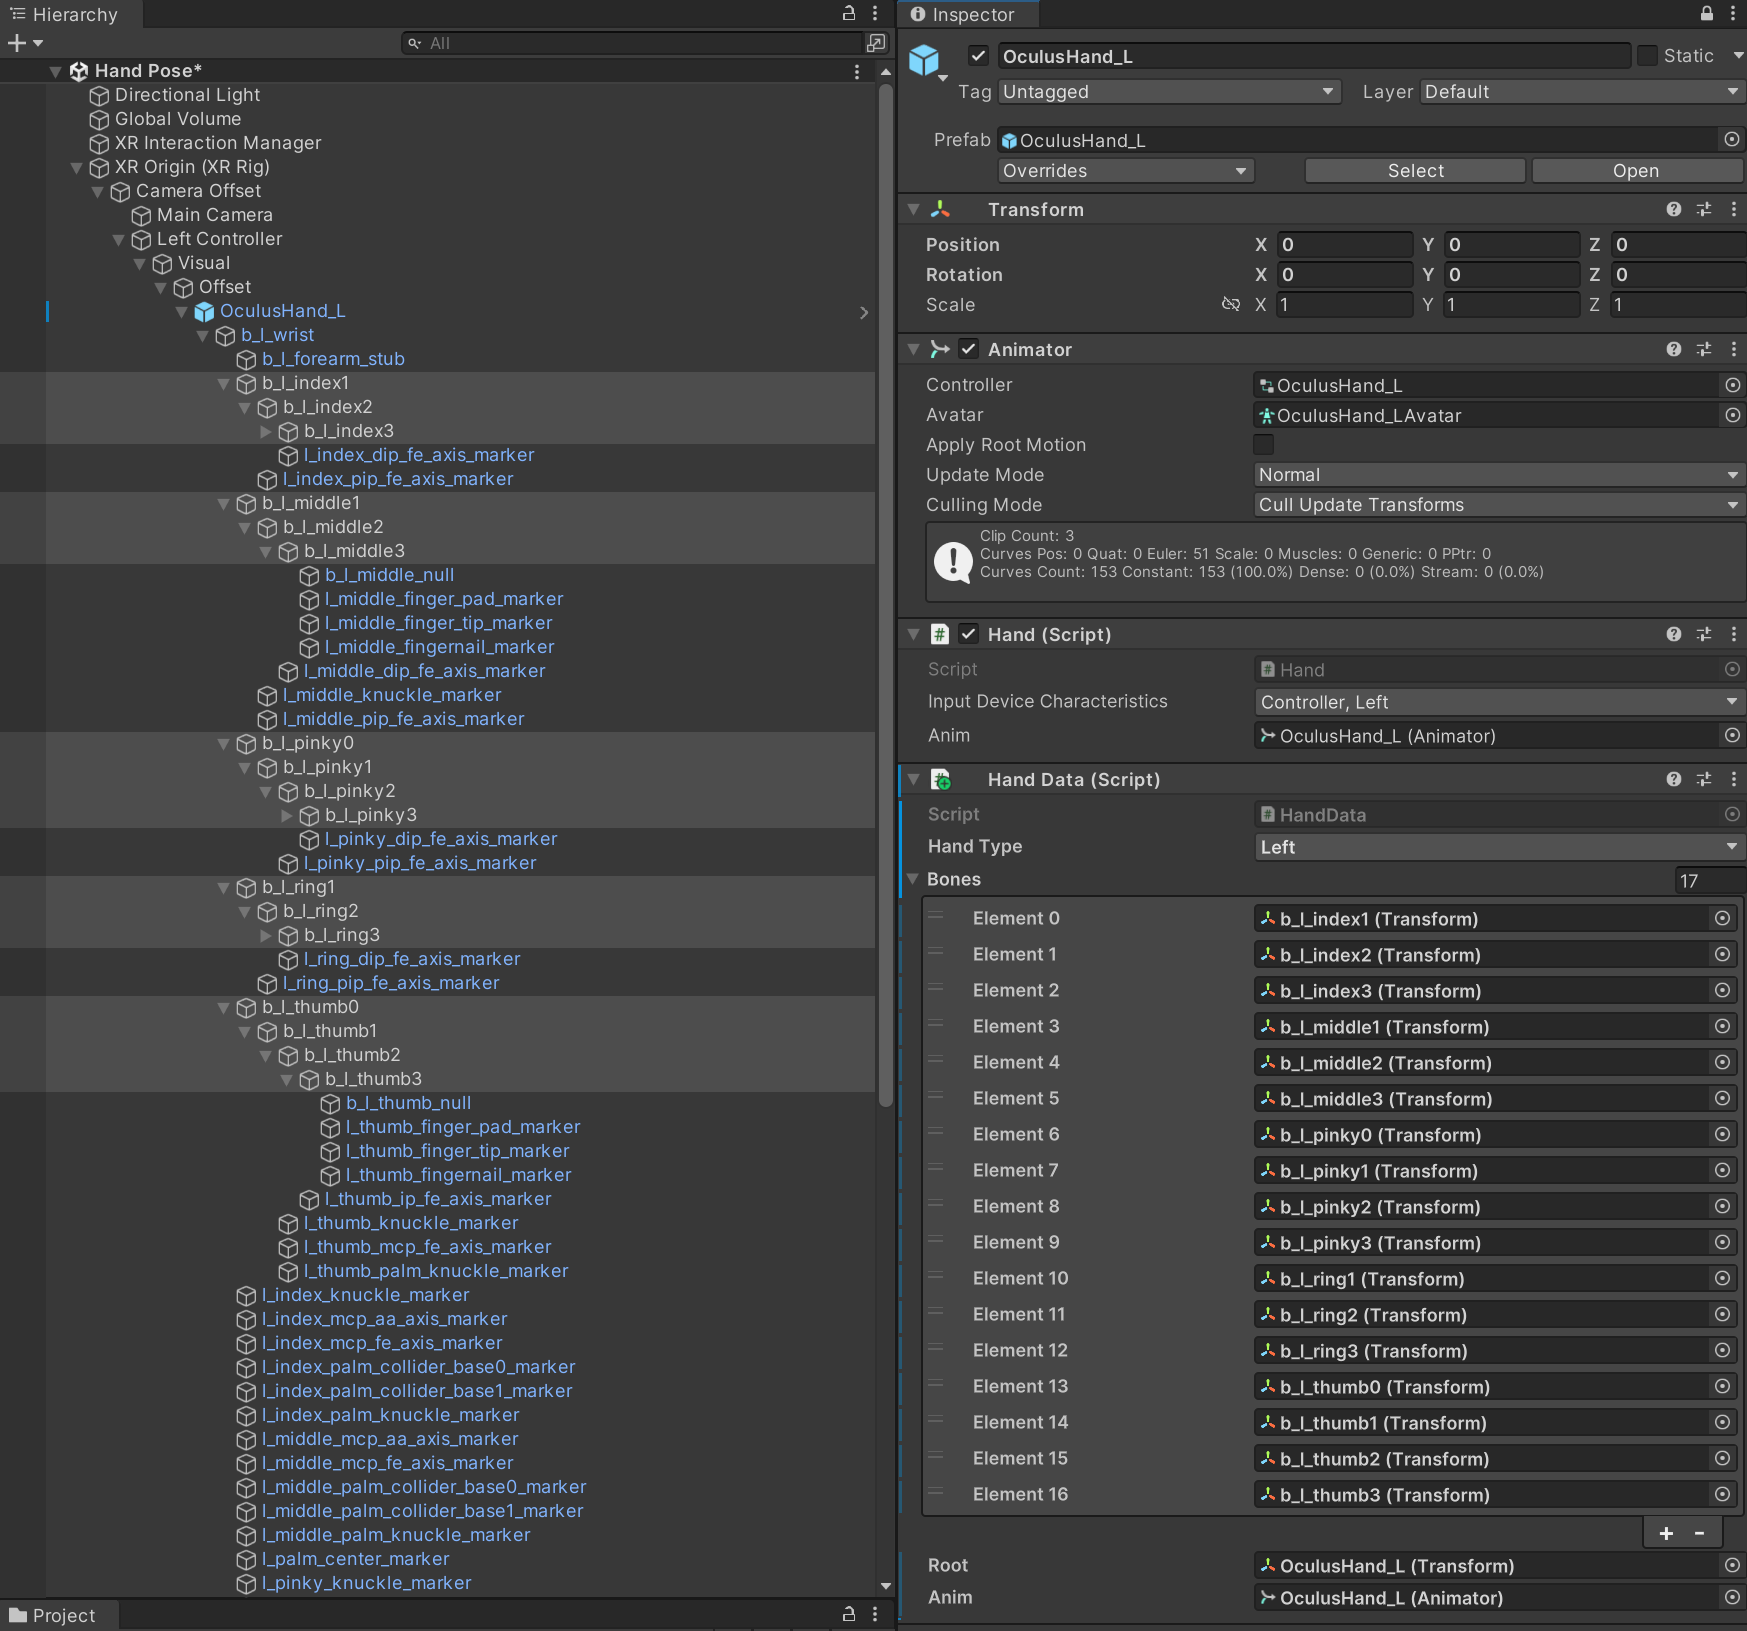
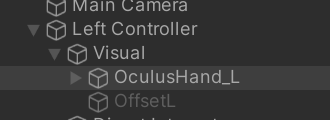
핸드 포즈 아래 핸드를 선택후 부착 한다
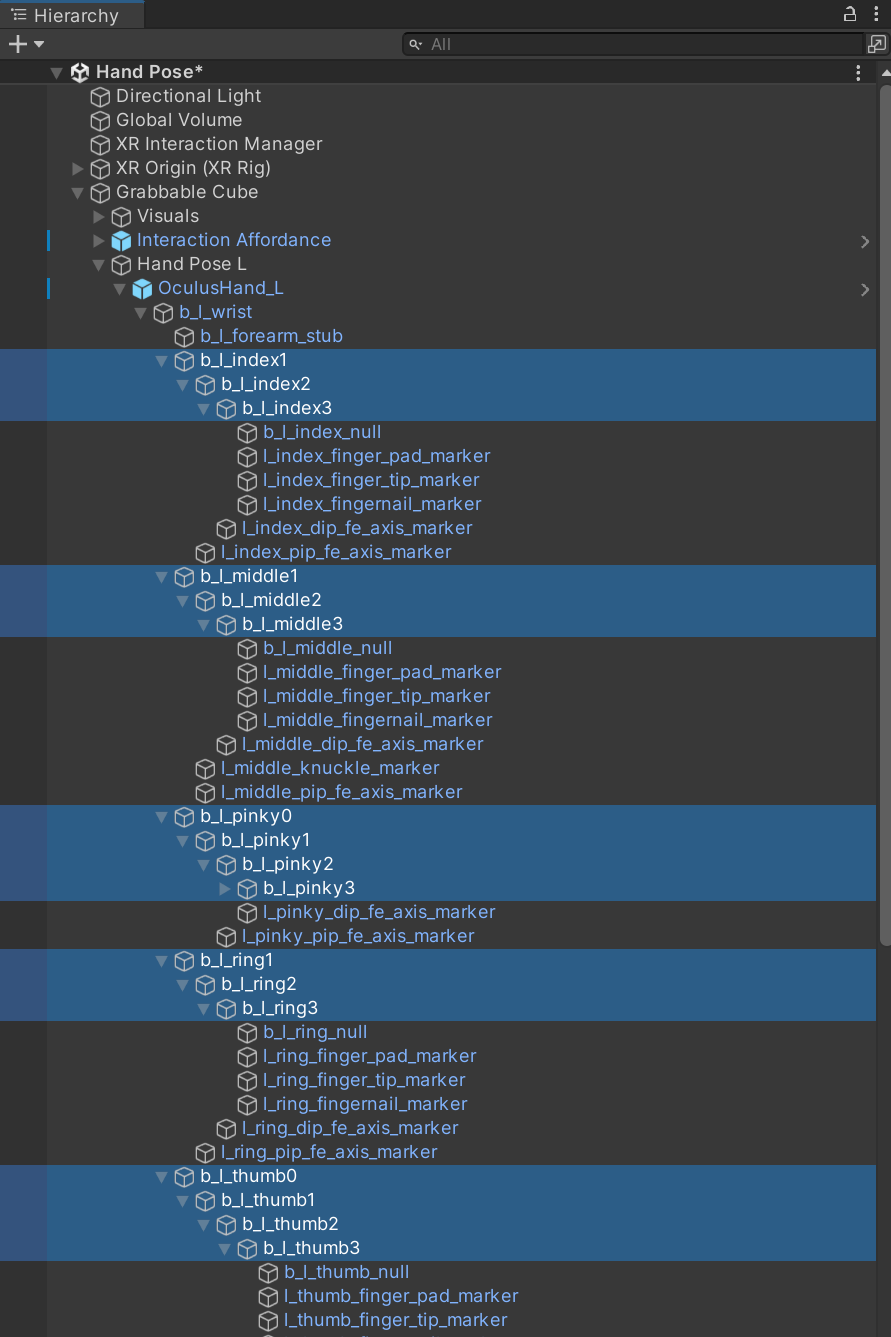
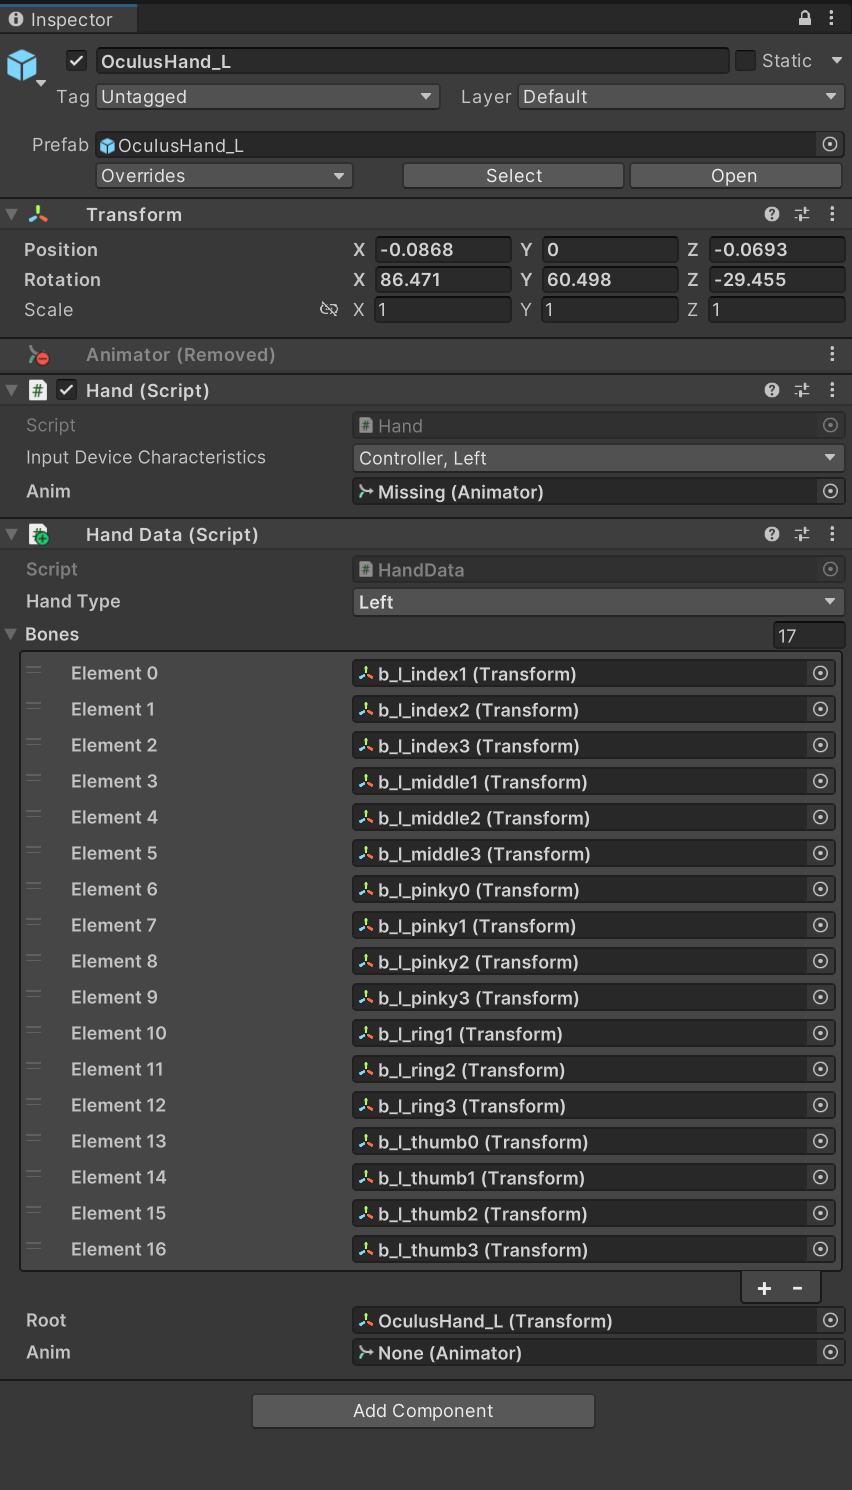
Animator를 제거 하고 Root를 할당 한다 인스펙터를 잠그고
17개의 본을 선택후
HandData의 Bones프로퍼티에 드레그 드롭 한다
이제 핸드 잠금을 해제 한다
이번에는 Left Controller아래 있는 핸드를 선택하고 HandData를 부착 하고 프로퍼티를 넣어 주자
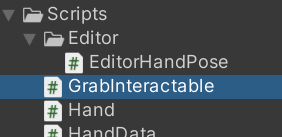
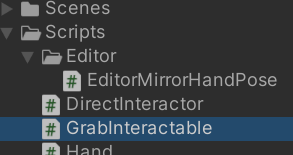
GrabInteractable 스크립트를 만들고
다음과 같이 작성한후
using System;
using System.Collections;
using System.Collections.Generic;
using UnityEngine;
using UnityEngine.XR.Interaction.Toolkit;

public class GrabInteractable : XRGrabInteractable
{
    [SerializeField]
    private Transform LeftHandAttachTransform;
    [SerializeField]
    XRDirectInteractor LeftController;
    [SerializeField]
    XRDirectInteractor RightController;

    protected override void OnSelectEntering(SelectEnterEventArgs args)
    {
        if (args.interactorObject == LeftController)
        {
            Debug.Log($"Left hand");
            attachTransform.SetPositionAndRotation(LeftHandAttachTransform.position, LeftHandAttachTransform.rotation);
        }
        else if (args.interactorObject == RightController)
        {
            Debug.Log($"Right hand");
        }
        base.OnSelectEntering(args);
    }
}
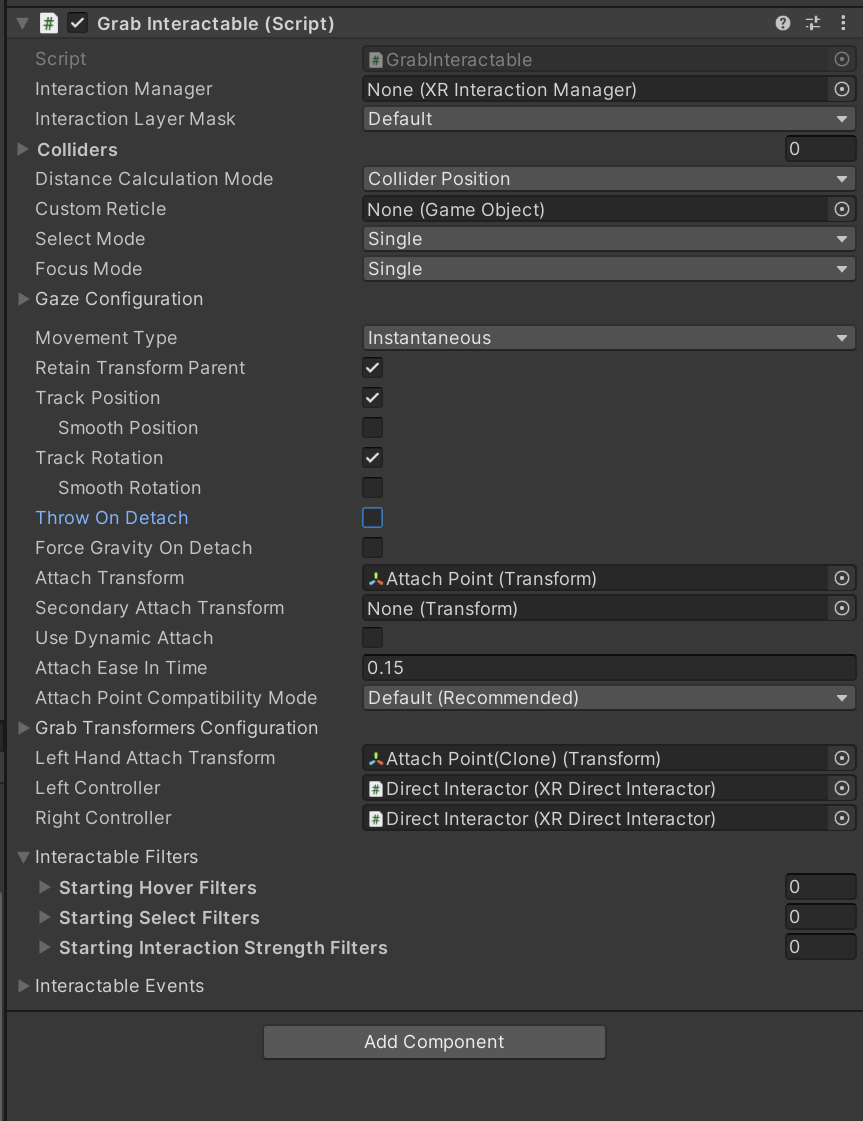
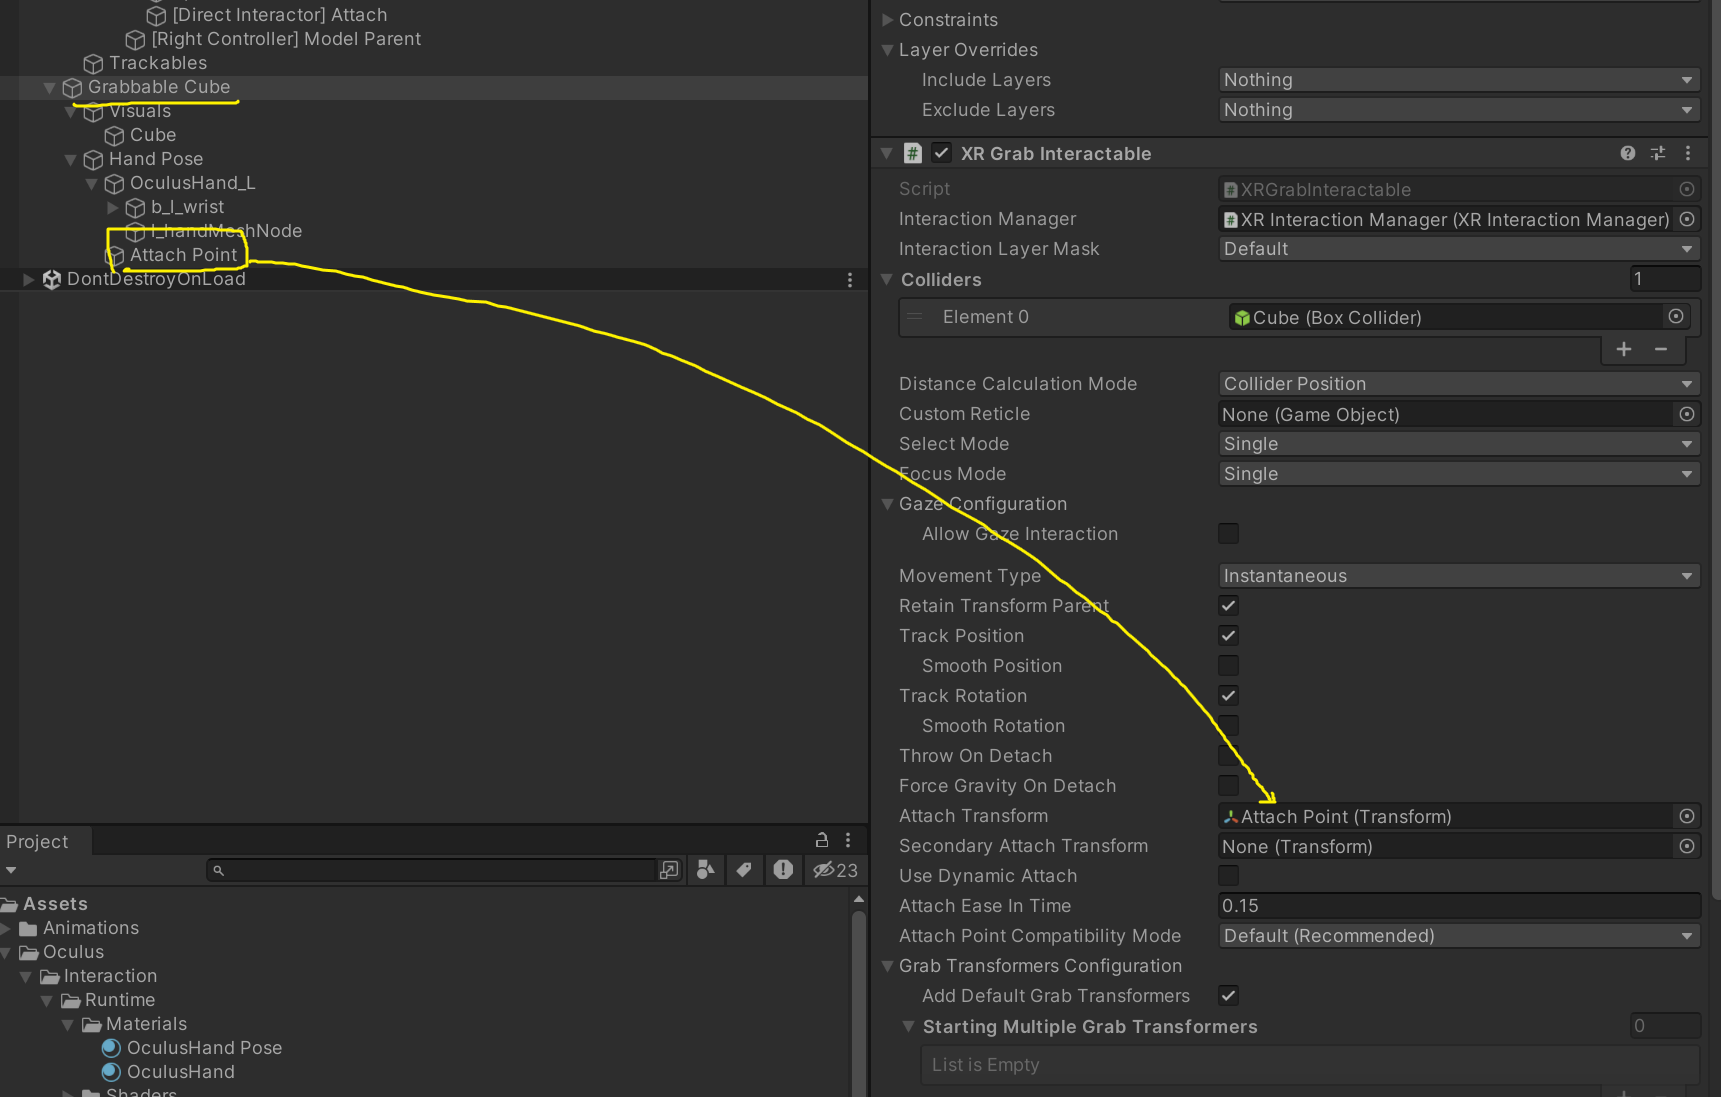
Grabbable Cube를 선택하고 XR Grab Interactable을 제거 후 부착 한다
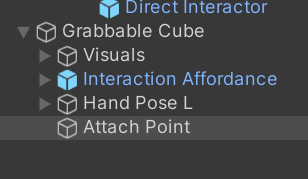
Grabbable Cube를 선택하고 빈오브젝트 Attach Point를 생성한다
다음과 같이 프로퍼티를 할당한다
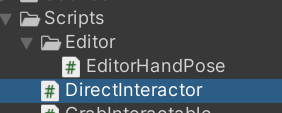
DirectInteractor 스크립트를 생성후
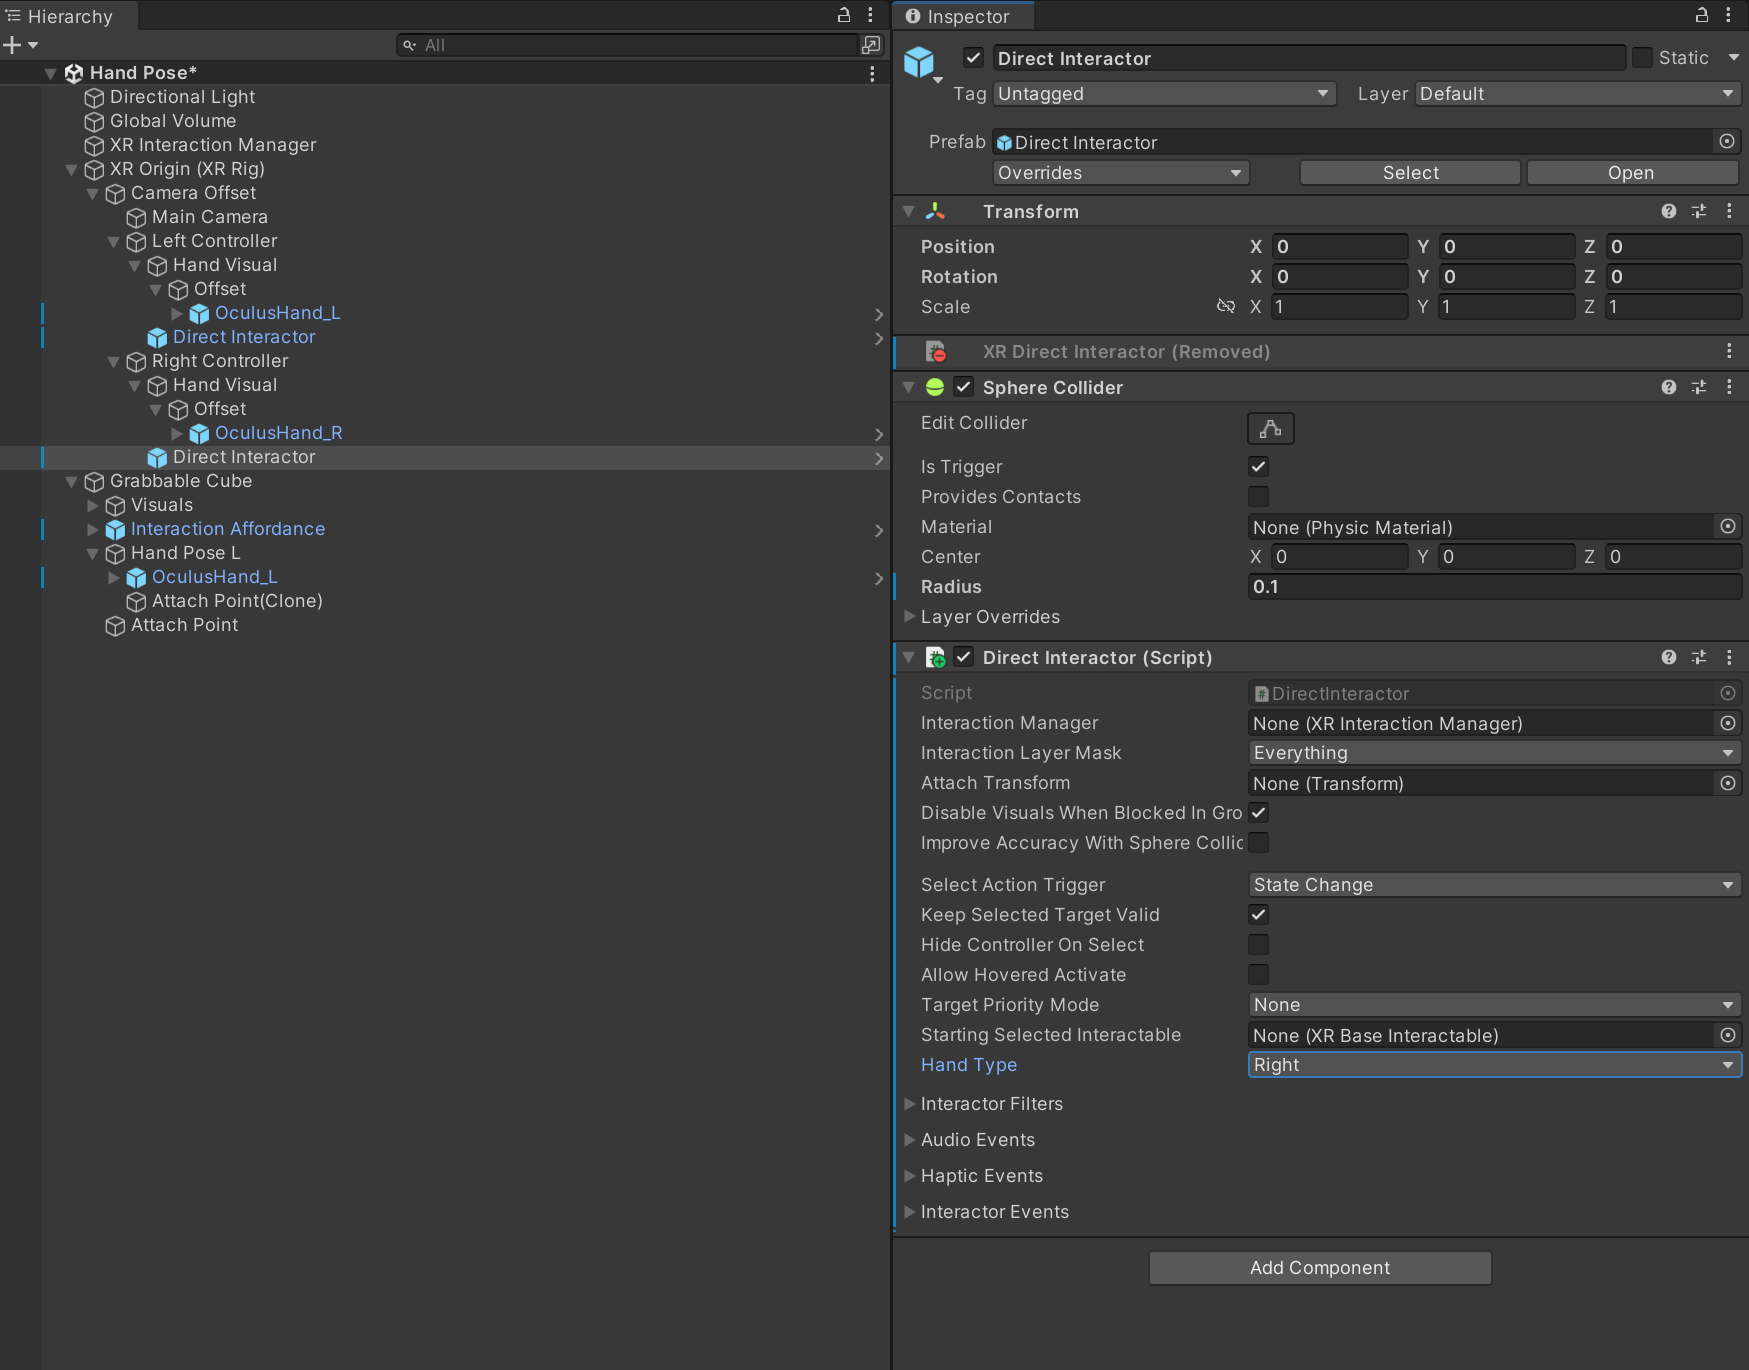
다음과 같이 작성하고 Direct Interactor를 선택하 XR Direct Interactor를 제거 하고 부착 한다
using System.Collections;
using System.Collections.Generic;
using UnityEngine;
using UnityEngine.XR.Interaction.Toolkit;

public class DirectInteractor : XRDirectInteractor
{
    public HandData.HandType handType;
}
그리고 Hand Type을 변경 한다
HandPose스크립트를 다음과 같이 수정 한다
using System;
using System.Collections;
using System.Collections.Generic;
using UnityEngine;
using UnityEngine.XR;
public class HandPose : MonoBehaviour
{
[SerializeField] private GameObject attachPointPrefab;
[SerializeField] private Transform wrist;
[SerializeField] private GrabInteractable grabInteractable;
[SerializeField] private HandData handDataPose;
private void Start()
{
grabInteractable.selectEntered.AddListener((arg) =>
{
var directInteractor = arg.interactorObject as DirectInteractor;
if (directInteractor.handType == this.handDataPose.handType)
{
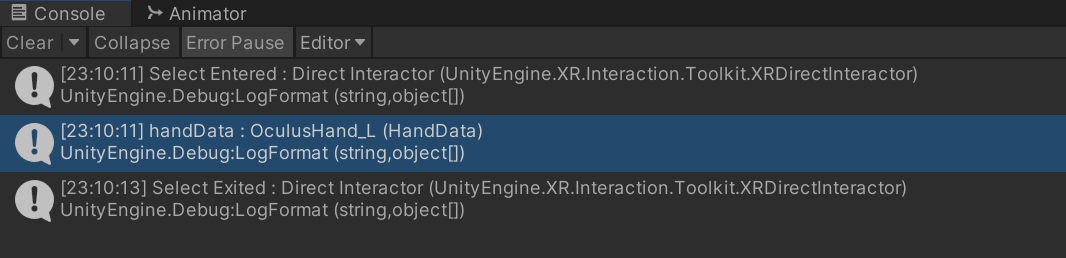
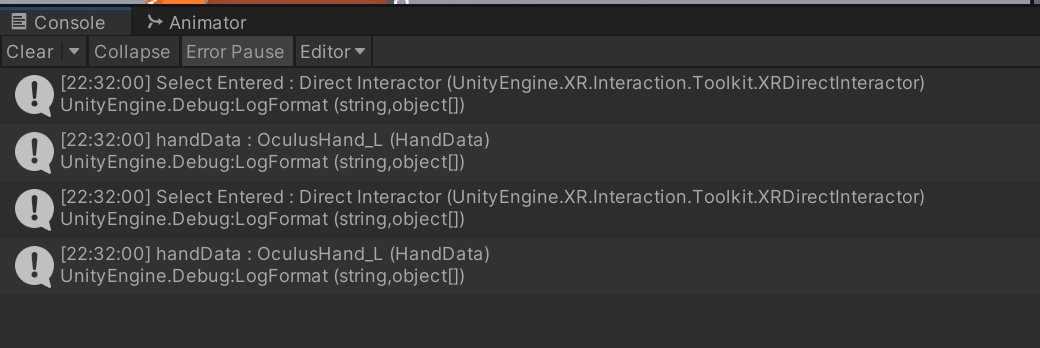
Debug.LogFormat("Select Entered : {0}", arg.interactorObject);
var handData = arg.interactorObject.transform.parent.GetComponentInChildren<HandData>();
Debug.LogFormat("handData : {0}", handData);
handData.anim.enabled = false;
handData.root.parent.localRotation = handDataPose.root.localRotation;
for (int i = 0; i < handDataPose.bones.Length; i++)
{
handData.bones[i].localRotation = handDataPose.bones[i].localRotation;
}
}
});
grabInteractable.selectExited.AddListener((arg) =>
{
var directInteractor = arg.interactorObject as DirectInteractor;
if (directInteractor.handType == this.handDataPose.handType)
{
Debug.LogFormat("Select Exited : {0}", arg.interactorObject);
var handData = arg.interactorObject.transform.parent.GetComponentInChildren<HandData>();
Debug.LogFormat("handData : {0}", handData);
handData.anim.enabled = true;
//초기화
handData.root.localPosition = Vector3.zero;
if (this.handDataPose.handType == HandData.HandType.Left)
handData.root.parent.localRotation = Quaternion.Euler(new Vector3(90, 0, -90));
}
});
}
public void CreateAttachPoint()
{
var point = Instantiate(attachPointPrefab, this.transform);
point.transform.localPosition = this.transform.InverseTransformPoint(wrist.position);
}
}
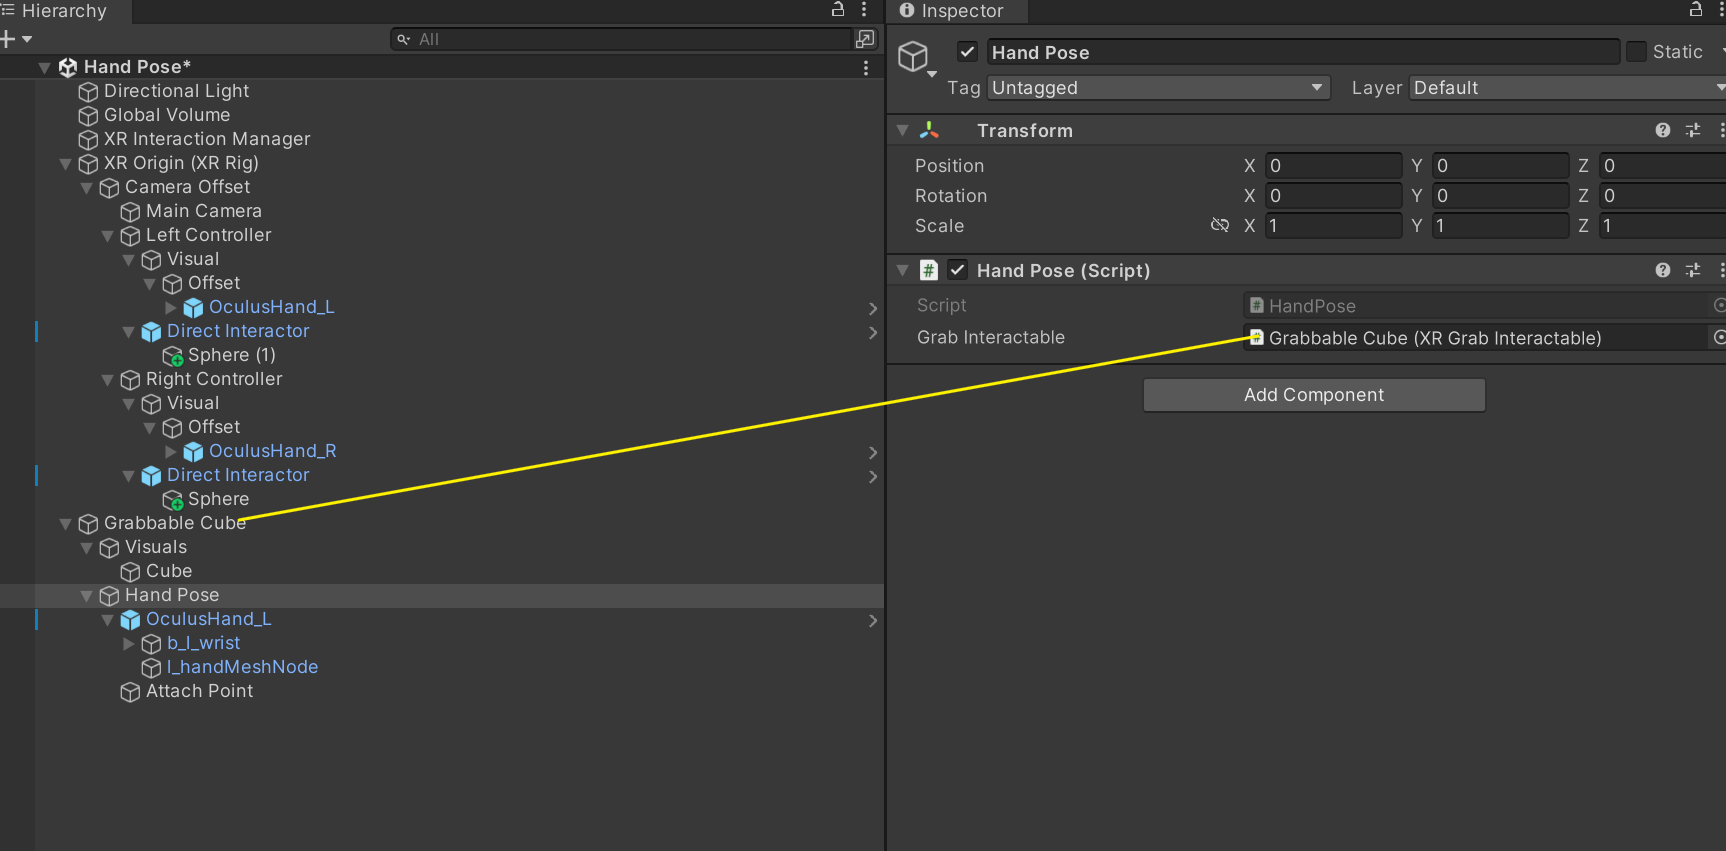
핸드 포즈를 눌러 프로퍼티를 할당한다
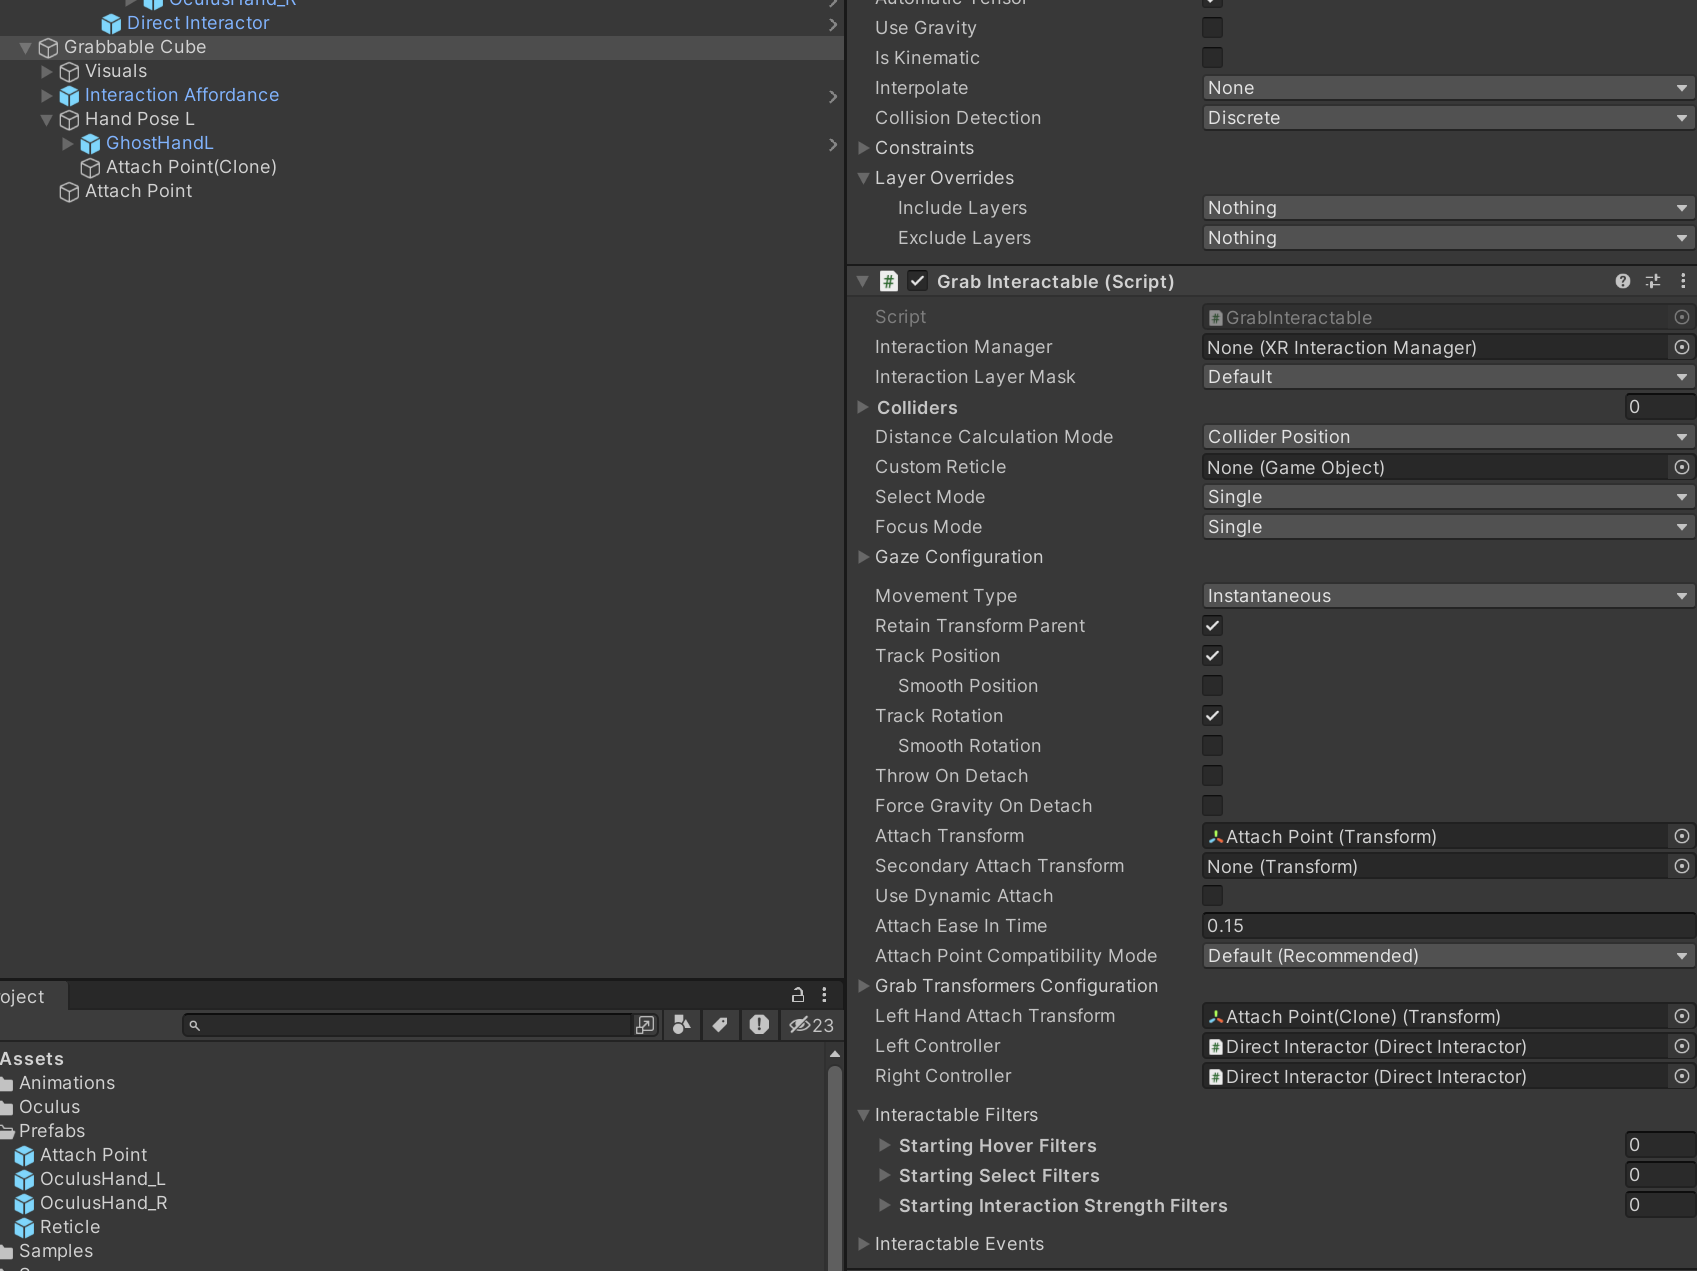
Grabbable Cube를 선택해 Grab Interactable 프로퍼티를 넣어준다
핸드 포즈 자식의 핸드를 선택해 Hand컴포넌트를 제거 한다
마지막으로 핸드 포즈 자식의 핸드의 메터리얼을 변경하고 이름을 GhostHandL로 변경 한다
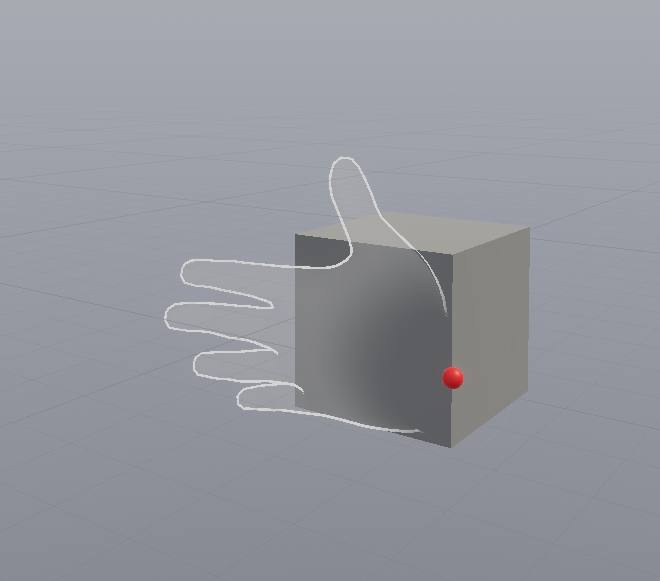
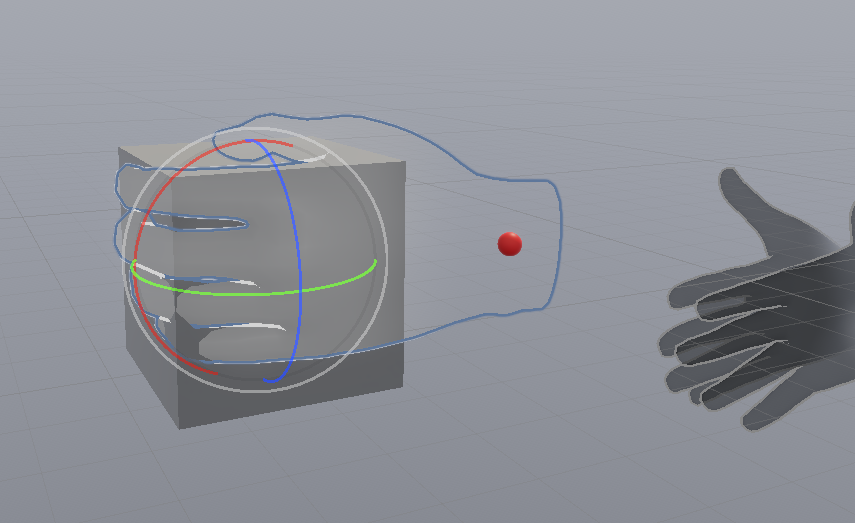
실행후 결과를 확인한다
이제 손을 조금 구부려 본다
위치가 변경되었다면 반드시 핸드 포즈의 Attach Point를 제거 하고 다시 만들어 주자
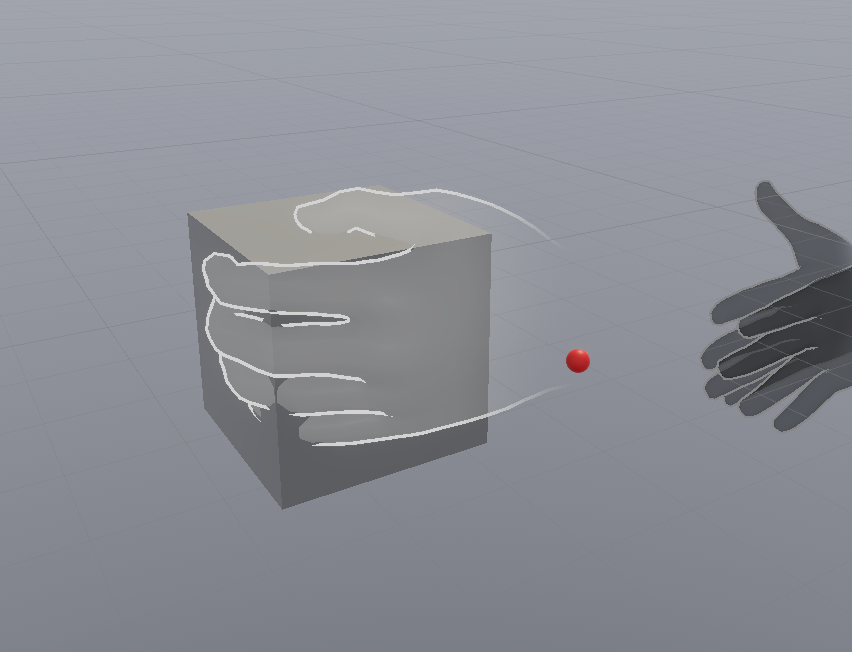
그리고 Grabbable Cube를 선택해 Grab Interactable 의 Left hand Attach Transform에 할당해줘야 한다
실행후 결과를 확인 한다
오른손도 테스트
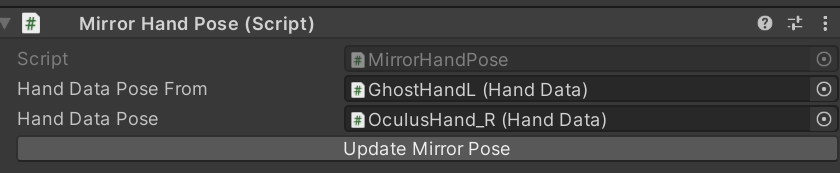
오른손 미러 포즈 만들기 MirrorHandPose, EditorMirrorHandPose스크립트를 생성하고
작성한다
using System;
using System.Collections;
using System.Collections.Generic;
using Unity.VisualScripting;
using UnityEngine;

public class MirrorHandPose : MonoBehaviour
{
    [SerializeField] private HandData handDataPoseFrom;
    [SerializeField] private HandData handDataPose;

    public void UpdateMirrorPose()
    {
        Vector3 mirroredPosition = handDataPoseFrom.root.localPosition;
        mirroredPosition.x *= -1;

        Quaternion mirroredQuaternion = handDataPoseFrom.root.localRotation;
        mirroredQuaternion.y *= -1;
        mirroredQuaternion.z *= -1;

        // Z축을 중심으로 180도 회전하는 쿼터니언 생성
        Quaternion rotate180 = Quaternion.Euler(0, 0, 180);

        // 반전된 회전에 추가 회전 적용
        mirroredQuaternion = rotate180 * mirroredQuaternion;

        handDataPose.root.localPosition = mirroredPosition;
        handDataPose.root.localRotation = mirroredQuaternion;

        for (int i = 0; i < this.handDataPoseFrom.bones.Length; i++)
        {
            this.handDataPose.bones[i].localRotation = handDataPoseFrom.bones[i].localRotation;
        }
    }
}
using UnityEngine;
using UnityEditor;

[CustomEditor(typeof(MirrorHandPose))]
public class EditorMirrorHandPose : Editor
{
    public override void OnInspectorGUI()
    {
        base.OnInspectorGUI();

        MirrorHandPose script = (MirrorHandPose)target;

        if (GUILayout.Button("Update Mirror Pose"))
        {
            script.UpdateMirrorPose();
        }
    }
}
왼손 포즈를 복사 하고
HandData를 넣어 주고
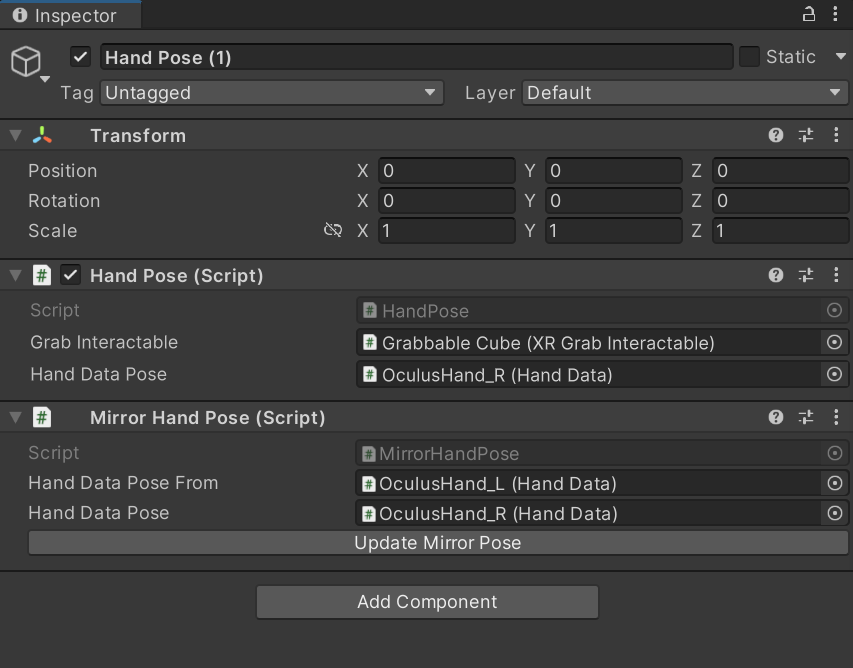
핸드 포즈 L 에 Mirror Hand Pose를 부착한다
From에 L을 To 에 R을 넣어주고
Update Mirror Pose를 누른다 그리고 각을 잘 잡아 주자
using UnityEngine;
using UnityEditor;

[CustomEditor(typeof(MirrorHandPose))]
public class EditorMirrorHandPose : Editor
{
    public override void OnInspectorGUI()
    {
        base.OnInspectorGUI();

        MirrorHandPose script = (MirrorHandPose)target;

        if (GUILayout.Button("Save Initial Pose"))
        {
            script.SaveInitialPose();
        }


        // "Update Mirror Pose" 버튼
        if (GUILayout.Button("Update Mirror Pose"))
        {
            script.UpdateMirrorPose();
        }

        // "Reset Pose" 버튼 추가
        if (GUILayout.Button("Reset Pose"))
        {
            script.ResetPose();
        }


    }
}
using System;
using System.Collections;
using System.Collections.Generic;
using Unity.VisualScripting;
using UnityEngine;

public class MirrorHandPose : MonoBehaviour
{
    [SerializeField] private HandData handDataPoseFrom;
    [SerializeField] private HandData handDataPose;
    // 초기 상태를 저장하기 위한 변수들
    [HideInInspector]
    public Vector3 initialRootPosition;
    [HideInInspector]
    public Quaternion initialRootRotation;
    [HideInInspector]
    public Quaternion[] initialBoneRotations;

    public void ResetPose()
    {
        // root의 초기 위치와 회전으로 재설정
        handDataPose.root.localPosition = initialRootPosition;
        handDataPose.root.localRotation = initialRootRotation;

        // 모든 bones의 초기 회전으로 재설정
        for (int i = 0; i < handDataPose.bones.Length; i++)
        {
            handDataPose.bones[i].localRotation = initialBoneRotations[i];
        }
    }


    public void UpdateMirrorPose()
    {
        Vector3 mirroredPosition = handDataPoseFrom.root.localPosition;
        mirroredPosition.x *= -1;

        Quaternion mirroredQuaternion = handDataPoseFrom.root.localRotation;
        mirroredQuaternion.y *= -1;
        mirroredQuaternion.z *= -1;

        // Z축을 중심으로 180도 회전하는 쿼터니언 생성
        Quaternion rotate180 = Quaternion.Euler(0, 0, 180);

        // 반전된 회전에 추가 회전 적용
        mirroredQuaternion = rotate180 * mirroredQuaternion;

        handDataPose.root.localPosition = mirroredPosition;
        handDataPose.root.localRotation = mirroredQuaternion;

        for (int i = 0; i < this.handDataPoseFrom.bones.Length; i++)
        {
            this.handDataPose.bones[i].localRotation = handDataPoseFrom.bones[i].localRotation;
        }
    }

    public void SaveInitialPose()
    {
        // handDataPose의 root와 bones에서 초기 상태 저장
        initialRootPosition = handDataPose.root.localPosition;
        initialRootRotation = handDataPose.root.localRotation;

        initialBoneRotations = new Quaternion[handDataPose.bones.Length];
        for (int i = 0; i < handDataPose.bones.Length; i++)
        {
            initialBoneRotations[i] = handDataPose.bones[i].localRotation;
        }
    }


}
x 위치에 -1을 곱하는 이유는 3D 공간에서 객체의 거울 이미지를 생성하기 위해서입니다. 유니티에서 3D 객체의 위치는 `(x, y, z)` 형식의 `Vector3`로 표현됩니다. 여기서 x 축은 왼쪽과 오른쪽을, y 축은 위와 아래를, z 축은 앞과 뒤를 나타냅니다.
거울 이미지를 만들기 위해서는 한 축을 기준으로 객체를 '뒤집어야' 합니다. 이 코드에서는 x 축을 기준으로 뒤집습니다. 즉, 객체의 x 위치를 그대로 반대 방향으로 이동시키는 것입니다. 예를 들어, 객체가 원래 x 축에서 +3의 위치에 있었다면, -1을 곱하면 -3의 위치로 이동하게 되어, 거울상에서의 위치가 됩니다.
이러한 변환은 주로 대칭적인 장면이나 객체를 만들 때 사용됩니다. 예를 들어, 캐릭터의 한 손 동작을 다른 손에 정확히 반대로 적용하려 할 때 유용합니다.
회전에서 y축과 z축에 -1을 곱하는 것은 3D 공간에서의 객체의 거울 이미지 회전을 생성하기 위한 것입니다. 유니티에서 객체의 회전은 `Quaternion`으로 표현되며, 이는 복잡한 3D 회전을 나타내는 데 사용되는 수학적 구조입니다.
손 또는 다른 객체를 거울상으로 반전시키기 위해서는 단순히 위치를 반전시키는 것 이상의 조치가 필요합니다. 회전도 반전시켜야 합니다. 3D 공간에서의 회전은 x, y, z 축 주위로 정의됩니다. 거울상 회전을 만들기 위해선, 특정 축(이 경우 y와 z) 주위의 회전 방향을 반대로 해야 합니다.
- **y축 회전 반전:** 객체가 수직(y축)을 중심으로 시계 방향으로 회전했다면, 이를 반대로 반전시키려면 시계 반대 방향으로 같은 각도만큼 회전해야 합니다. 이를 수학적으로 나타내기 위해 y축 회전 성분에 -1을 곱합니다.
- **z축 회전 반전:** 마찬가지로, 객체가 수평(z축)을 중심으로 앞뒤로 회전했다면, 거울상에서는 그 회전이 반대 방향으로 보여야 합니다. z축 회전 성분에 -1을 곱함으로써 이를 달성할 수 있습니다.
이러한 변환을 통해, 객체의 3D 회전이 거울상에서 보는 것처럼 정확하게 반전됩니다. 예를 들어, VR/AR 게임에서 사용자의 한 손 동작을 다른 손에 정확히 반대로 적용하려 할 때 이 방법이 유용합니다.
코드에서 180도 회전을 적용하는 이유는 3D 공간에서의 객체의 거울 이미지를 보다 정확하게 생성하기 위해서입니다. 특히, 이 경우에는 손의 위치와 방향을 거울 이미지처럼 만들기 위해 사용됩니다.
위에서 언급한 것처럼, y축과 z축의 회전 성분에 -1을 곱하는 것만으로는 완벽한 거울 이미지를 생성할 수 없습니다. 이는 객체가 거울을 통해 본 것처럼 완전히 반대 방향을 보도록 하지 않기 때문입니다. 여기서 필요한 것이 바로 Z축을 중심으로 180도 회전하는 추가적인 변환입니다.
Z축 주위로 180도 회전(`Quaternion.Euler(0, 0, 180)`)을 적용하면, 객체가 수평 평면을 기준으로 정확히 반대 방향을 바라보게 됩니다. 이는 객체가 거울에 반사된 것처럼 보이게 하기 위해 필요한 마지막 조정입니다.
결론적으로, y축과 z축 회전 성분에 -1을 곱하고, Z축 주위로 180도 추가 회전을 적용함으로써, 객체는 거울상에서 보는 것처럼 완전히 반대 방향을 바라보게 되며, 이는 거울 이미지 회전을 정확하게 재현하는 데 중요합니다.
public class MirrorPoseUtil { // 3D 객체를 거울 이미지로 변환하는 메서드 public static void UpdateMirrorPose(Transform objectTransform) { // 위치를 거울 이미지로 반전 objectTransform.localPosition = MirrorPosition(objectTransform.localPosition);
// Z축을 중심으로 180도 회전 적용 Quaternion rotate180 = Quaternion.Euler(0, 0, 180); return rotate180 * originalRotation; } }
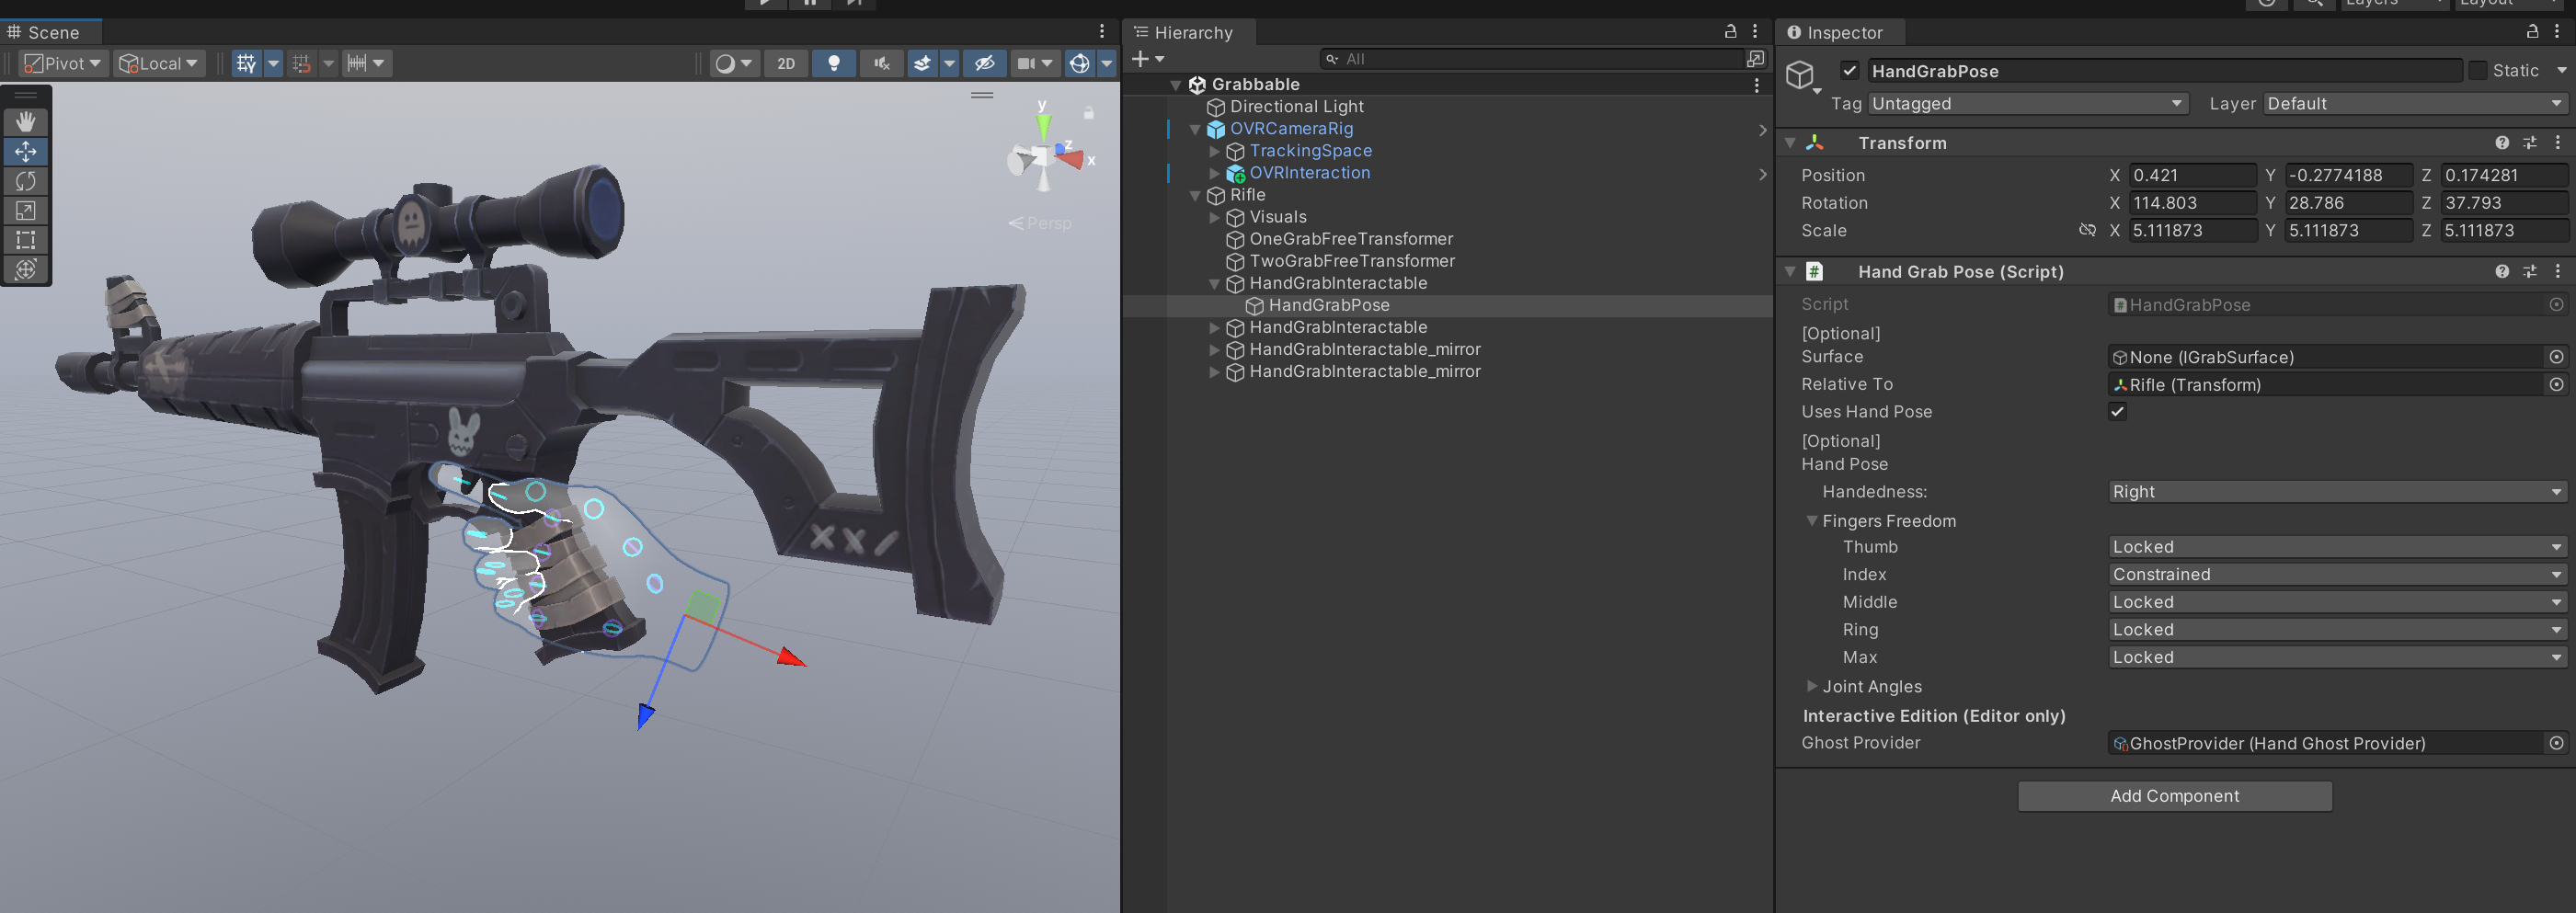
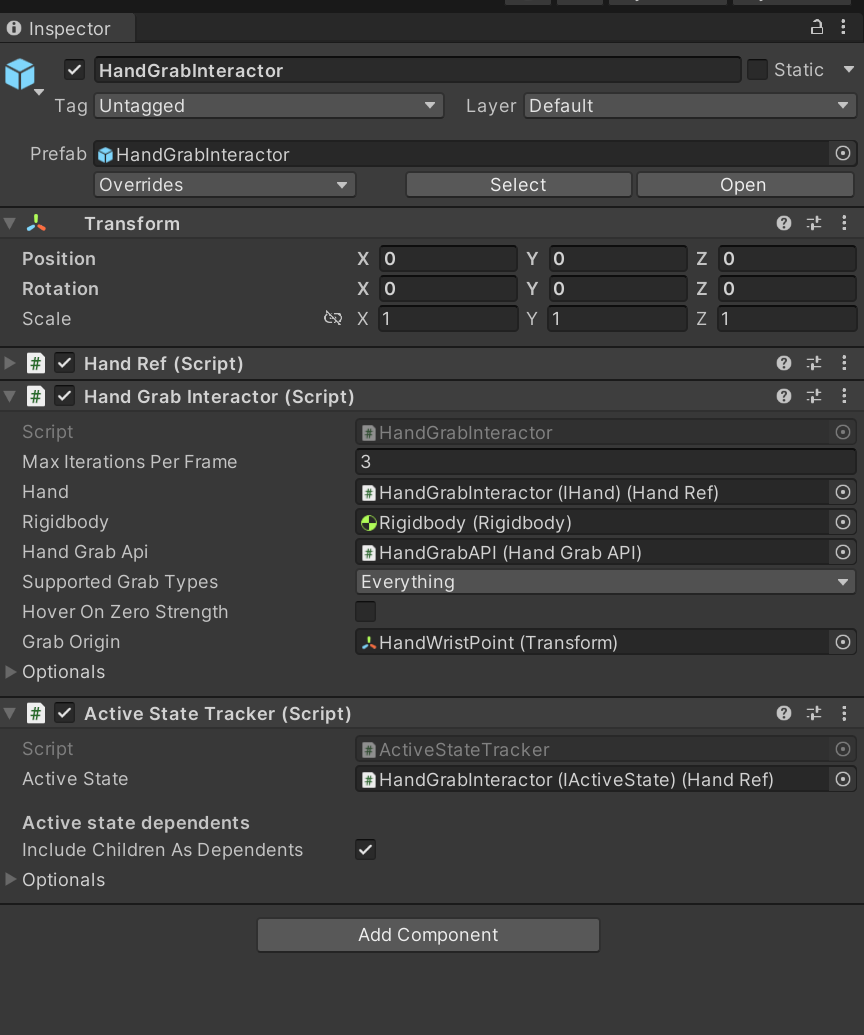
HandGrabInteractor
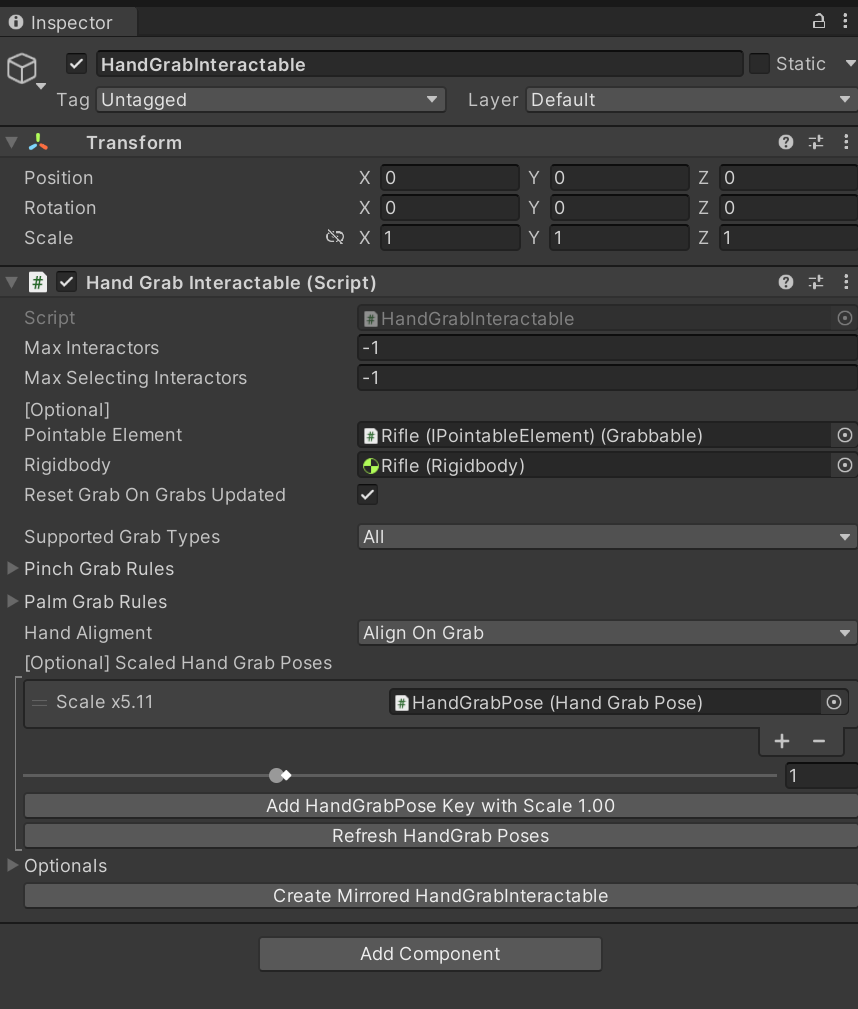
HandGrabInteractable
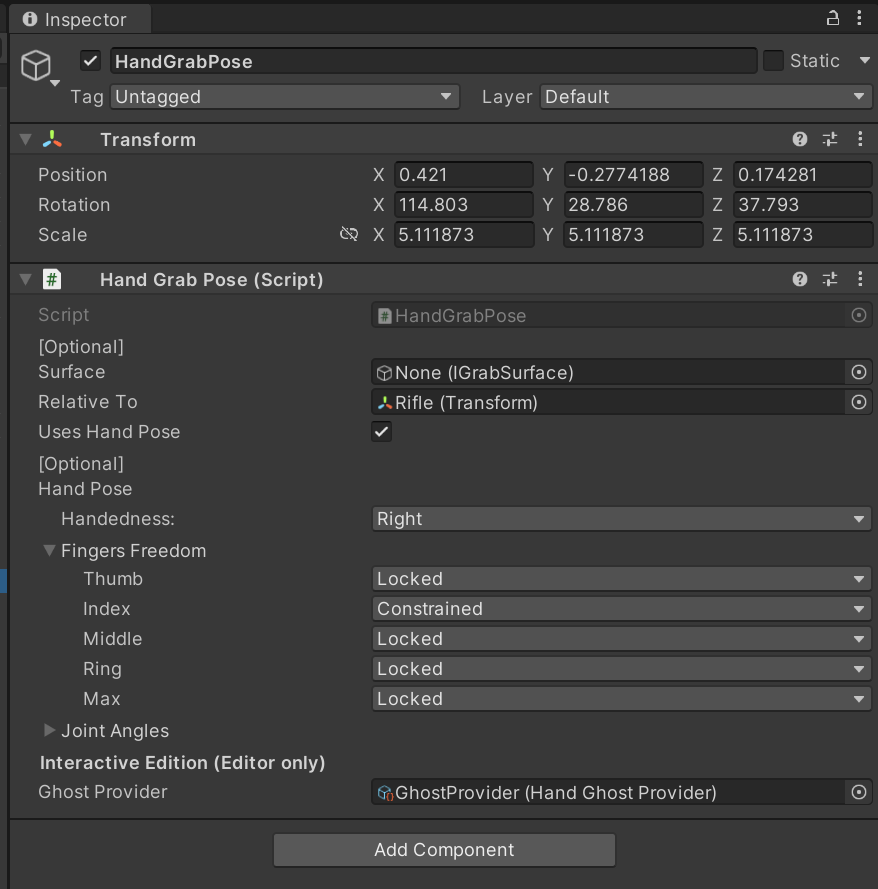
HandGrabPose
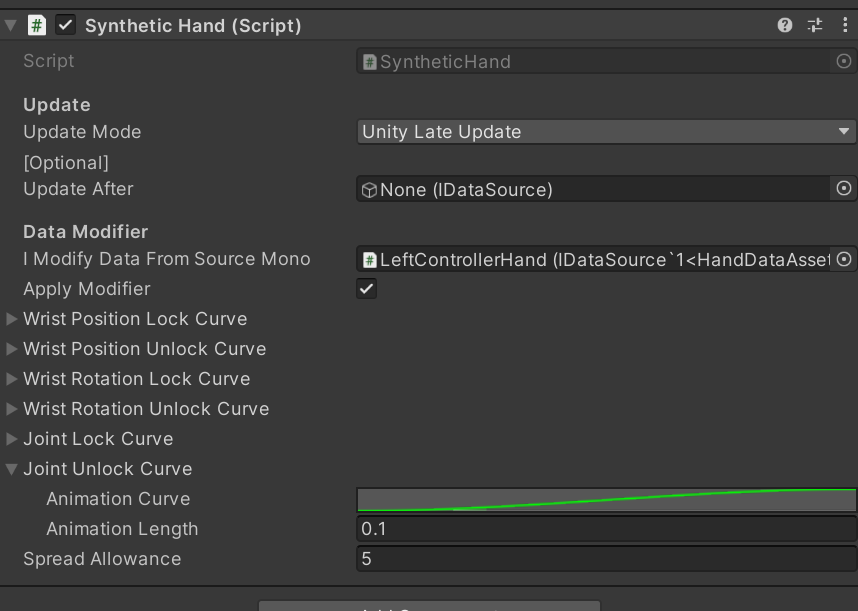
Synthetic Hand
테스트 코드들
using UnityEngine;
using UnityEditor;

[CustomEditor(typeof(MirrorHandPose))]
public class EditorMirrorHandPose : Editor
{
    public override void OnInspectorGUI()
    {
        base.OnInspectorGUI();

        MirrorHandPose script = (MirrorHandPose)target;

        if (GUILayout.Button("Update Mirror Pose"))
        {
            script.UpdateMirrorPose();
        }
    }
}
using System;
using System.Collections;
using System.Collections.Generic;
using UnityEngine;
using UnityEngine.XR.Interaction.Toolkit;

public class XRHandedGrabInteractable : XRGrabInteractable
{
    [SerializeField]
    private Transform LeftHandAttachTransform;
    [SerializeField]
    private Transform RightHandAttachTransform;
    [SerializeField]
    XRDirectInteractor LeftController;
    [SerializeField]
    XRDirectInteractor RightController;

    protected override void OnSelectEntering(SelectEnterEventArgs args)
    {
        if (args.interactorObject == LeftController)
        {
            Debug.Log($"Left hand");
            attachTransform.SetPositionAndRotation(LeftHandAttachTransform.position, LeftHandAttachTransform.rotation);
        }
        else if (args.interactorObject == RightController)
        {
            Debug.Log($"Right hand");
            attachTransform.SetPositionAndRotation(RightHandAttachTransform.position, RightHandAttachTransform.rotation);
        }
        base.OnSelectEntering(args);
    }
}
using System;
using System.Collections;
using System.Collections.Generic;
using Unity.VisualScripting;
using UnityEngine;


public class MirrorHandPose : MonoBehaviour
{
    [SerializeField] private HandData handDataPoseFrom;
    [SerializeField] private HandData handDataPose;

    public void UpdateMirrorPose()
    {
        Vector3 mirrorredPosition = handDataPoseFrom.root.localPosition;
        Quaternion mirroredQuaternion = handDataPoseFrom.root.localRotation;
        handDataPose.root.localPosition = mirrorredPosition;
        handDataPose.root.localRotation = mirroredQuaternion * Quaternion.Euler(new Vector3(0, 0, 180));

        for (int i = 0; i < this.handDataPoseFrom.bones.Length; i++)
        {
            this.handDataPose.bones[i].localRotation = handDataPoseFrom.bones[i].localRotation;
        }
    }
}
using System.Collections;
using System.Collections.Generic;
using UnityEngine;
using UnityEngine.XR;

public class Hand : MonoBehaviour
{
    [SerializeField] private InputDeviceCharacteristics inputDeviceCharacteristics;
    [SerializeField] private Animator anim;
    private InputDevice targetDevice;
    void Start()
    {
        this.StartCoroutine(this.WaitForGetDevices());
    }

    private IEnumerator WaitForGetDevices()
    {
        WaitForEndOfFrame wait = new WaitForEndOfFrame();
        List<InputDevice> devices = new List<InputDevice>();

        while (devices.Count == 0)
        {
            yield return wait;
            InputDevices.GetDevicesWithCharacteristics(inputDeviceCharacteristics, devices);
        }

        this.targetDevice = devices[0];
    }

    void Update()
    {
        if (this.targetDevice.isValid)
        {
            UpdateHand();
        }
    }

    private void UpdateHand()
    {
        if (this.targetDevice.TryGetFeatureValue(CommonUsages.grip, out float gripValue))
        {
            this.anim.SetFloat("Grip", gripValue);
        }

        if (this.targetDevice.TryGetFeatureValue(CommonUsages.trigger, out float triggerValue))
        {
            this.anim.SetFloat("Trigger", triggerValue);
        }

    }
}
using System.Collections;
using System.Collections.Generic;
using UnityEngine;

public class HandData : MonoBehaviour
{
    public enum  HandType
    {
        Left, Right
    }

    public HandType handType;
    public Transform[] bones;
    public Transform root;
    public Animator anim;

}
using System.Collections;
using System.Collections.Generic;
using Unity.Mathematics;
using UnityEngine;
using UnityEngine.XR.Interaction.Toolkit;

public class HandPose : MonoBehaviour
{
    [SerializeField]
    private XRGrabInteractable grabInteractable;
    [SerializeField] private HandData handDataPose;

    void Start()
    {
        grabInteractable.selectEntered.AddListener((arg) =>
        {

            var directInteractor = arg.interactorObject as DirectInteractor;

            if (directInteractor.handType == this.handDataPose.handType)
            {


                Debug.LogFormat("Select Entered : {0}", arg.interactorObject);
                var handData = arg.interactorObject.transform.parent.GetComponentInChildren<HandData>();

                Debug.LogFormat("handData : {0}", handData);

                handData.anim.enabled = false;

                //handData.root.localRotation = handDataPose.root.localRotation * Quaternion.Euler(new Vector3(-90, 0, 90));

                handData.root.parent.localRotation = handDataPose.root.localRotation;

                for (int i = 0; i < handDataPose.bones.Length; i++)
                {
                    handData.bones[i].localRotation = handDataPose.bones[i].localRotation;
                }

                //handDataPose.gameObject.SetActive(false);
            }
        });


        grabInteractable.selectExited.AddListener((arg) =>
        {
            var directInteractor = arg.interactorObject as DirectInteractor;
            if (directInteractor.handType == this.handDataPose.handType)
            {
                Debug.LogFormat("Select Exited : {0}", arg.interactorObject);

                var handData = arg.interactorObject.transform.parent.GetComponentInChildren<HandData>();

                Debug.LogFormat("handData : {0}", handData);

                handData.anim.enabled = true;

                //초기화
                handData.root.localPosition = Vector3.zero;

                if(this.handDataPose.handType == HandData.HandType.Left)
                    handData.root.parent.localRotation = Quaternion.Euler(new Vector3(90, 0, -90));
                if(this.handDataPose.handType == HandData.HandType.Right)
                    handData.root.parent.localRotation = Quaternion.Euler(new Vector3(-90, 0, -90));

                //handDataPose.gameObject.SetActive(true);
            }


        });
    }


}
XR Grab Interactable 컴포넌트의 Attach Transform에 Attach Point를 넣어 줍니다.
Left Right Controller의 Direct Interactor 를 선택해 위치를 초기화 합니다.
Direct Interactor를 선택하고 Sphere를 생성하고 메터리얼을 빨강색, 콜라이더는 제거 합니다.
실행해보기
HandData스크립트를 만들어 다음과 같이 작성 합니다.
using System.Collections;
using System.Collections.Generic;
using UnityEngine;

public class HandData : MonoBehaviour
{
    public enum  HandType
    {
        Left, Right
    }

    public HandType handType;
    public Transform[] bones;
    public Transform root;
    public Animator anim;

}
핸드 포즈 자식으로 있는 핸드를 선택해 HandData를 부착 합니다.
인스펙터를 잠그고
다음과 같이 선택해서 Bones에 넣어 줍니다.
이제 인스펙터 잠금을 해제 합니다
HandPose 스크립트를 생성하고
다음과 같이 작성 합니다.
using System.Collections;
using System.Collections.Generic;
using UnityEngine;
using UnityEngine.XR.Interaction.Toolkit;

public class HandPose : MonoBehaviour
{
    [SerializeField]
    private XRGrabInteractable grabInteractable;

    void Start()
    {
        grabInteractable.selectEntered.AddListener((arg) =>
        {
            Debug.LogFormat("Select Entered : {0}", arg.interactorObject);
        });

        grabInteractable.selectExited.AddListener((arg) =>
        {
            Debug.LogFormat("Select Exited : {0}", arg.interactorObject);
        });
    }


}
Left Controller의 핸드를 선택 하고 HandData를 부착 합니다. 그리고 프로퍼티를 채워줍니다.
다음과 같이 코드를 수정 합니다.
using System.Collections;
using System.Collections.Generic;
using UnityEngine;
using UnityEngine.XR.Interaction.Toolkit;

public class HandPose : MonoBehaviour
{
    [SerializeField]
    private XRGrabInteractable grabInteractable;

    void Start()
    {
        grabInteractable.selectEntered.AddListener((arg) =>
        {
            Debug.LogFormat("Select Entered : {0}", arg.interactorObject);

            var handData = arg.interactorObject.transform.parent.GetComponentInChildren<HandData>();

            Debug.LogFormat("handData : {0}", handData);
        });

        grabInteractable.selectExited.AddListener((arg) =>
        {
            Debug.LogFormat("Select Exited : {0}", arg.interactorObject);
        });
    }


}
코드를 다음과 같이 수정하고 실행 합니다.
using System.Collections;
using System.Collections.Generic;
using UnityEngine;
using UnityEngine.XR.Interaction.Toolkit;

public class HandPose : MonoBehaviour
{
    [SerializeField]
    private XRGrabInteractable grabInteractable;

    [SerializeField] private HandData handDataPose;

    void Start()
    {
        grabInteractable.selectEntered.AddListener((arg) =>
        {
            Debug.LogFormat("Select Entered : {0}", arg.interactorObject);

            var handData = arg.interactorObject.transform.parent.GetComponentInChildren<HandData>();

            Debug.LogFormat("handData : {0}", handData);

            handData.anim.enabled = false;

            handData.root.localRotation = handDataPose.root.localRotation;

            for (int i = 0; i < handDataPose.bones.Length; i++)
            {
                handData.bones[i].localRotation = handDataPose.bones[i].localRotation;
            }

        });


        grabInteractable.selectExited.AddListener((arg) =>
        {
            Debug.LogFormat("Select Exited : {0}", arg.interactorObject);

            var handData = arg.interactorObject.transform.parent.GetComponentInChildren<HandData>();

            Debug.LogFormat("handData : {0}", handData);

            handData.anim.enabled = true;

            //초기화
            handData.root.localPosition = Vector3.zero;
            handData.root.localRotation = Quaternion.Euler(new Vector3(90, 0, -90));
        });
    }


}
using System.Collections;
using System.Collections.Generic;
using Unity.Mathematics;
using UnityEngine;
using UnityEngine.XR.Interaction.Toolkit;

public class HandPose : MonoBehaviour
{
    [SerializeField]
    private XRGrabInteractable grabInteractable;

    [SerializeField] private HandData handDataPose;

    void Start()
    {
        grabInteractable.selectEntered.AddListener((arg) =>
        {
            Debug.LogFormat("Select Entered : {0}", arg.interactorObject);

            var handData = arg.interactorObject.transform.parent.GetComponentInChildren<HandData>();

            Debug.LogFormat("handData : {0}", handData);

            handData.anim.enabled = false;

            //handData.root.localRotation = handDataPose.root.localRotation * Quaternion.Euler(new Vector3(-90, 0, 90));

            handData.root.localRotation = handDataPose.root.localRotation;

            for (int i = 0; i < handDataPose.bones.Length; i++)
            {
                handData.bones[i].localRotation = handDataPose.bones[i].localRotation;
            }

            //handDataPose.gameObject.SetActive(false);

        });


        grabInteractable.selectExited.AddListener((arg) =>
        {
            Debug.LogFormat("Select Exited : {0}", arg.interactorObject);

            var handData = arg.interactorObject.transform.parent.GetComponentInChildren<HandData>();

            Debug.LogFormat("handData : {0}", handData);

            handData.anim.enabled = true;

            //초기화
            handData.root.localPosition = Vector3.zero;
            handData.root.localRotation = Quaternion.Euler(new Vector3(90, 0, -90)); //quaternion.identity;

            handDataPose.gameObject.SetActive(true);
        });
    }


}
Mirror 포즈 만들기
MirrorHandPose스크립트를 만들고
using System;
using System.Collections;
using System.Collections.Generic;
using Unity.VisualScripting;
using UnityEngine;


public class MirrorHandPose : MonoBehaviour
{
    [SerializeField] private HandData handDataPoseFrom;
    [SerializeField] private HandData handDataPose;

    public void UpdateHandPose()
    {
        Vector3 mirrorredPosition = handDataPoseFrom.root.localPosition;
        Quaternion mirroredQuaternion = handDataPoseFrom.root.localRotation;
        handDataPose.root.localPosition = mirrorredPosition;
        handDataPose.root.localRotation = mirroredQuaternion * Quaternion.Euler(new Vector3(0, 0, 180));

        for (int i = 0; i < this.handDataPoseFrom.bones.Length; i++)
        {
            this.handDataPose.bones[i].localRotation = handDataPoseFrom.bones[i].localRotation;
        }
    }
}
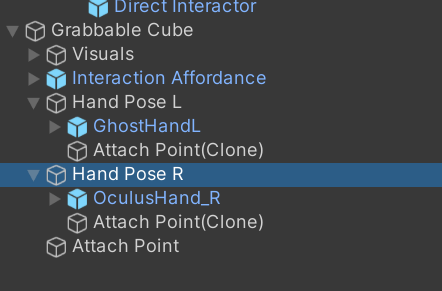
왼손 Hand Pose를 복사 한후 모델을 변경 해준다 (OculusHand_R)로
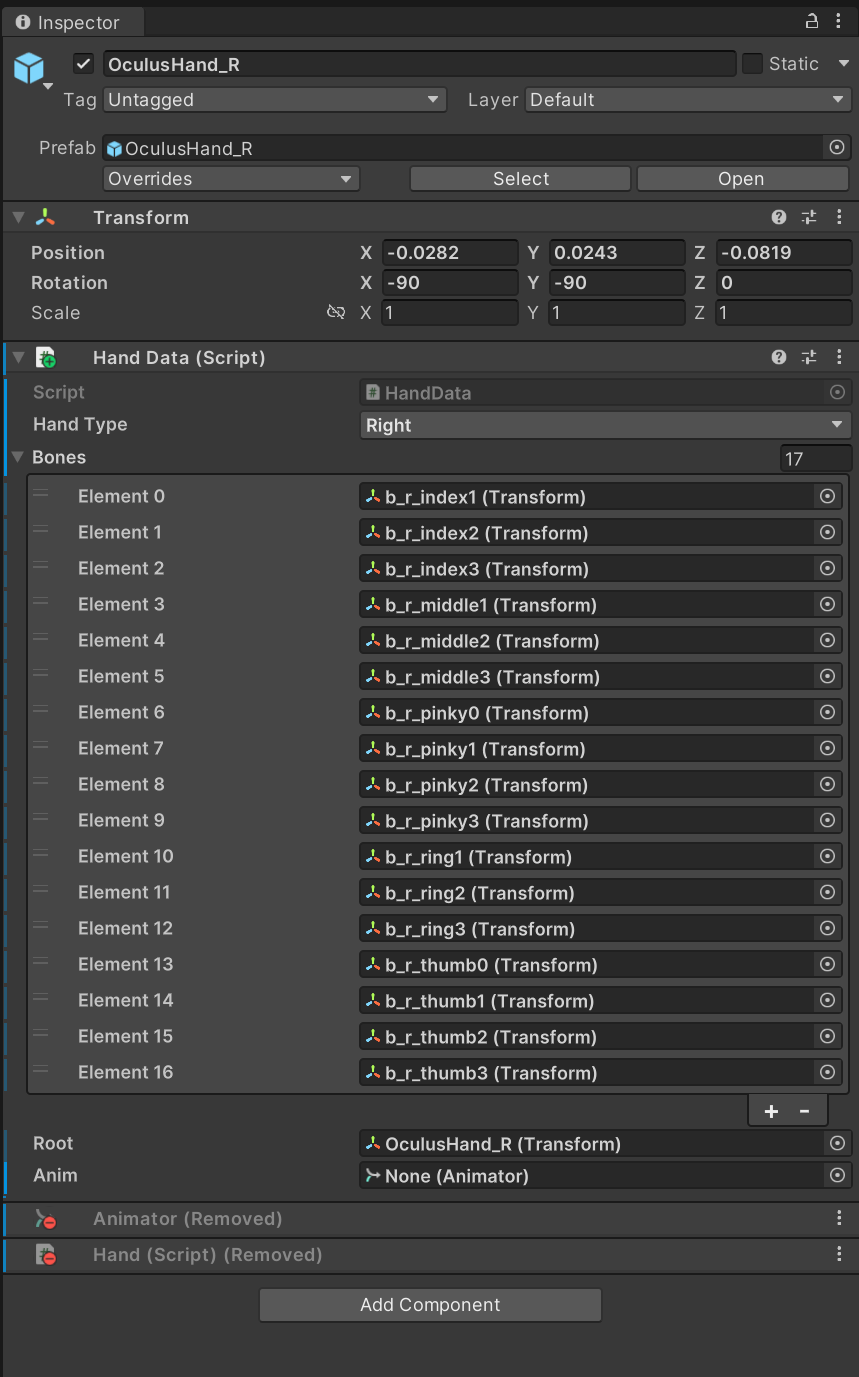
오른손 모델을 선택 하고 Hand Data를 부착 후 프로퍼티를 설정한다
Editor Mirror Hand Pose 스크립트를 만들어 주고
using UnityEngine;
using UnityEditor;

[CustomEditor(typeof(MirrorHandPose))]
public class EditorMirrorHandPose : Editor
{
    public override void OnInspectorGUI()
    {
        base.OnInspectorGUI();

        MirrorHandPose script = (MirrorHandPose)target;

        if (GUILayout.Button("Update Mirror Pose"))
        {
            script.UpdateMirrorPose();
        }
    }
}
Mirror Hand Pose 스크립트를 부착 한다
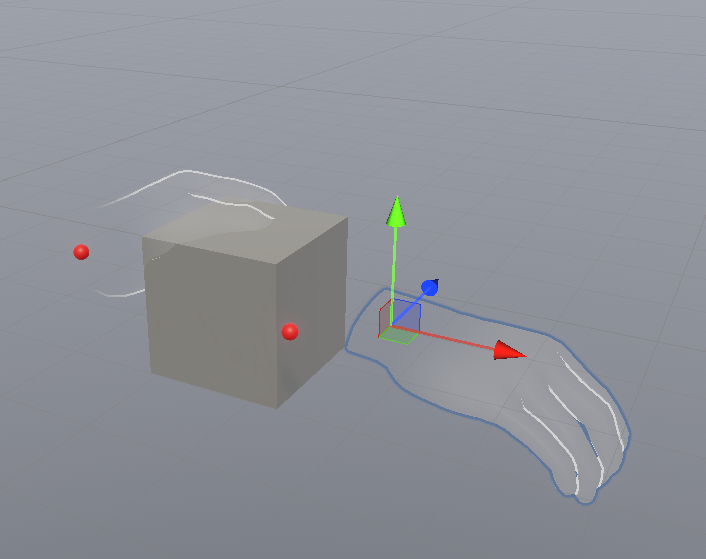
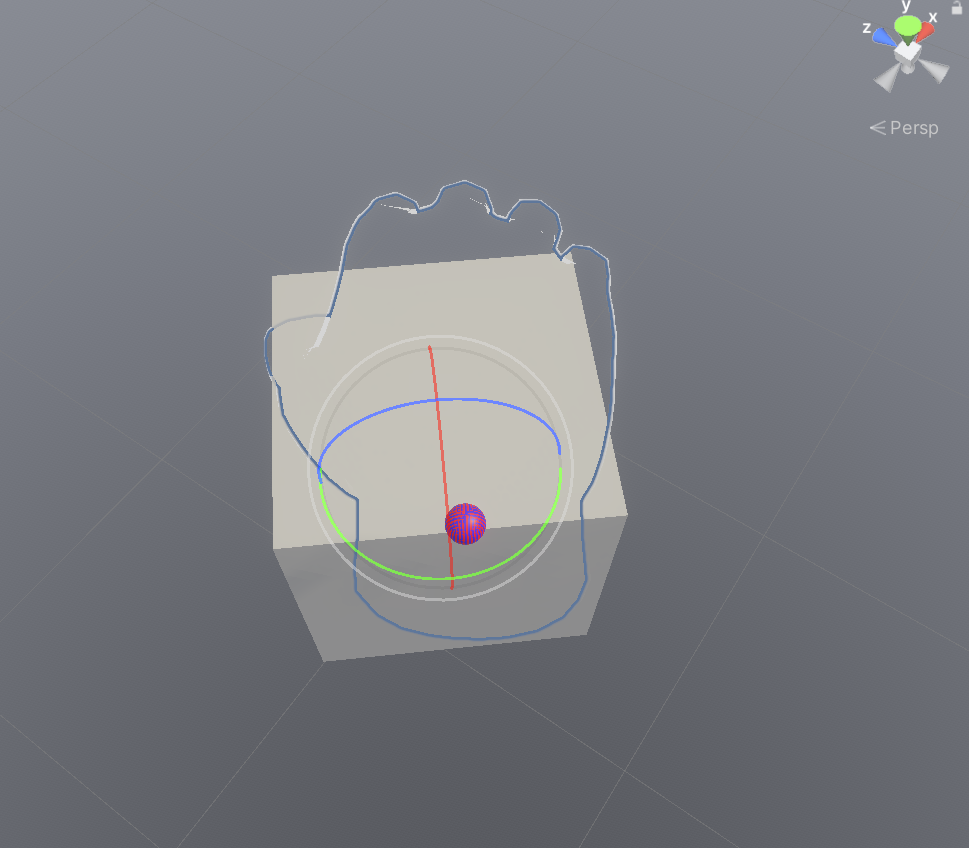
인스펙터에서 Update mirror pose 버튼을 누른다
왼손의 포즈가 오른손으로 적용된 모습이다
왼손으로 잡았는지 오른손으로 잡았는지 알아내기
문제는 이제 왼손 오른손에 HandPose가 달려 있기 때문에 2번씩 호출 된다
Direct Interactor 오브젝트를 선택하고 XR Direct Interactor를 제거 한다
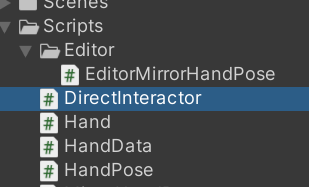
DirectInteractor 스크립트를 만들고 다음과 같이 작성후 다시 붙여 주자
using System.Collections;
using System.Collections.Generic;
using UnityEngine;
using UnityEngine.XR.Interaction.Toolkit;

public class DirectInteractor : XRDirectInteractor
{
    public HandData.HandType handType;

    protected override void OnSelectEntered(SelectEnterEventArgs args)
    {
        base.OnSelectEntered(args);

        Debug.LogFormat("OnSelectEntered : <color=yellow>{0}</color>", this.handType);
    }
}
이제 HandPose스크립트를 수정 한다
using System.Collections;
using System.Collections.Generic;
using Unity.Mathematics;
using UnityEngine;
using UnityEngine.XR.Interaction.Toolkit;

public class HandPose : MonoBehaviour
{
    [SerializeField]
    private XRGrabInteractable grabInteractable;
    [SerializeField] private HandData handDataPose;
    void Start()
    {
        grabInteractable.selectEntered.AddListener((arg) =>
        {

            var directInteractor = arg.interactorObject as DirectInteractor;
            if (directInteractor.handType == this.handDataPose.handType)
            {
                Debug.LogFormat("Select Entered : {0}", arg.interactorObject);
                var handData = arg.interactorObject.transform.parent.GetComponentInChildren<HandData>();

                Debug.LogFormat("handData : {0}", handData);

                handData.anim.enabled = false;

                //handData.root.localRotation = handDataPose.root.localRotation * Quaternion.Euler(new Vector3(-90, 0, 90));

                handData.root.parent.localRotation = handDataPose.root.localRotation;

                for (int i = 0; i < handDataPose.bones.Length; i++)
                {
                    handData.bones[i].localRotation = handDataPose.bones[i].localRotation;
                }

                //handDataPose.gameObject.SetActive(false);
            }
        });


        grabInteractable.selectExited.AddListener((arg) =>
        {
            var directInteractor = arg.interactorObject as DirectInteractor;
            if (directInteractor.handType == this.handDataPose.handType)
            {
                Debug.LogFormat("Select Exited : {0}", arg.interactorObject);

                var handData = arg.interactorObject.transform.parent.GetComponentInChildren<HandData>();

                Debug.LogFormat("handData : {0}", handData);

                handData.anim.enabled = true;

                //초기화
                handData.root.localPosition = Vector3.zero;

                if(this.handDataPose.handType == HandData.HandType.Left)
                    handData.root.parent.localRotation = Quaternion.Euler(new Vector3(90, 0, -90));
                if(this.handDataPose.handType == HandData.HandType.Right)
                    handData.root.parent.localRotation = Quaternion.Euler(new Vector3(-90, 0, -90));

                handDataPose.gameObject.SetActive(true);
            }


        });
    }


}
양손모두 동작 하는지 확인 하자
using System;
using System.Collections;
using System.Collections.Generic;
using UnityEngine;
using UnityEngine.XR.Interaction.Toolkit;

public class XRHandedGrabInteractable : XRGrabInteractable
{
    [SerializeField]
    private Transform LeftHandAttachTransform;
    [SerializeField]
    private Transform RightHandAttachTransform;
    [SerializeField]
    XRDirectInteractor LeftController;
    [SerializeField]
    XRDirectInteractor RightController;

    protected override void OnSelectEntering(SelectEnterEventArgs args)
    {
        if (args.interactorObject == LeftController)
        {
            Debug.Log($"Left hand");
            attachTransform.SetPositionAndRotation(LeftHandAttachTransform.position, LeftHandAttachTransform.rotation);
        }
        else if (args.interactorObject == RightController)
        {
            Debug.Log($"Right hand");
            attachTransform.SetPositionAndRotation(RightHandAttachTransform.position, RightHandAttachTransform.rotation);
        }
        base.OnSelectEntering(args);
    }
}
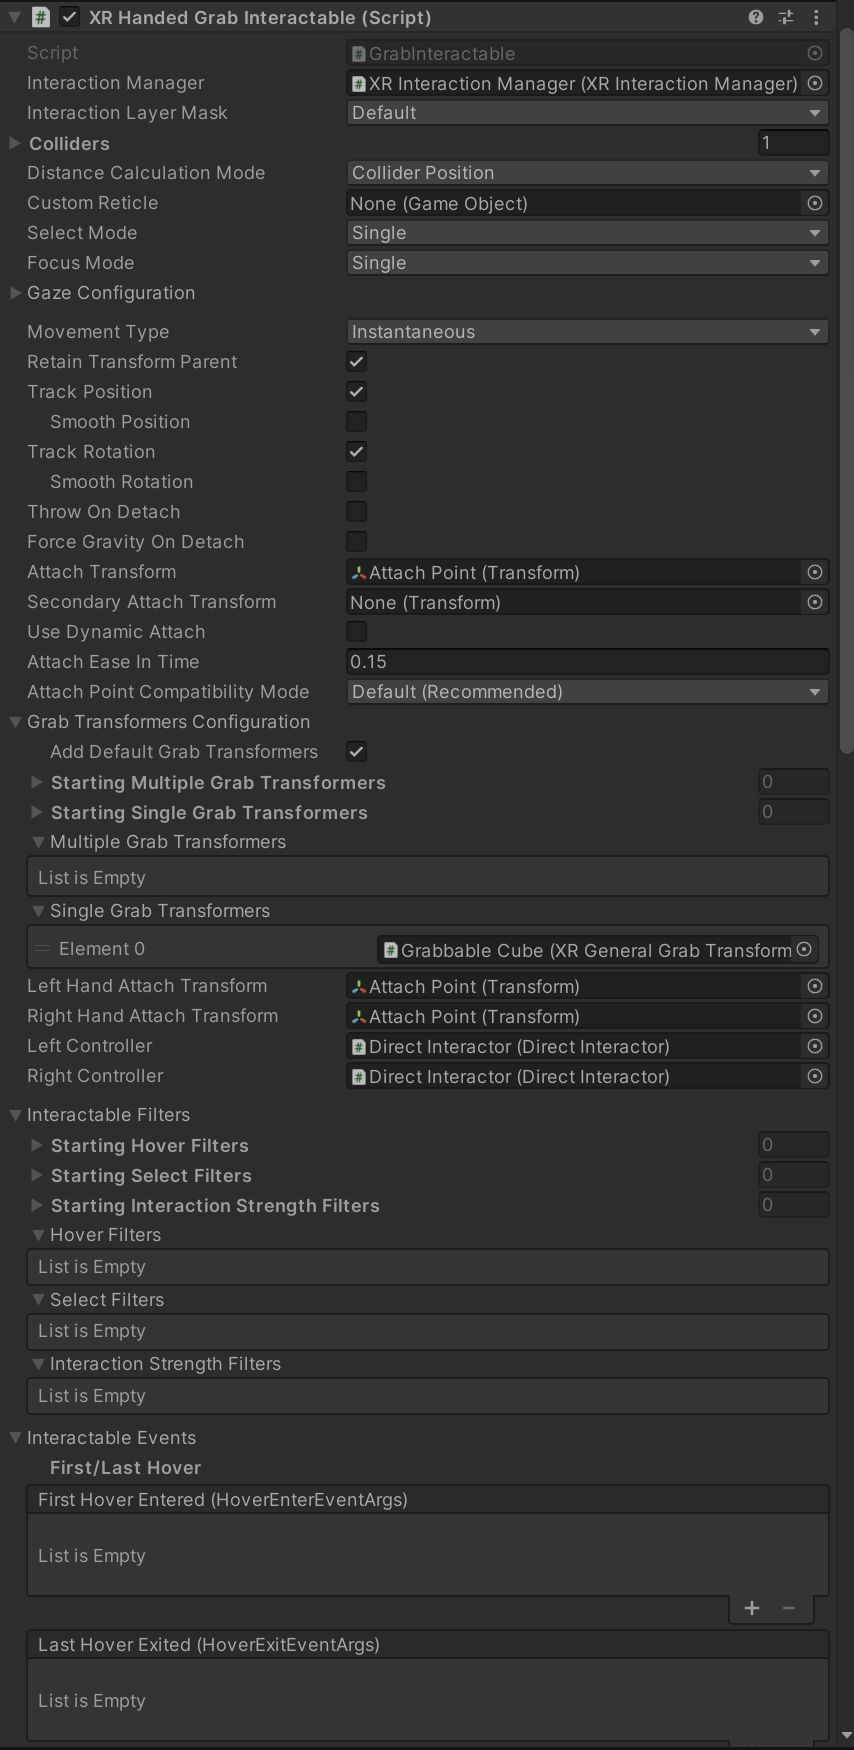
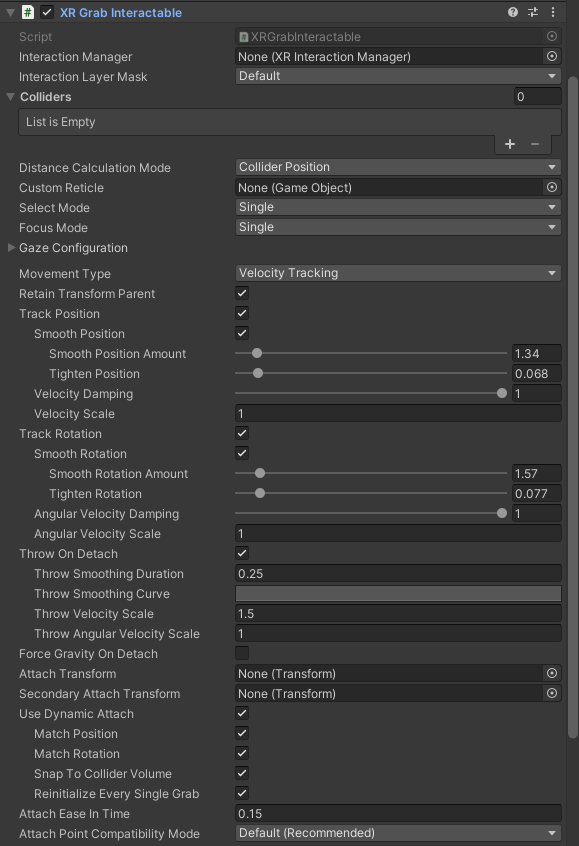
기본 잡기 기능을 허용하는 상호 작용 가능한 구성 요소입니다. 이 동작이 인터랙터에 의해 선택(잡아)지면 이 동작은 이를 따라가며 놓을 때 속도를 상속합니다.
Interaction Manager
The XRInteractionManager that this Interactable will communicate with (will find one if None).
없으면 찾아서 넣는다
Interaction Manager는 Interactor와 Interactable 사이의 중개자 역할을 합니다. 각각 고유한 유효한 인터랙터 및 인터랙터블 세트를 포함하는 여러 인터랙션 관리자를 가질 수 있습니다. 활성화되면 Interactor와 Interactable 모두 유효한 Interaction Manager에 등록됩니다(특정 관리자가 검사기에 아직 할당되지 않은 경우). 로드된 장면에는 Interactor 및 Interactable이 통신할 수 있도록 Interaction Manager가 하나 이상 있어야 합니다. Interactors 및 Interactables의 많은 메서드는 상호 작용 이벤트의 두 대상 간의 일관성을 유지하기 위해 직접 호출되지 않고 이 Interaction Manager에 의해 호출되도록 설계되었습니다.
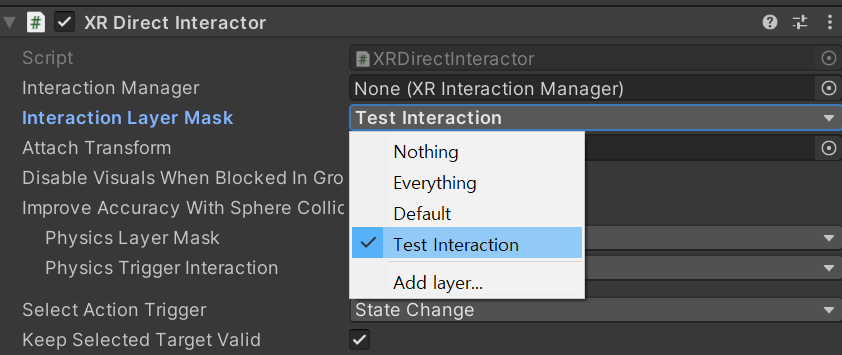
Interaction Layer Mask
Allows interaction with Interactors whose Interaction Layer Mask overlaps with any Layer in this Interaction Layer Mask.
상호 작용 레이어 마스크가 이 상호 작용 레이어 마스크의 레이어와 겹치는 인터랙터와의 상호 작용을 허용합니다.
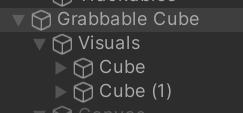
큐브를 하나 복사 하고
.
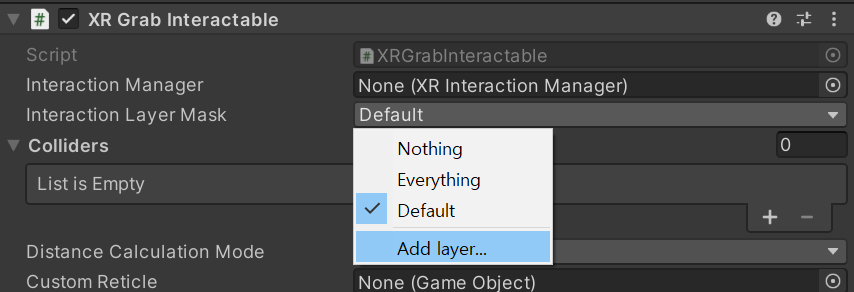
복사된 큐브를 선택하고
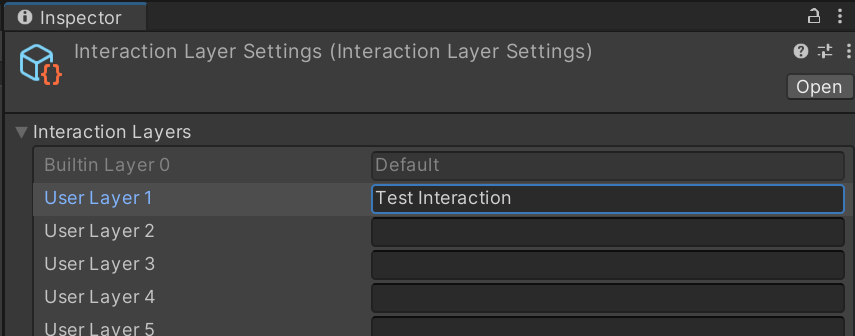
인터렉션 레이어를 추가 하고
인터렉션 레이어 마스크를 변경한다
이제 왼손 컨트롤러의 Direct Interactor를 선택후
인터렉션 레이어 마스크를 설정 한다
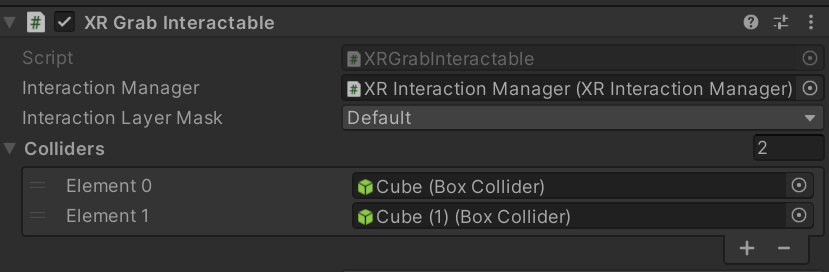
이 Interactable과의 상호 작용에 사용할 충돌체(비어 있는 경우 하위 충돌체를 사용함)
Colliders
Colliders to use for interaction with this Interactable (if empty, will use any child Colliders).
다음과 같이 콜라이더를 하나 더 만들고 실행해 본다
자동으로 하위 콜라이더들이 할당 되었다
가장 빠른 것부터 가장 정확한 것까지 인터랙터까지의 거리가 계산되는 방식을 지정합니다. Mesh Colliders를 사용하는 경우 Collider Volume은 메쉬가 볼록한 경우에만 작동합니다.
Distance Calculation Mode
Specifies how distance is calculated to Interactors, from fastest to most accurate. If using Mesh Colliders, Collider Volume only works if the mesh is convex.
Unity의 XR Interaction Toolkit에서 XR Grab Interactable 컴포넌트의 Distance Calculation Mode 속성은 인터랙터와 상호작용 가능한 객체 간의 거리를 계산하는 방법을 제공합니다. 이 옵션들을 이해하는 것은 XR 애플리케이션의 성능과 사용자 경험을 최적화하는 데 중요합니다. 각 모드에 대한 자세한 설명은 다음과 같습니다:
Transform Position (변환 위치):
설명: 이 모드는 상호작용 가능한 객체의 변환 위치를 사용하여 거리를 계산합니다.
성능 비용: 낮음.
거리 계산 정확도: 일부 객체에 대해 정확도가 낮을 수 있습니다. 이는 객체의 중심점을 기준으로 거리를 계산하기 때문에, 크기가 크거나 복잡한 형태의 객체에서는 정확도가 떨어질 수 있습니다.
Collider Position (콜라이더 위치):
설명: 이 모드는 상호작용 가능한 객체의 콜라이더 목록을 사용하여 각 콜라이더까지의 가장 짧은 거리를 계산합니다.
성능 비용: 중간.
거리 계산 정확도: 대부분의 객체에 대해 중간 정도의 정확도를 제공합니다. 이 방법은 콜라이더의 위치를 기반으로 거리를 계산하기 때문에, 객체의 형태가 복잡하거나 여러 콜라이더를 가진 경우에도 적절한 정확도를 제공할 수 있습니다.
Collider Volume (콜라이더 볼륨):
설명: 이 모드는 상호작용 가능한 객체의 콜라이더 목록을 사용하여 각 콜라이더의 가장 가까운 지점까지의 거리를 계산합니다(콜라이더의 표면이나 내부에 있는 지점 포함).
성능 비용: 높음.
거리 계산 정확도: 높음. 이 방법은 콜라이더의 볼륨 내부나 표면에 있는 가장 가까운 지점까지의 거리를 계산하기 때문에, 가장 정확한 거리 측정을 제공하지만 성능 비용이 높습니다.
각 모드는 성능과 정확도의 균형을 고려하여 선택해야 합니다. 애플리케이션의 요구 사항과 사용자 경험에 따라 적절한 모드를 선택하는 것이 중요합니다.
Transform Position
Interactable의 변환 위치를 사용하여 거리를 계산합니다. 이 옵션은 성능 비용이 낮지만 일부 객체의 경우 거리 계산 정확도가 낮을 수 있습니다.
Collider Position
Interactable의 Colliders 목록을 사용하여 각각에 대한 최단 거리를 사용하여 거리를 계산합니다. 이 옵션은 성능 비용이 적당하며 대부분의 객체에 대해 적당한 거리 계산 정확도를 가져야 합니다.
Collider Volume
Interactable의 Colliders 목록을 사용하여 각각의 가장 가까운 지점(표면 또는 Collider 내부)까지의 최단 거리를 사용하여 거리를 계산합니다. 이 옵션은 성능 비용이 높지만 거리 계산 정확도가 높습니다.
Custom Reticle
The reticle that appears at the end of the line when valid.
이 속성은 XR Grab Interactable 컴포넌트의 중요한 속성 중 하나입니다. 이것은 해당 상호작용 대상이 그랩될 때 동적으로 그랩 포인트(Grab Point)를 생성하고 이동시키는 데 사용됩니다.
Use Dynamic Attach를 활성화하면 XR Grab Interactable가 그랩될 때 그랩 포인트가 자동으로 생성되고 설정된 조건에 따라 업데이트됩니다. 이로써 사용자의 손 또는 컨트롤러와 상호작용하는 물체에 더 자연스러운 물리적 연결을 만들 수 있습니다.
예를 들어, Use Dynamic Attach를 사용하면 물체가 그랩될 때 손 또는 컨트롤러와 물체 사이의 상대 위치와 회전이 고정되지 않고 동적으로 조정됩니다.
Match Position (일치하는 위치):
"Match Position" 프로퍼티는 XR Grab Interactable 컴포넌트의 일부로 설정할 수 있는 옵션 중 하나입니다.
이 프로퍼티를 활성화하면 물체가 그랩될 때 그랩 포인트(Grab Point)가 사용자의 손 또는 컨트롤러 위치와 일치하도록 설정됩니다. 즉, 그랩 포인트가 그랩될 때 손의 위치에 따라 동적으로 조정됩니다.
일반적으로 "Match Position"을 사용하면 물체가 그랩될 때 물체의 위치가 사용자의 손 또는 컨트롤러의 위치와 일치하여 더 자연스러운 상호작용을 가능하게 합니다.
Match Rotation (일치하는 회전):
"Match Rotation" 프로퍼티는 XR Grab Interactable 컴포넌트의 또 다른 중요한 설정입니다.
이 프로퍼티를 활성화하면 물체가 그랩될 때 그랩 포인트의 회전이 사용자의 손 또는 컨트롤러의 회전과 일치하도록 설정됩니다. 즉, 그랩 포인트의 회전이 동적으로 조정됩니다.
"Match Rotation"을 사용하면 물체가 그랩될 때 회전이 맞추어져 물체가 사용자의 손 또는 컨트롤러와 일치하여 물체를 더 쉽게 조작할 수 있습니다.
Snap To Collider Volume:
이 옵션은 XR Grab Interactable가 그랩될 때 물체를 자동으로 해당 콜라이더 볼륨에 맞게 조정하는 데 사용됩니다.
Snap To Collider Volume을 활성화하면 XR Grab Interactable가 그랩될 때 물체가 그랩 포인트에 따라 자동으로 해당 콜라이더의 경계에 맞추어집니다. 이것은 물체가 손이나 컨트롤러와 자연스럽게 들어맞는 것을 도와줍니다.
이 옵션을 사용하면 사용자의 입체감과 상호작용 경험이 향상됩니다.
Reinitialize Every Single Grab:
이 옵션은 XR Grab Interactable가 여러 번 그랩될 때마다 초기화를 다시 수행할지 여부를 결정합니다.
Reinitialize Every Single Grab를 활성화하면 물체가 그랩될 때마다 XR Grab Interactable가 재설정되며 모든 상태와 속성이 초기 상태로 돌아갑니다. 이것은 그랩 해제 및 다시 그랩할 때마다 일종의 리셋을 수행하는 데 사용됩니다.
이 옵션을 비활성화하면 물체가 그랩될 때마다 초기화가 수행되지 않으며, 그랩 상태가 유지됩니다.
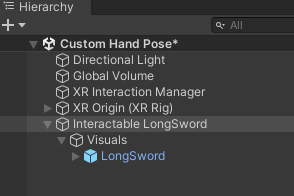
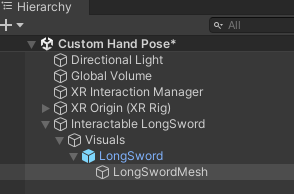
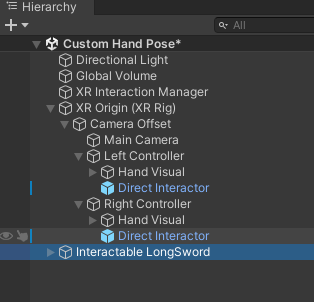
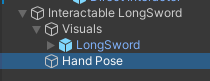
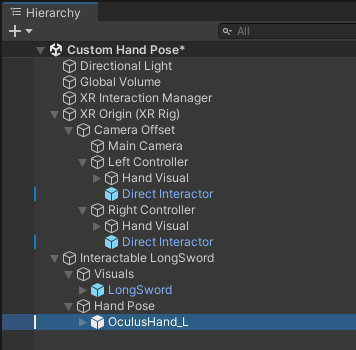
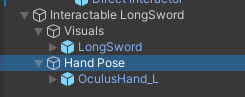
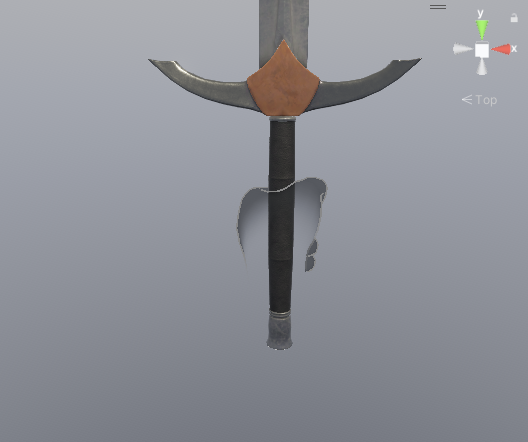
Interactable LongSword를 선택하고 빈오브젝트 (Hand Pose)를 생성 합니다.
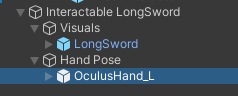
Hand Pose 자식으로 Left Controller의 Model Prefab과 동일한 프리팹을 넣어줍니다. 이것은 핸드 포즈를 잡을 손 입니다.
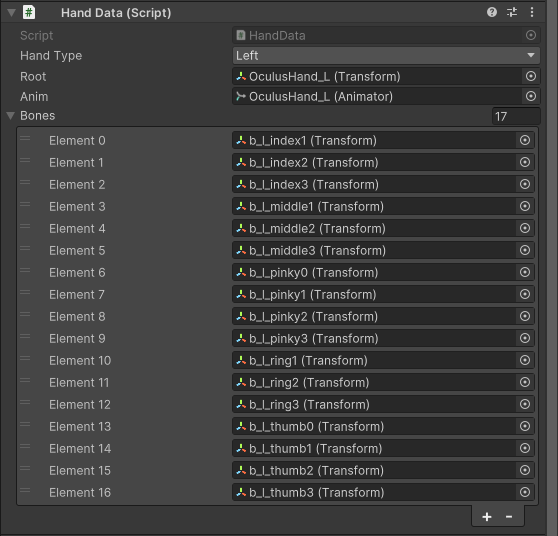
Hand Data 스크립트를 만들고 다음과 같이 작성 합니다.
using System;
using System.Collections;
using System.Collections.Generic;
using UnityEditor;
using UnityEngine;
using UnityEngine.XR.Hands;

public class HandData : MonoBehaviour
{
    public enum HandType
    {
        Left, Right
    }

    public HandType handType;
    public Transform root;
    public Animator anim;
    public Transform[] bones;

}
Hand Data를 Hand Pose / OculusHand_L 에 부착 하고 각 프로퍼티에 아래와 같이 넣어 줍니다.
OculusHand_L 오브젝트를 선택하고
Animator와 Hand 스크립트를 제거 합니다.
HandPose 스크립트를 생성하고 다음과 같이 작성 합니다.
using System.Collections;
using System.Collections.Generic;
using UnityEngine;
using UnityEngine.Serialization;
using UnityEngine.XR.Interaction.Toolkit;

public class HandPose : MonoBehaviour
{
    public HandData.HandType handType;
    public HandData handDataRef;
    public XRGrabInteractable grabInteractable;

    private Vector3 startingHandPosition;
    private Vector3 finalHandPosition;
    private Quaternion startingHandRotation;
    private Quaternion finalHandRotation;
    private Quaternion[] startingFingerRotaions;
    private Quaternion[] finalFingerRotations;

    void Start()
    {
        grabInteractable.selectEntered.AddListener(this.SetupPose);
        grabInteractable.selectExited.AddListener(this.UnSetPose);
    }

    private void UnSetPose(SelectExitEventArgs arg0)
    {
        if (arg0.interactorObject is XRDirectInteractor)
        {
            if (this.handDataRef.handType == this.handType && arg0.interactorObject.transform.name.Contains(this.handType.ToString()))
            {
                Debug.LogFormat("UnSetPose: <color=yellow>{0}</color>", arg0.interactorObject.transform.name);
                HandData handData = arg0.interactorObject.transform.GetComponentInChildren<HandData>();
                handData.anim.enabled = true;
                //handData.gameObject.SetActive(false);

                SetHandDataValues(handData, handDataRef);
                SetHandData(handData, startingHandPosition, startingHandRotation, startingFingerRotaions);

                handData.gameObject.transform.localPosition = Vector3.zero;
                handData.gameObject.transform.localRotation = Quaternion.identity;
            }
        }
    }

    private void SetupPose(SelectEnterEventArgs arg0)
    {
        if (arg0.interactorObject is XRDirectInteractor)
        {
            if (this.handDataRef.handType == this.handType && arg0.interactorObject.transform.name.Contains(this.handType.ToString()))
            {
                Debug.LogFormat("SetupPose: <color=yellow>{0}</color>", arg0.interactorObject.transform.name);
                HandData handData = arg0.interactorObject.transform.GetComponentInChildren<HandData>();
                handData.anim.enabled = false;


                //handData.gameObject.SetActive(false);

                SetHandDataValues(handData, handDataRef);
                SetHandData(handData, finalHandPosition, finalHandRotation, finalFingerRotations);

                handData.gameObject.transform.localPosition = Vector3.zero;
                handData.gameObject.transform.localRotation = Quaternion.identity;
            }
        }
    }

    public void SetHandDataValues(HandData h1, HandData h2)
    {
        // startingHandPosition = h1.root.localPosition;
        // finalHandPosition = h2.root.localPosition;

        startingHandPosition = new Vector3(h1.root.localPosition.x / h1.root.localScale.x,
            h1.root.localPosition.y / h1.root.localScale.y, h1.root.localPosition.z / h1.root.localScale.z);
        finalHandPosition = new Vector3(h2.root.localPosition.x / h2.root.localScale.x,
            h2.root.localPosition.y / h2.root.localScale.y, h2.root.localPosition.z / h2.root.localScale.z);

        startingHandRotation = h1.root.localRotation;
        finalHandRotation = h2.root.rotation;

        startingFingerRotaions = new Quaternion[h1.bones.Length];
        finalFingerRotations = new Quaternion[h2.bones.Length];

        for (int i = 0; i < h1.bones.Length; i++)
        {
            startingFingerRotaions[i] = h1.bones[i].localRotation;
            finalFingerRotations[i] = h2.bones[i].localRotation;
        }
    }

    public void SetHandData(HandData handData, Vector3 newPosition, Quaternion newRotation,
        Quaternion[] newBonesRotation)
    {
        handData.root.localPosition = newPosition;
        handData.root.localRotation = newRotation;
        for (int i = 0; i < newBonesRotation.Length; i++)
        {
            handData.bones[i].localRotation = newBonesRotation[i];
        }
    }
}
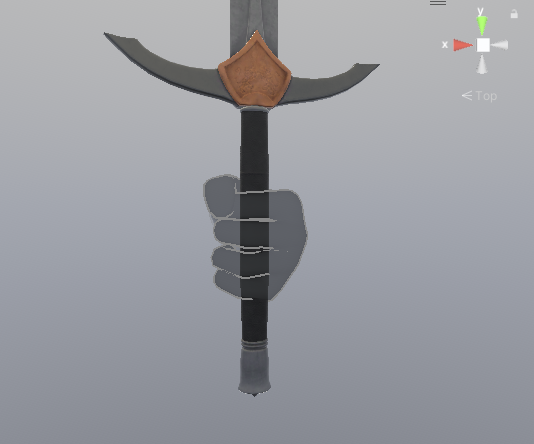
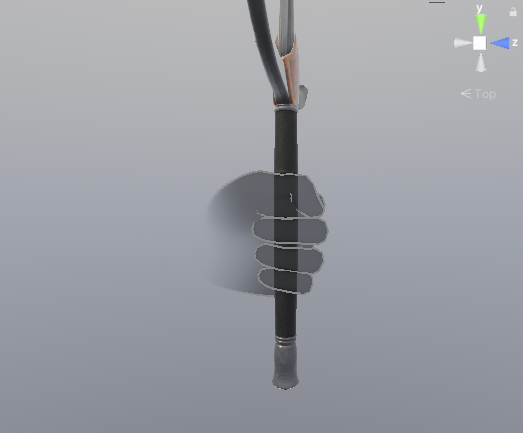
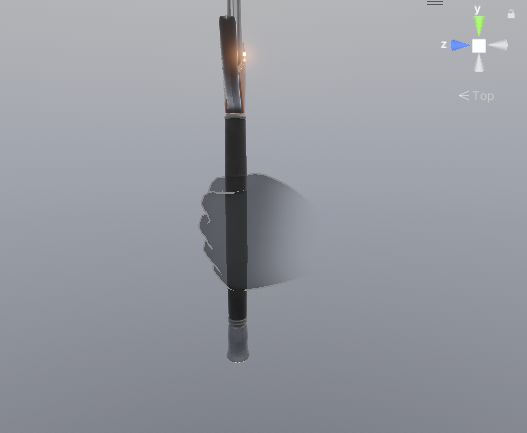
Hand Pose를 선택하고
손의 모양을 잡아주고
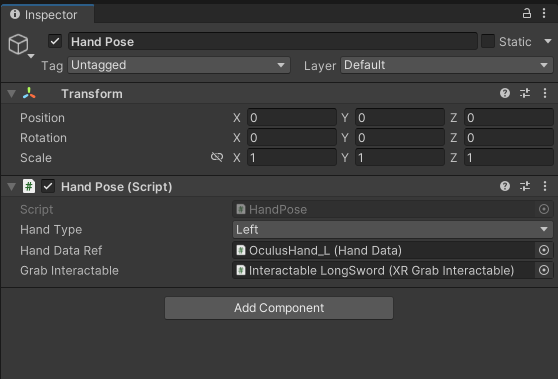
HandPose 스크립트를 부착 합니다.
using System;
using System.Collections;
using System.Collections.Generic;
using UnityEngine;
using UnityEngine.XR.Interaction.Toolkit;

public class XRHandedGrabInteractable : XRGrabInteractable
{
    [SerializeField]
    private Transform LeftHandAttachTransform;
    [SerializeField]
    private Transform RightHandAttachTransform;
    [SerializeField]
    XRDirectInteractor LeftController;
    [SerializeField]
    XRDirectInteractor RightController;

    protected override void OnSelectEntering(SelectEnterEventArgs args)
    {
        if (args.interactorObject == LeftController)
        {
            Debug.Log($"Left hand");
            attachTransform.SetPositionAndRotation(LeftHandAttachTransform.position, LeftHandAttachTransform.rotation);
        }
        else if (args.interactorObject == RightController)
        {
            Debug.Log($"Right hand");
            attachTransform.SetPositionAndRotation(RightHandAttachTransform.position, RightHandAttachTransform.rotation);
        }
        base.OnSelectEntering(args);
    }
}
XR Interaction Toolkit (XRIT)은 Unity에서 확장형 현실(VR), 증강현실(AR) 및 기타 현실 혼합 기술(XR) 애플리케이션을 개발하는 데 사용되는 훌륭한 도구입니다. XRIT에서 제공하는 다양한 이동 방식 중 Kinematic Movement, Instantaneous Movement, 그리고 Velocity Tracked Movement의 주요 차이점을 설명해 드리겠습니다.
Kinematic Movement (운동학적 움직임):
Kinematic Movement는 XRIT에서 가장 기본적인 이동 방식 중 하나입니다.
이 방식은 개체나 사용자의 위치와 상호 작용하는 데 사용됩니다.
Kinematic 이동은 사용자 입력을 기반으로 플레이어 또는 개체를 부드럽게 제어하며, 물리적인 특성을 고려하지 않습니다.
이동이 부드럽고 예측 가능하며, 사용자 경험을 개선하기 위해 고려되는 역학 요소가 없습니다.
Instantaneous Movement (순간이동):
Instantaneous Movement는 사용자가 즉각적으로 원하는 위치로 이동하는 방식입니다.
이 방식은 사용자가 특정 위치로 순간적으로 이동할 수 있도록 합니다.
주로 포털, 텔레포트, 뷰포인트 변경 등의 상황에서 사용됩니다.
이동이 순간적이므로 물리 역학을 고려하지 않으며, 사용자 경험의 편리성을 높입니다.
Velocity Tracked Movement (속도 추정 이동):
Velocity Tracked Movement는 사용자의 속도와 방향에 따라 이동하는 방식입니다.
사용자의 움직임을 실시간으로 추적하고, 이동 방향과 속도를 고려하여 개체 또는 플레이어를 제어합니다.
이 방식은 물리 역학을 시뮬레이션하고 실제 물체의 움직임을 모방할 때 사용됩니다.
예를 들어, 사용자의 손이나 머리 움직임을 추적하여 VR 환경에서 자연스러운 상호 작용을 제공합니다.
이 세 가지 이동 방식은 XRIT에서 제공하는 다양한 상황에 맞게 선택할 수 있으며, 프로젝트의 목적 및 사용자 경험을 고려하여 적절한 방식을 선택해야 합니다.
Instantaneous Movement (순간이동)
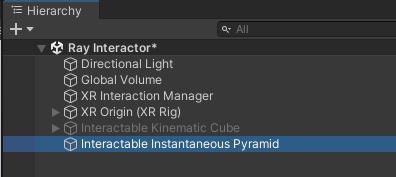
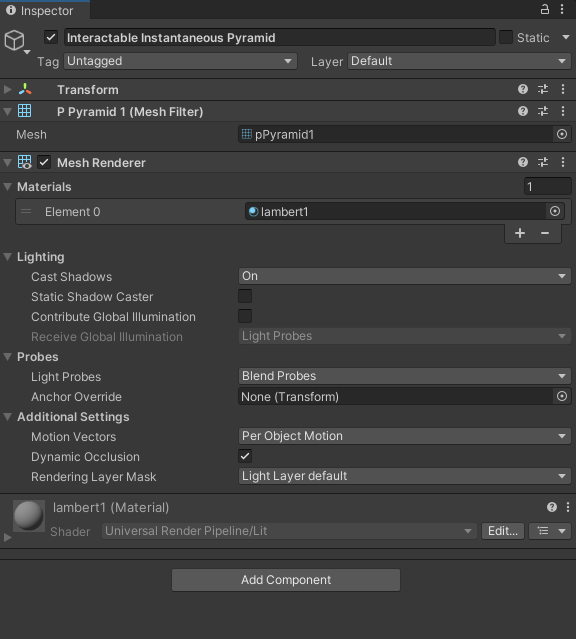
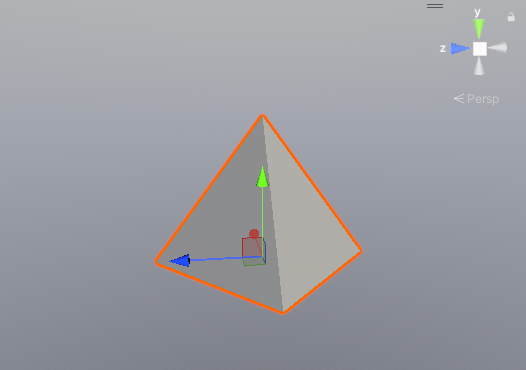
빈오브젝트를 생성 한다 (Interactable Instant Pyramid)
Mesh Filter 와 Mesh Renderer 를 부착 한다
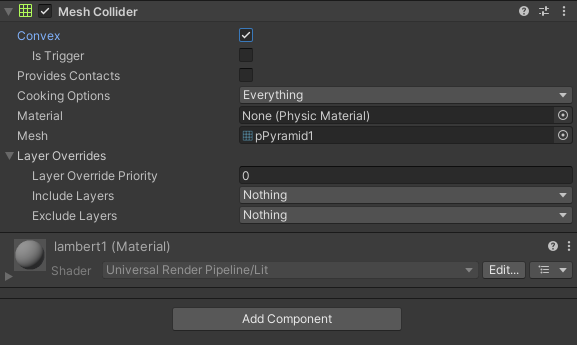
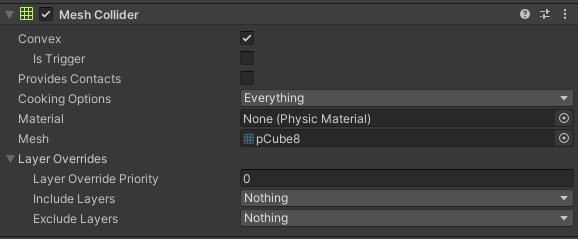
Mesh Collider를 부착 한다
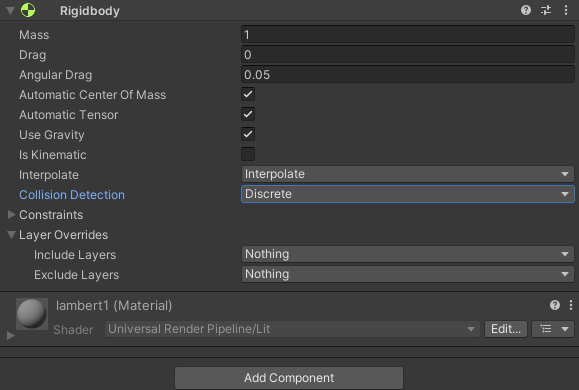
Rigidbody를 부착 한다
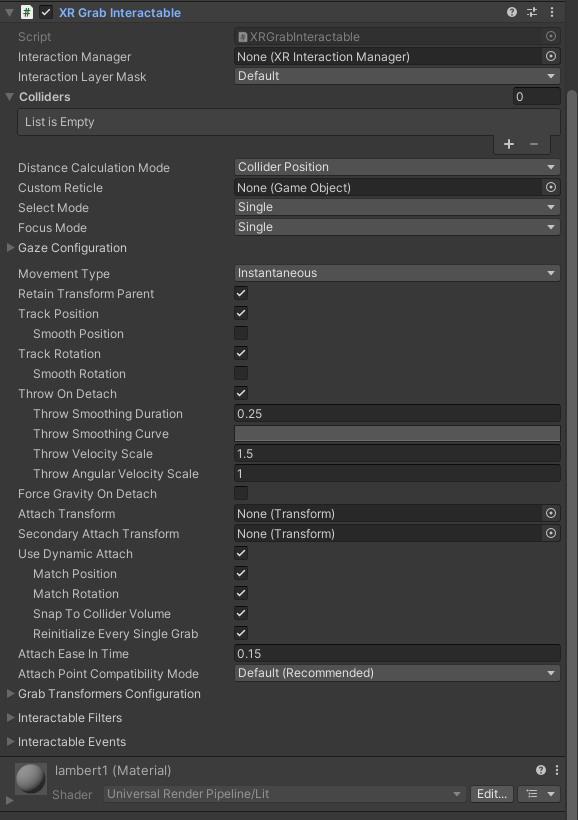
XR Grab Interactable 컴포넌트를 부착 하고 Use Dynamic Attach를 체크 한다
Movement Type을 Instantaneous로 변경 한다
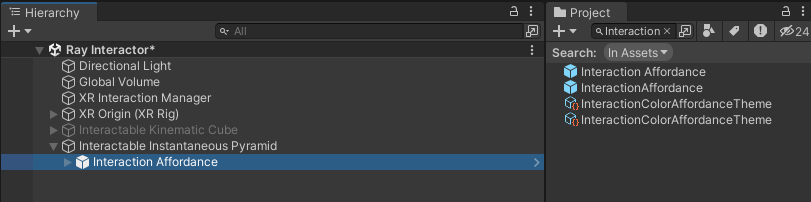
프로젝트 창에서 Interaction Affordance프리팹을 찾아 자식으로 넣어 준다
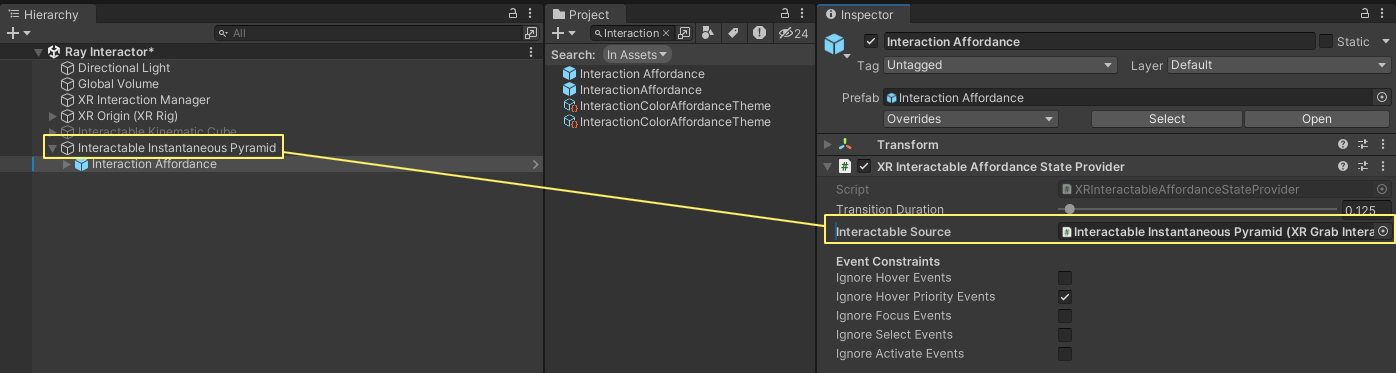
Interactable Source 에 Interactable Instantaneous Pyramid 오브젝트를 넣어 준다
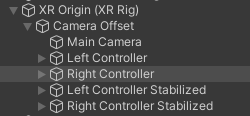
Left Controller 셋팅
Right Controller를 선택 하고 XR Controller를 제외한 나머지 컴포넌트를 제거 한다
XR Controller 의 Model Prefab, Model Parent 프로퍼티에 알맞게 넣어준다
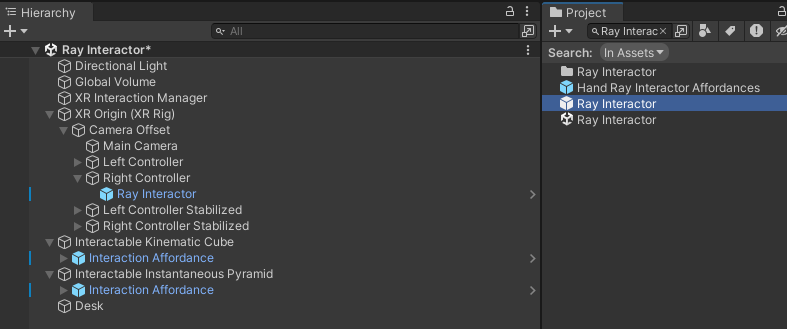
프로젝트 창에서 Ray Interactor 프리팹을 찾아서 Right Controller 자식으로 넣어 준다
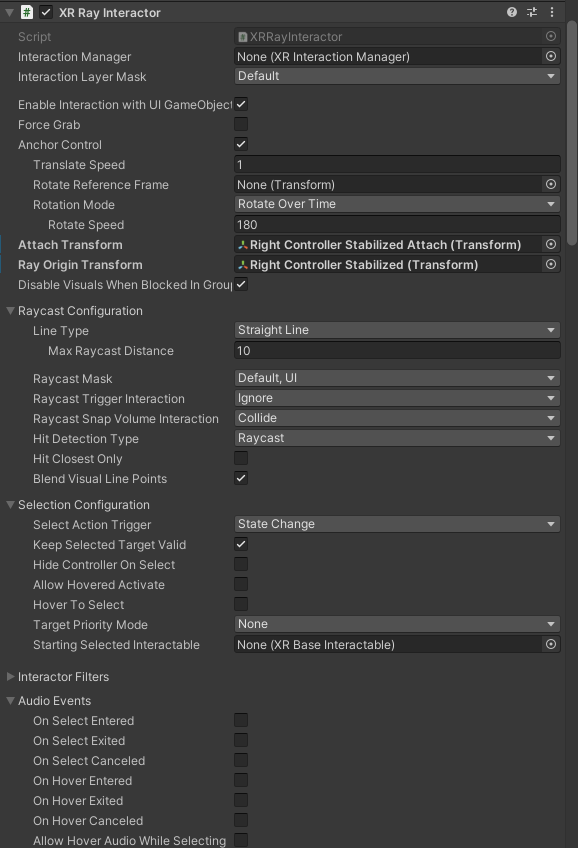
다음과 같이 설정 한다 이때 Attach Transform에 Right Controller Stabilized Attach를 Ray Origin Transform 에는 Right Controller Stabilized 를 넣어 준다
XR Interaction Toolkit (XRIT)에서 XR Controller 컴포넌트의 Attach Transform 및 Ray Origin Transform 프로퍼티는 컨트롤러와 상호 작용하는 데 사용되는 중요한 설정입니다. 이 두 프로퍼티에 대한 설명은 다음과 같습니다:
Attach Transform:
Attach Transform 프로퍼티는 XR 컨트롤러에 연결된 개체의 위치와 회전을 지정합니다.
일반적으로 이 프로퍼티는 컨트롤러의 물리적인 모양과 일치하는 개체를 나타냅니다. 예를 들어, VR 헤드셋의 컨트롤러에는 특정한 모양을 가진 컨트롤러 모델이 있습니다.
이 프로퍼티를 올바르게 설정하면, XR 컨트롤러가 이 개체에 연결되어 사용자의 손 또는 컨트롤러와 같은 개체로 보입니다.
Attach Transform은 컨트롤러의 위치 및 회전을 정확하게 추적하기 위해 사용됩니다.
Ray Origin Transform:
Ray Origin Transform 프로퍼티는 XR 컨트롤러에서 발사되는 레이(선)의 시작점을 나타냅니다.
이 레이는 주로 컨트롤러 버튼을 누르고 레이를 사용하여 상호 작용할 때 유용합니다. 예를 들어, 사용자가 컨트롤러 버튼을 눌러 가상의 레이저 포인터를 표시하고 화면의 개체와 상호 작용하는 경우가 있습니다.
Ray Origin Transform을 올바르게 설정하면, 레이의 시작점이 컨트롤러의 원하는 위치에 정확하게 위치하게 됩니다.
이것은 사용자가 레이를 통해 상호 작용하는 가상의 개체를 정확하게 조준하는 데 도움이 됩니다.
이 두 프로퍼티는 XRIT를 사용하여 상호 작용 기능을 개발할 때 중요한 역할을 합니다. 올바르게 설정되지 않으면 사용자 경험이 부정확하거나 불편할 수 있으므로 주의 깊게 설정해야 합니다.
실행해보고 결과를 확인 한다
Velocity Tracked Movement
빈 오브젝트를 만들어주고 (Interactable Velocity Tracked Wedge)
Mesh Filter와 Mesh Renderer컴포넌트를 부착 하고 Mesh와 Material을 설정 한다
Mesh Collider를 부착 하고
Rigidbody를 부착 한다
XR Grab Interactable 컴포넌트를 부착 한다
Movement Type을 Velocity Tracking으로 변경 하고 Use Dynamic Attach 를 체크 한다
이하 기본 설정
프로젝트 창에서 Interaction Affordance를 검색해 프리팹을 찾아 자식으로 넣어준다