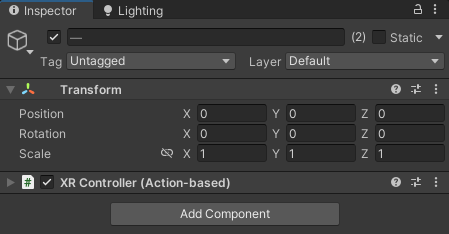
Box Collider컴포넌트를 추가후 Size를 조절하고 Is Trigger를 체크 합니다.
Toggle Component Zone컴포넌트를 추가 합니다.
Toggle Component Zone스크립트는 다음과 같습니다.
namespace UnityEngine.XR.Content.Interaction
{
    /// <summary>
    /// This component is designed to easily toggle a specific component on or off when an object
    /// enters the specified <see cref="triggerVolume"/>.
    /// </summary>
    [RequireComponent(typeof(Collider))]
    public class ToggleComponentZone : MonoBehaviour
    {
        [SerializeField]
        [Tooltip("Main Trigger Volume to detect the Activation Object within. Must be on same physics layer as the Activation Object.")]
        Collider m_TriggerVolume;

        /// <summary>
        /// Main Trigger Volume to detect the Activation Object within.
        /// Must be on same physics layer as the Activation Object.
        /// </summary>
        public Collider triggerVolume
        {
            get => m_TriggerVolume;
            set => m_TriggerVolume = value;
        }

        [SerializeField]
        [Tooltip("Collider that will trigger the component to turn on or off when entering the Trigger Volume. Must have a Rigidbody component and be on the same physics layer as the Trigger Volume.")]
        Collider m_ActivationObject;

        /// <summary>
        /// Collider that will trigger the component to turn on or off when entering the Trigger Volume.
        /// Must have a Rigidbody component and be on the same physics layer as the Trigger Volume.
        /// </summary>
        public Collider activationObject
        {
            get => m_ActivationObject;
            set => m_ActivationObject = value;
        }

        [SerializeField]
        [Tooltip("Component to set the enabled state for. Will set the value to the Enable On Entry value upon entry and revert to original value on exit.")]
        Behaviour m_ComponentToToggle;

        /// <summary>
        /// Component to set the enabled state for. Will set the value to the
        /// Enable On Entry value upon entry and revert to original value on exit.
        /// </summary>
        public Behaviour componentToToggle
        {
            get => m_ComponentToToggle;
            set => m_ComponentToToggle = value;
        }

        [SerializeField]
        [Tooltip("Sets whether to enable or disable the Component To Toggle upon entry into the Trigger Volume.")]
        bool m_EnableOnEntry = true;

        /// <summary>
        /// Sets whether to enable or disable the Component To Toggle upon entry into the Trigger Volume.
        /// </summary>
        public bool enableOnEntry
        {
            get => m_EnableOnEntry;
            set => m_EnableOnEntry = value;
        }

        bool m_InitialStateOnEntry;

        void Start()
        {
            if (m_TriggerVolume == null && !TryGetComponent(out m_TriggerVolume))
            {
                enabled = false;
                return;
            }

            if (!m_TriggerVolume.isTrigger)
                m_TriggerVolume.isTrigger = true;
        }

        void OnTriggerEnter(Collider other)
        {
            if (other != null && other == m_ActivationObject)
            {
                m_InitialStateOnEntry = m_ComponentToToggle.enabled;
                m_ComponentToToggle.enabled = m_EnableOnEntry;
            }
        }

        void OnTriggerExit(Collider other)
        {
            if (other != null && other == m_ActivationObject)
            {
                m_ComponentToToggle.enabled = m_InitialStateOnEntry;
            }
        }
    }
}
Gaze오브젝트를 선택하고 약간 앞으로 이동시켜 줍니다.
Trigger Volume에 GazeActivationZone을 넣어주고
Activation Object에 XR Origin을 넣어줍니다.
Component To Toggle에는 Gaze Interactor를 넣어주면 되는데 이때 Gaze Interactor에 붙어 있는 XR Interactor Reticle Visual이 들어가야 합니다.
일반적으로는 들어가지 않기에 Editor스크립트를 만들었습니다.
다음과 같이 ToggleComponentZoneEditor와 ToggleComponentZoneWindow스크립트가 필요 합니다.
using UnityEngine;
using UnityEditor;
using UnityEngine.XR.Content.Interaction;

[CustomEditor(typeof(ToggleComponentZone))]
public class ToggleComponentZoneEditor : Editor
{
    public override void OnInspectorGUI()
    {
        DrawDefaultInspector(); // Draw the default inspector

        ToggleComponentZone script = (ToggleComponentZone)target;

        if (script.componentToToggle != null && GUILayout.Button("Select Behaviour"))
        {
            // Open the selection window
            ToggleComponentZoneWindow.ShowWindow(script);
        }
    }
}
using UnityEngine;
using UnityEditor;
using UnityEngine.XR.Content.Interaction;

public class ToggleComponentZoneWindow : EditorWindow
{
    private ToggleComponentZone targetSelector;
    private Behaviour[] behaviours;

    // Method to create the window
    public static void ShowWindow(ToggleComponentZone target)
    {
        ToggleComponentZoneWindow window = (ToggleComponentZoneWindow)GetWindow(typeof(ToggleComponentZoneWindow), true, "Select Behaviour");
        window.targetSelector = target;
        window.behaviours = target.componentToToggle.GetComponents<Behaviour>();
        window.Show();
    }

    void OnGUI()
    {
        if (behaviours != null)
        {
            foreach (Behaviour behaviour in behaviours)
            {
                if (GUILayout.Button(behaviour.GetType().Name))
                {
                    targetSelector.componentToToggle = behaviour; // Assign the selected behaviour
                    Debug.Log(behaviour.GetType().Name + " selected.");
                    Close(); // Close the window after selection
                }
            }
        }
    }
}
using System.Collections;
using System.Collections.Generic;
using UnityEngine;
using UnityEngine.XR.Interaction.Toolkit;

namespace UnityEngine.XR.Content.Interaction
{
    /// <summary>
    /// Class to control progress bar on coaching card prefabs.
    /// </summary>
    public class ProgressBarController : MonoBehaviour
    {
        [SerializeField]
        [Tooltip("The projectile that's created")]
        SkinnedMeshRenderer m_Blendshape = null;

        [SerializeField]
        [Tooltip("Lenght of the blendshape progress bar.")]
        float m_BarLength = 28.0f;

        [SerializeField]
        [Tooltip("Duration to dwell and fill the progress bar.")]
        float m_Seconds = 7.5f;

        [SerializeField]
        [Tooltip("The next step GameObject to enable when this step is complete.")]
        GameObject m_NextStep = null;

        [SerializeField] private XRInteractorReticleVisual _reticleVisual;

        float m_SecondsCnt;
        bool m_UpdateTimer;

        void Update()
        {
            if (m_UpdateTimer)
                UpdateTimer();
        }

        /// <summary>
        /// Updates the state of the proress bar.
        /// </summary>
        /// <param name="state">When true, the progress bar will progress. When false, the progresss bar will not progress.</param>
        /// <returns></returns>
        public void UpdateTimerState(bool state)
        {
            m_UpdateTimer = state;
        }

        void UpdateTimer()
        {
            if (!_reticleVisual.enabled) return;
            m_SecondsCnt += Time.deltaTime;
            if (m_SecondsCnt >= m_Seconds)
            {
                m_SecondsCnt = 0f;
                if (m_NextStep != null)
                    m_NextStep.SetActive(true);

                gameObject.SetActive(false);
            }

            m_Blendshape.SetBlendShapeWeight(0, m_SecondsCnt / m_Seconds * m_BarLength);
        }
    }
}
Blendshape에 ProgressBar 오브젝트를 넣어주고
Reticle Visual에 Gaze Interactor를 넣어 줍니다
Hands Free Coaching Card오브젝트를 선택후 Hover Entered, Exited이벤트를 등록 합니다.
실행후 결과를 확인 합니다.
이 문장은 VR(가상 현실) 또는 AR(증강 현실)과 같은 상호작용 시스템에서의 '시선 상호작용자(Gaze Interactors)'와 '상호작용 가능한 객체(Interactables)' 사이의 상호작용을 설정하는 옵션에 대해 설명하고 있습니다. 간단히 요약하면 다음과 같습니다:
"Allows gaze interactors to interact with this interactable."
이 옵션을 활성화하면, 사용자가 시선으로 대상 객체를 바라보았을 때, 해당 객체와 상호작용할 수 있습니다. 즉, 시선 상호작용자는 객체를 '보는 것만으로도' 특정 행동(예: 객체 선택, 버튼 클릭 등)을 유발할 수 있습니다.
"If false, interactor will receive no interactable events from gaze interactors."
이 옵션을 비활성화하면, 시선 상호작용자는 해당 객체와의 상호작용에서 배제됩니다. 즉, 사용자가 객체를 바라보더라도 아무런 상호작용이 발생하지 않습니다. 이는 특정 객체가 시선에 의한 상호작용을 받지 않아야 할 때 유용할 수 있습니다.
이러한 설정은 VR/AR 상호작용 설계에서 중요한 부분입니다. 예를 들어, 사용자가 의도치 않게 너무 많은 객체와 상호작용을 유발하는 것을 방지하거나, 특정 상황에서만 특정 객체와의 상호작용을 허용하고자 할 때 이러한 옵션을 조정할 수 있습니다. 이는 사용자 경험(UX)을 향상시키고, 상호작용의 정확성을 높이는 데 기여할 수 있습니다.
이 문장은 시선 기반 상호작용 시스템에서 "상호작용 가능한 객체(interactable)"를 "시선 상호작용자(gaze interactors)"가 선택할 수 있는지 여부를 설정하는 옵션에 대해 설명하고 있습니다. 간단히 요약하면 다음과 같습니다:
"Allows gaze interactors to select this interactable."
이 옵션을 활성화하면, 사용자가 시선으로 해당 객체를 바라봄으로써 객체를 '선택'할 수 있습니다. 즉, 사용자가 그 객체를 정확히 바라보고 있을 때, 특정 입력(예: 버튼 클릭, 시선 유지 등)을 통해 객체와의 상호작용을 시작할 수 있습니다.
이 설정은 VR(가상 현실)이나 AR(증강 현실)과 같은 상호작용 시스템에서 사용자가 시선을 통해 인터페이스 요소나 가상 객체와 효과적으로 상호작용할 수 있게 하는 중요한 기능입니다. 사용자는 물리적인 컨트롤러를 사용하지 않고도 시선을 통해 버튼을 클릭하거나 메뉴를 탐색하는 등의 작업을 수행할 수 있습니다. 이 기능은 특히 손을 자유롭게 사용할 수 없는 상황이나, 사용자가 물리적인 컨트롤러를 사용하는 것이 불편한 환경에서 유용하게 사용될 수 있습니다.
이 문장은 시선 기반 상호작용 시스템에서 '시선 보조(Gaze Assistance)' 기능에 대해 설명하고 있습니다. 이 기능은 시선 상호작용자(gaze interactor)가 상호작용 가능한 객체(interactable)에 '스냅 볼륨(snap volume)'을 배치하여, 광선 상호작용자(ray interactor)가 해당 볼륨에 '스냅(snap)'하도록 허용합니다. 간단히 요약하면 다음과 같습니다:
"Enables gaze assistance"
이 옵션을 활성화하면, 시선 보조 기능이 활성화됩니다. 이는 상호작용 시스템이 시선 기반 입력을 더 잘 인식하고 처리할 수 있도록 도와줍니다.
"Allows a gaze interactor to place a snap volume at this interactable"
시선 상호작용자가 상호작용 가능한 객체에 스냅 볼륨을 배치할 수 있습니다. 스냅 볼륨은 상호작용자가 객체에 더 쉽게 '접근'하고 '상호작용'할 수 있도록 하는 가상의 공간입니다.
"For ray interactors to snap to"
광선 상호작용자(ray interactor)는 이 스냅 볼륨에 스냅할 수 있습니다. 즉, 사용자가 광선(예: VR 컨트롤러에서 발사되는 가상의 광선)을 사용하여 객체와 상호작용할 때, 광선이 스냅 볼륨 내에 들어오면 자동으로 그 객체에 '부착'되어 상호작용이 더 쉬워집니다.
이 기능은 사용자가 시선 또는 광선을 사용하여 가상 환경 내의 객체와 상호작용할 때 정확도와 편의성을 높이기 위한 것입니다. 특히 복잡하거나 정밀한 상호작용이 필요한 경우, 스냅 볼륨은 사용자가 원하는 객체를 빠르고 정확하게 선택할 수 있도록 도와줍니다. 이는 사용자 경험을 개선하고 상호작용 시스템의 직관성을 높이는 데 기여할 수 있습니다.
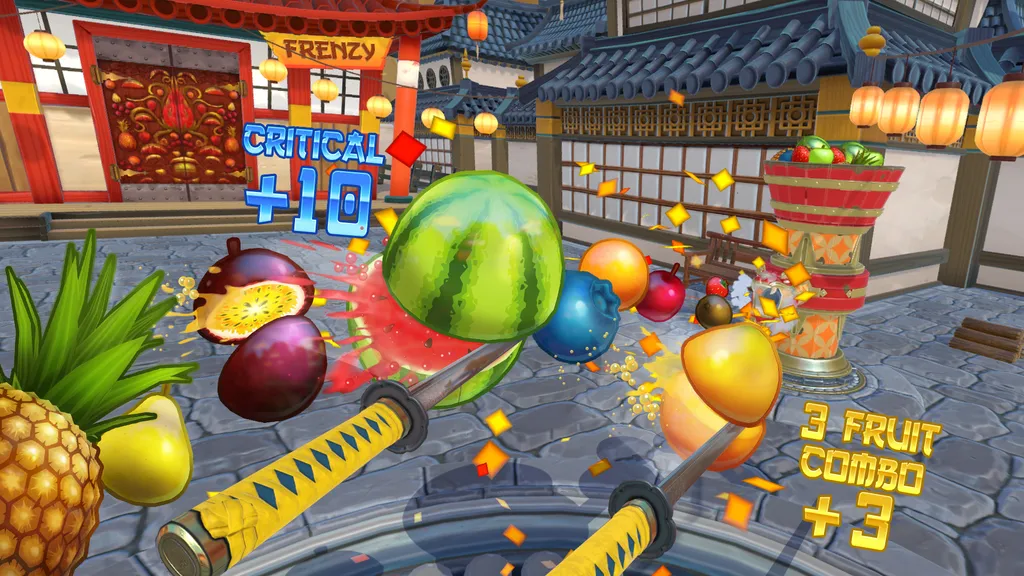
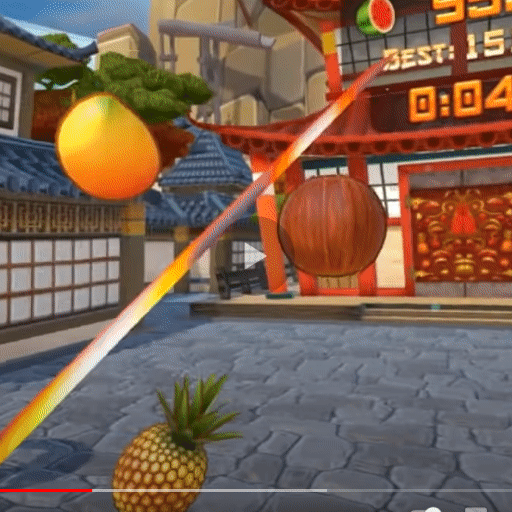
오늘은 VR Fruit Ninja라는 게임에서 오브젝트를 잘라내는 부분만 구현 해보겠습니다.
Fruit Ninja
Unity3D 게임 엔진용 오픈 소스 슬라이서 프레임워크인 Ezy - Slice를 소개 합니다.
평면을 사용하여 볼록한 메시를 슬라이스하는 기능 원활한 절단을 위한 UV/일반/접선 공간 보간 유연하고 문서화된 API 외부 플러그인 종속성이 없으며 완전히 C#으로 작성되었습니다.
사용 중인 알고리즘 볼록 슬라이스의 단면 삼각측량을 위한 범용 모노톤 체인 UV/Normal/Tangent 공간 보간을 위한 무게 중심 좌표 슬라이싱에 대한 모든 일반적인 경우를 포괄하기 위해 특수 목적으로 만들어진 삼각형-평면 교차점 성능을 고려한 설계
자세한 내용은 다음 깃허브 페이지를 참고 하시면 될듯 합니다.
https://github.com/DavidArayan/ezy-slice
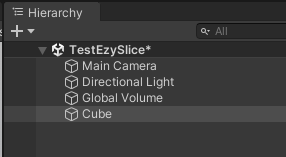
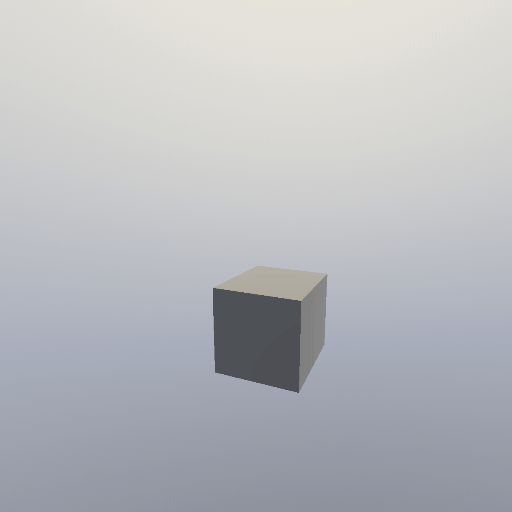
먼저 이지 슬라이스를 테스트 해보기 위해 새로운 씬을 생성한뒤
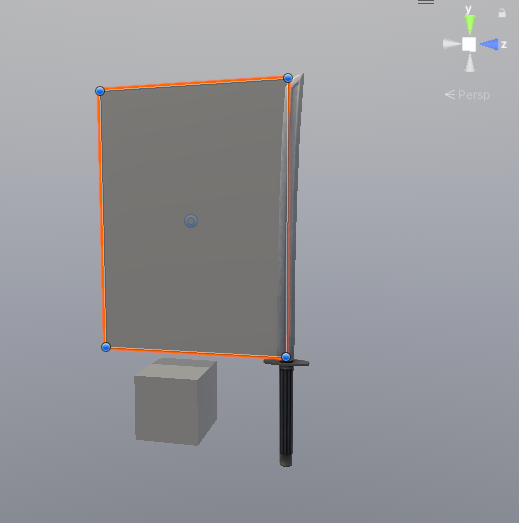
큐브하나를 만들어 줍니다.
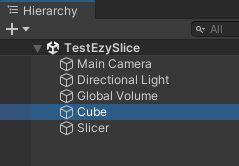
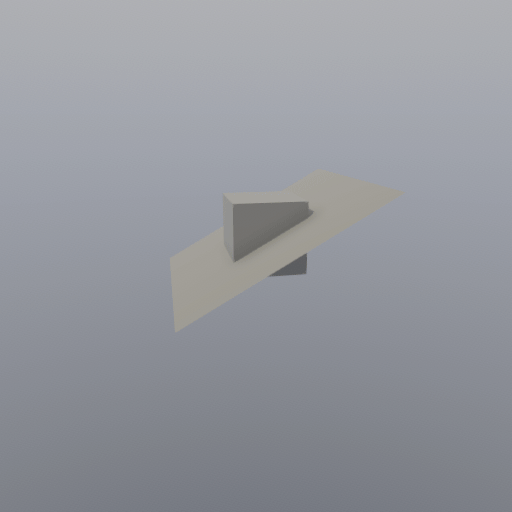
이어서 Plane하나를 만들고 큐브를 관통하게 위치 시킵니다. 크기도 조절해주세요
Plane의 이름은 Slicer로 변경합니다.
Slicer 스크립트를 생성한뒤 다음과 같이 작성 합니다.
using System.Collections;
using System.Collections.Generic;
using EzySlice;
using UnityEngine;

public class Slicer : MonoBehaviour
{
    public Material afterSliceMaterial;
    public LayerMask sliceMask;

    private void Update()
    {
        if (Input.GetKeyDown(KeyCode.Space))
        {
            Slice();
        }
    }

    public void Slice()
    {
        Collider[] objectsToSlice = Physics.OverlapBox(transform.position, new Vector3(0.3f, 0.3f, 0.3f),
            transform.rotation, sliceMask);

        Debug.LogFormat("objectsToSlice.Length: {0}", objectsToSlice.Length);

        foreach (Collider col in objectsToSlice)
        {
            SlicedHull slicedObject = SliceObject(col.gameObject);

            Debug.LogFormat("slicedObject: {0}", slicedObject);

            var upperHullGo = slicedObject.CreateUpperHull(col.gameObject, afterSliceMaterial);
            var lowerHullGo = slicedObject.CreateLowerHull(col.gameObject, afterSliceMaterial);

            Debug.LogFormat("upperHullGo: {0}", upperHullGo);
            Debug.LogFormat("lowerHullGo: {0}", lowerHullGo);

            upperHullGo.transform.position = col.transform.position;
            lowerHullGo.transform.position = col.transform.position;

            ApplyPhysical(upperHullGo);
            ApplyPhysical(lowerHullGo);
            Destroy(col.gameObject);
        }
    }

    private void ApplyPhysical(GameObject go)
    {
        go.AddComponent<MeshCollider>().convex = true;
        go.AddComponent<Rigidbody>();
        //go.AddComponent<DestroyAfterSeconds>();
    }

    private SlicedHull SliceObject(GameObject go)
    {
        return go.Slice(transform.position, transform.up, afterSliceMaterial);
    }
}
Slicer오브젝트를 선택하고 스크립트를 부착 합니다.
After Slice Material은 잘려진 단면을 채울 메터리얼입니다. Slice Mask는 슬라이드 대상 레이어 마스크입니다.
새로운 레이어 Sliceable을 추가 하고 다음과 같이 설정 합니다.
큐브를 선택후 레이어를 Sliceable로 변경 합니다.
실행후 스페이스바를 눌러봅니다.
어떻게 하면 칼로 베는 듯한 연출을 할수 있을까?
아이디어
칼에 Slice Plane을 붙이고 물체와 충돌했을때 단면을 자르면 되겟구나?
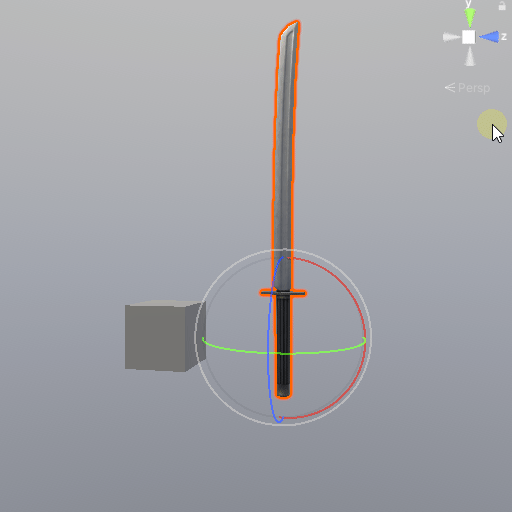
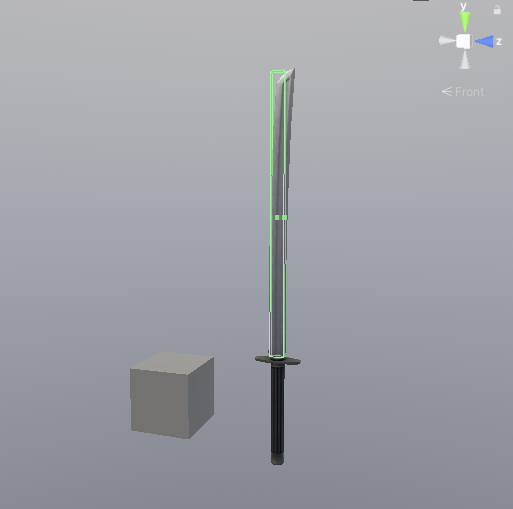
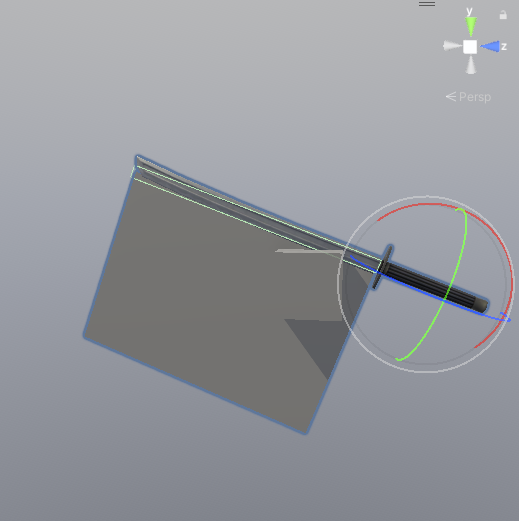
다음과 같이 칼 에셋을 가져와 설치 하고
어떻게 테스트 할지 손으로 해본다
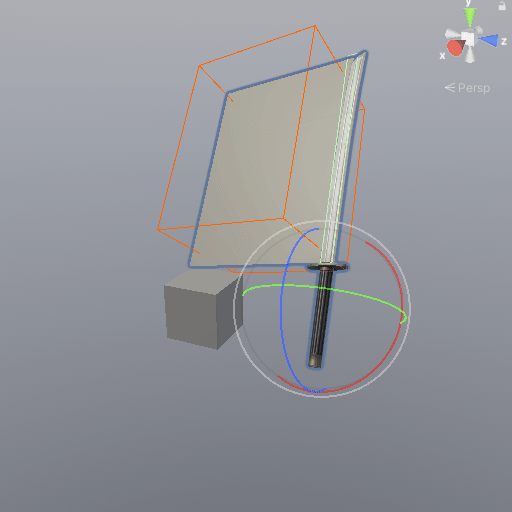
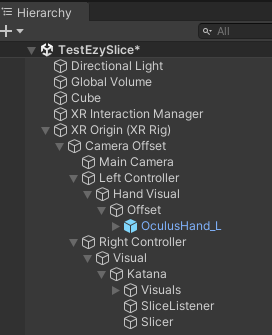
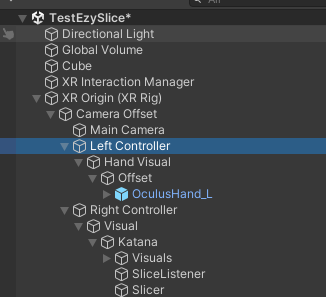
다음과 같은 구조로 만들어 주고
콜라이더를 추가 합니다.
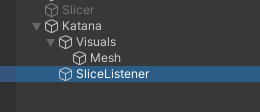
SliceListener스크립트를 만들고 다음과 같이 작성후
using System;
using System.Collections;
using System.Collections.Generic;
using EzySlice;
using UnityEngine;
using UnityEngine.UIElements;

public class SliceListener : MonoBehaviour
{
    public Slicer slicer;

    private void OnTriggerEnter(Collider other)
    {
        Debug.LogFormat("OnTriggerEnter: {0}", other);
    }
}
Collider에 붙여 줍니다.
다음과 같이 수정해줍니다.
물체에 닿았을때 다음과 같이 나오면 됩니다.
SliceListener를 선택후 Slice Listener컴포넌트의 Slicer속성에 Slicer오브젝트를 넣어 줍니다.
스크립트를 수정후
Slicer
public bool isTouch = false;
private void Update()
{
    if (isTouch)
    {
        Slice();
    }
}
SliceListener
using System;
using System.Collections;
using System.Collections.Generic;
using EzySlice;
using UnityEngine;
using UnityEngine.UIElements;

public class SliceListener : MonoBehaviour
{
    public Slicer slicer;

    private void OnTriggerEnter(Collider other)
    {
        if (other.tag == "SliceObject")
        {
            Debug.LogFormat("OnTriggerEnter: {0}", other);
            slicer.isTouch = true;
        }
    }
}
태그 (SliceObject)를 추가 후 Cube에 적용합니다.
HalfExtentsVisualizer 스크립트를 작성후
using UnityEngine;

public class HalfExtentsVisualizer : MonoBehaviour
{
    public Vector3 halfExtents = new Vector3(1, 1, 1);
    public Color boxColor = Color.blue;  // 상자의 색깔을 설정합니다.
    public bool useWireframe = false;    // 상자를 와이어프레임으로 그릴지 여부를 결정합니다.

    void OnDrawGizmos()
    {
        // Gizmo 색상을 설정합니다.
        Gizmos.color = boxColor;

        // 오브젝트의 Collider로부터 중심 위치를 얻습니다.
        Collider collider = GetComponent<Collider>();
        Vector3 center = collider != null ? collider.bounds.center : transform.position;

        // Gizmo의 변환 행렬을 설정합니다. 오브젝트의 회전은 반영하지만, 스케일은 1로 고정합니다.
        Gizmos.matrix = Matrix4x4.TRS(center, transform.rotation, Vector3.one);

        // 상자를 그립니다. useWireframe 값에 따라 와이어프레임 또는 솔리드 상자를 그립니다.
        if (useWireframe)
        {
            Gizmos.DrawWireCube(Vector3.zero, 2.0f * halfExtents);  // 와이어프레임 상자를 그립니다.
        }
        else
        {
            Gizmos.DrawCube(Vector3.zero, 2.0f * halfExtents);  // 솔리드 상자를 그립니다.
        }
    }
}
Slicer를 선택하고
부착 합니다.
Slicer의 다음 부분을 수정 합니다.
테스트를 위해 카타나를 회전 시키고
실행후 결과를 확인 합니다.
이제 잘려진 단면들이 흩어졌으면 좋겠네요
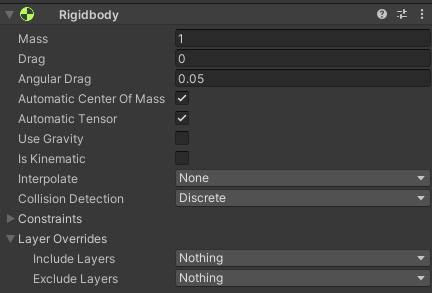
Cube를 선택후 Rigidbody를 추가하고
Slicer스크립트를 다음과 같이 수정 합니다.
using System.Collections;
using System.Collections.Generic;
using EzySlice;
using UnityEngine;

public class Slicer : MonoBehaviour
{
    public Material afterSliceMaterial;
    public LayerMask sliceMask;

    public bool isTouch = false;
    private void Update()
    {
        if (isTouch)
        {
            Slice();
        }
    }

    public void Slice()
    {
        Collider[] objectsToSlice = Physics.OverlapBox(transform.position, new Vector3(1.8f, 1.2f, 1.3f),
            transform.rotation, sliceMask);

        //Debug.LogFormat("objectsToSlice.Length: {0}", objectsToSlice.Length);

        foreach (Collider col in objectsToSlice)
        {
            SlicedHull slicedObject = SliceObject(col.gameObject);

            Debug.LogFormat("slicedObject: {0}", slicedObject);

            var upperHullGo = slicedObject.CreateUpperHull(col.gameObject, afterSliceMaterial);
            var lowerHullGo = slicedObject.CreateLowerHull(col.gameObject, afterSliceMaterial);

            Debug.LogFormat("upperHullGo: {0}", upperHullGo);
            Debug.LogFormat("lowerHullGo: {0}", lowerHullGo);

            upperHullGo.transform.position = col.transform.position;
            lowerHullGo.transform.position = col.transform.position;

            var velocity = col.GetComponent<Rigidbody>().velocity;

            ApplyPhysical(upperHullGo, velocity);
            ApplyPhysical(lowerHullGo, velocity);

            Destroy(col.gameObject);
        }
    }

    private void ApplyPhysical(GameObject go, Vector3 velocity)
    {
        go.AddComponent<MeshCollider>().convex = true;
        var rbody = go.AddComponent<Rigidbody>();
        rbody.velocity = -velocity;

        int randX = UnityEngine.Random.Range(0, 3);
        int randY = UnityEngine.Random.Range(0, 3);
        int randZ = UnityEngine.Random.Range(0, 3);

        rbody.AddForce(1.5f * new Vector3(randX, randY, randZ), ForceMode.Impulse);

        go.AddComponent<DestroyAfterSeconds>();
    }

    private SlicedHull SliceObject(GameObject go)
    {
        return go.Slice(transform.position, transform.up, afterSliceMaterial);
    }
}
실행후 결과를 확인 합니다.
이제 모든 연구가 끝났습니다.
메인 카메라를 제거하고 XR Origin을 생성후 Left, Right Controller를 선택해 XR Controller를 제외한 나머지 컴포넌트들을 지웁니다.
XR Controller의 Model Prefab을 None으로 설정후
Right Controller에 카타나를 넣어줍니다.
Left Controller에는 핸드 모델을 넣어 줍시다
Slicer를 선택하고
Extents값을 수정후
using System;
using System.Collections;
using System.Collections.Generic;
using EzySlice;
using UnityEngine;

[RequireComponent(typeof(HalfExtentsVisualizer))]
public class Slicer : MonoBehaviour
{
    public Material afterSliceMaterial;
    public LayerMask sliceMask;
    private HalfExtentsVisualizer visualizer;
    public bool isTouch = false;

    private void Awake()
    {
        visualizer = GetComponent<HalfExtentsVisualizer>();
    }

    private void Update()
    {
        if (isTouch)
        {
            Slice();
        }
    }

    public void Slice()
    {
        Collider[] objectsToSlice = Physics.OverlapBox(transform.position, visualizer.halfExtents,
            transform.rotation, sliceMask);

        //Debug.LogFormat("objectsToSlice.Length: {0}", objectsToSlice.Length);

        foreach (Collider col in objectsToSlice)
        {
            SlicedHull slicedObject = SliceObject(col.gameObject);

            Debug.LogFormat("slicedObject: {0}", slicedObject);

            var upperHullGo = slicedObject.CreateUpperHull(col.gameObject, afterSliceMaterial);
            var lowerHullGo = slicedObject.CreateLowerHull(col.gameObject, afterSliceMaterial);

            Debug.LogFormat("upperHullGo: {0}", upperHullGo);
            Debug.LogFormat("lowerHullGo: {0}", lowerHullGo);

            upperHullGo.transform.position = col.transform.position;
            lowerHullGo.transform.position = col.transform.position;

            var velocity = col.GetComponent<Rigidbody>().velocity;

            ApplyPhysical(upperHullGo, velocity);
            ApplyPhysical(lowerHullGo, velocity);

            Destroy(col.gameObject);
        }
    }

    private void ApplyPhysical(GameObject go, Vector3 velocity)
    {
        go.AddComponent<MeshCollider>().convex = true;
        var rbody = go.AddComponent<Rigidbody>();
        rbody.velocity = -velocity;

        int randX = UnityEngine.Random.Range(0, 3);
        int randY = UnityEngine.Random.Range(0, 3);
        int randZ = UnityEngine.Random.Range(0, 3);

        rbody.AddForce(1.5f * new Vector3(randX, randY, randZ), ForceMode.Impulse);

        go.AddComponent<DestroyAfterSeconds>();
    }

    private SlicedHull SliceObject(GameObject go)
    {
        return go.Slice(transform.position, transform.up, afterSliceMaterial);
    }
}
실행후 결과를 확인 합니다.
이제 큐브를 활성화 후 앞으로 가져옵니다. 실행후 결과를 확인 합니다.
이제 왼손 X 버튼을 누르면 해당 위치에 다시 큐브가 생겨나도록 하고 칼에 붙어 있는 SlicerPlane의 메쉬 랜더러를 비활성화 합니다.
PrimaryButtonWatcher스크립트를 다음과 같이 작성후
using System.Collections.Generic;
using UnityEngine;
using UnityEngine.Events;
using UnityEngine.XR;

[System.Serializable]
public class PrimaryButtonEvent : UnityEvent<bool> { }

public class PrimaryButtonWatcher : MonoBehaviour
{
    public PrimaryButtonEvent primaryButtonPress;

    private bool lastButtonState = false;
    private List<InputDevice> devicesWithPrimaryButton;

    private void Awake()
    {
        if (primaryButtonPress == null)
        {
            primaryButtonPress = new PrimaryButtonEvent();
        }

        devicesWithPrimaryButton = new List<InputDevice>();
    }

    void OnEnable()
    {
        List<InputDevice> allDevices = new List<InputDevice>();
        InputDevices.GetDevices(allDevices);
        foreach(InputDevice device in allDevices)
            InputDevices_deviceConnected(device);

        InputDevices.deviceConnected += InputDevices_deviceConnected;
        InputDevices.deviceDisconnected += InputDevices_deviceDisconnected;
    }

    private void OnDisable()
    {
        InputDevices.deviceConnected -= InputDevices_deviceConnected;
        InputDevices.deviceDisconnected -= InputDevices_deviceDisconnected;
        devicesWithPrimaryButton.Clear();
    }

    private void InputDevices_deviceConnected(InputDevice device)
    {
        bool discardedValue;
        if (device.TryGetFeatureValue(CommonUsages.primaryButton, out discardedValue))
        {
            devicesWithPrimaryButton.Add(device); // Add any devices that have a primary button.
        }
    }

    private void InputDevices_deviceDisconnected(InputDevice device)
    {
        if (devicesWithPrimaryButton.Contains(device))
            devicesWithPrimaryButton.Remove(device);
    }

    void Update()
    {
        bool tempState = false;
        foreach (var device in devicesWithPrimaryButton)
        {
            bool primaryButtonState = false;
            tempState = device.TryGetFeatureValue(CommonUsages.primaryButton, out primaryButtonState) // did get a value
                        && primaryButtonState // the value we got
                        || tempState; // cumulative result from other controllers
        }

        if (tempState != lastButtonState) // Button state changed since last frame
        {
            primaryButtonPress.Invoke(tempState);
            lastButtonState = tempState;
        }
    }
}
Left Controller를 선택후
부착 합니다.
Main오브젝트를 생성하고
Main 스크립트를 생성후 다음과 같이 작성후 부착 합니다.
using System.Collections;
using System.Collections.Generic;
using UnityEngine;

public class Main : MonoBehaviour
{
    [SerializeField] private GameObject cubePrefab;
    [SerializeField] private Transform initPoint;

    public void CreateCube(bool press)
    {
        if (press)
        {
            var go = Instantiate(cubePrefab);
            go.transform.position = initPoint.position;
        }
    }
}
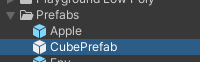
큐브를 프리팹화 시키고 Main에 넣어 줍니다.
씬에 있던 큐브는 제거 하고 원래 큐브가 있던 자리에 빈 오브젝트를 만들어 준후 메인에 InitPoint에 넣어줍니다.
이제 Left Controller를 선택후
다음과 같이 Primary Button Watcher컴포넌트의 Button Press이벤트를 추가 후 Main을 넣고 Function을 선택 합니다.
Slicer를 선택후 Mesh Renderer를 비활성화 합니다.
using UnityEngine;

public class DestroyAfterSeconds : MonoBehaviour
{
    // duration 속성을 public으로 설정하여 Inspector에서 수정 가능하게 함
    public float duration = 2.0f;

    // Start is called before the first frame update
    void Start()
    {
        // duration 시간 후에 현재 게임 오브젝트를 파괴
        Destroy(gameObject, duration);
    }
}