

XRI Slicing Object (1월 4째주 방송예정)
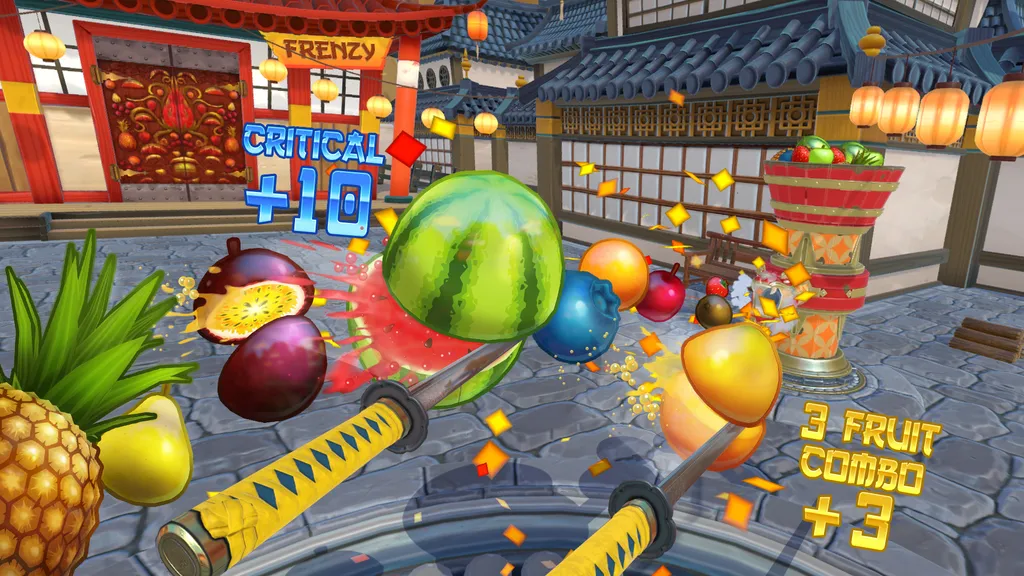
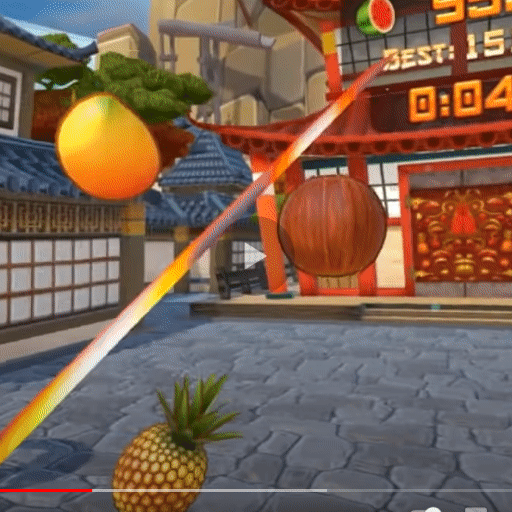
VR/XR Interaction Toolkit 2024. 1. 18. 10:24오늘은 VR Fruit Ninja라는 게임에서 오브젝트를 잘라내는 부분만 구현 해보겠습니다.
Unity3D 게임 엔진용 오픈 소스 슬라이서 프레임워크인 Ezy - Slice를 소개 합니다.
평면을 사용하여 볼록한 메시를 슬라이스하는 기능
원활한 절단을 위한 UV/일반/접선 공간 보간 유연하고 문서화된 API
외부 플러그인 종속성이 없으며 완전히 C#으로 작성되었습니다.
사용 중인 알고리즘
볼록 슬라이스의 단면 삼각측량을 위한 범용 모노톤 체인
UV/Normal/Tangent 공간 보간을 위한 무게 중심 좌표
슬라이싱에 대한 모든 일반적인 경우를 포괄하기 위해 특수 목적으로 만들어진 삼각형-평면 교차점
성능을 고려한 설계
자세한 내용은 다음 깃허브 페이지를 참고 하시면 될듯 합니다.

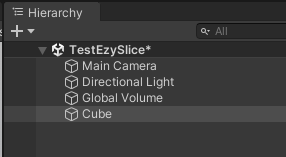
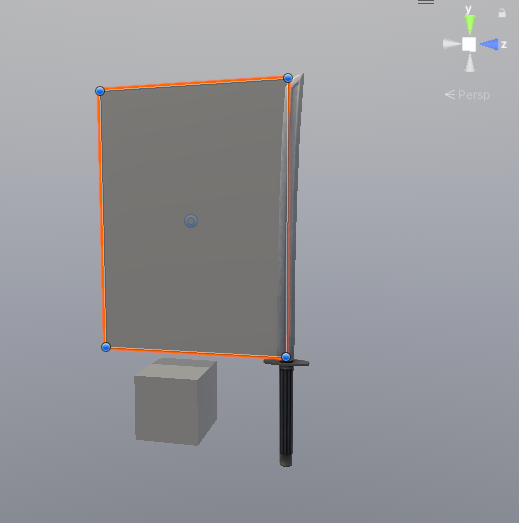
먼저 이지 슬라이스를 테스트 해보기 위해 새로운 씬을 생성한뒤
큐브하나를 만들어 줍니다.
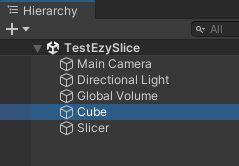
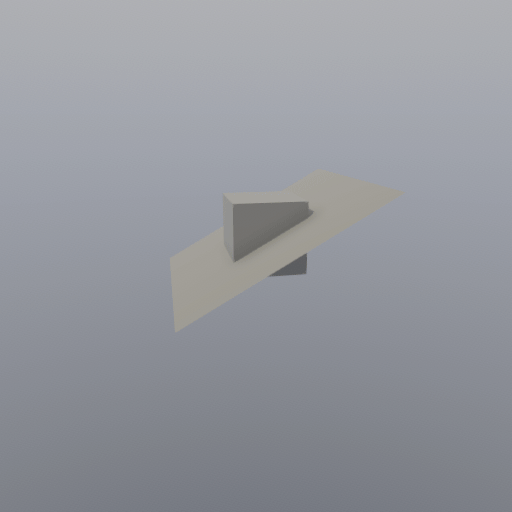
이어서 Plane하나를 만들고 큐브를 관통하게 위치 시킵니다.
크기도 조절해주세요

Plane의 이름은 Slicer로 변경합니다.


Slicer 스크립트를 생성한뒤 다음과 같이 작성 합니다.
using System.Collections;
using System.Collections.Generic;
using EzySlice;
using UnityEngine;

public class Slicer : MonoBehaviour
{
    public Material afterSliceMaterial;
    public LayerMask sliceMask;

    private void Update()
    {
        if (Input.GetKeyDown(KeyCode.Space))
        {
            Slice();
        }
    }

    public void Slice()
    {
        Collider[] objectsToSlice = Physics.OverlapBox(transform.position, new Vector3(0.3f, 0.3f, 0.3f),
            transform.rotation, sliceMask);

        Debug.LogFormat("objectsToSlice.Length: {0}", objectsToSlice.Length);

        foreach (Collider col in objectsToSlice)
        {
            SlicedHull slicedObject = SliceObject(col.gameObject);

            Debug.LogFormat("slicedObject: {0}", slicedObject);

            var upperHullGo = slicedObject.CreateUpperHull(col.gameObject, afterSliceMaterial);
            var lowerHullGo = slicedObject.CreateLowerHull(col.gameObject, afterSliceMaterial);

            Debug.LogFormat("upperHullGo: {0}", upperHullGo);
            Debug.LogFormat("lowerHullGo: {0}", lowerHullGo);

            upperHullGo.transform.position = col.transform.position;
            lowerHullGo.transform.position = col.transform.position;

            ApplyPhysical(upperHullGo);
            ApplyPhysical(lowerHullGo);
            Destroy(col.gameObject);
        }
    }

    private void ApplyPhysical(GameObject go)
    {
        go.AddComponent<MeshCollider>().convex = true;
        go.AddComponent<Rigidbody>();
        //go.AddComponent<DestroyAfterSeconds>();
    }

    private SlicedHull SliceObject(GameObject go)
    {
        return go.Slice(transform.position, transform.up, afterSliceMaterial);
    }
}
Slicer오브젝트를 선택하고 스크립트를 부착 합니다.

After Slice Material은 잘려진 단면을 채울 메터리얼입니다.
Slice Mask는 슬라이드 대상 레이어 마스크입니다.
새로운 레이어 Sliceable을 추가 하고 다음과 같이 설정 합니다.


큐브를 선택후 레이어를 Sliceable로 변경 합니다.

실행후 스페이스바를 눌러봅니다.
어떻게 하면 칼로 베는 듯한 연출을 할수 있을까?
아이디어
- 칼에 Slice Plane을 붙이고 물체와 충돌했을때 단면을 자르면 되겟구나?

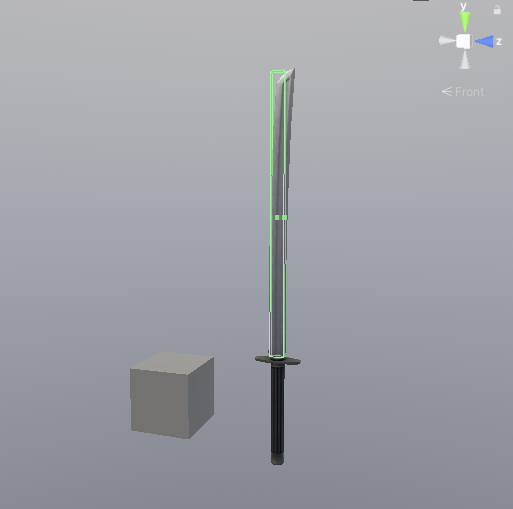
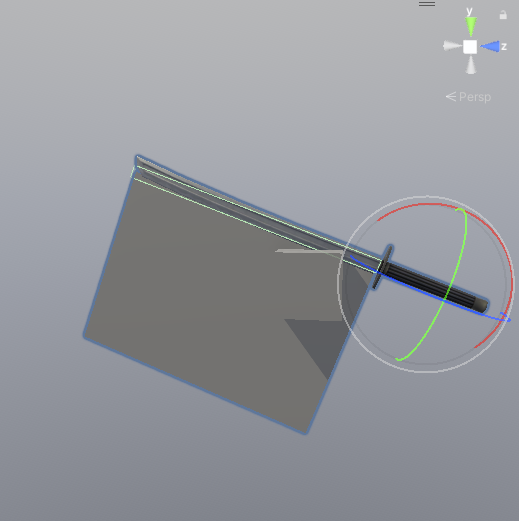
다음과 같이 칼 에셋을 가져와 설치 하고

어떻게 테스트 할지 손으로 해본다
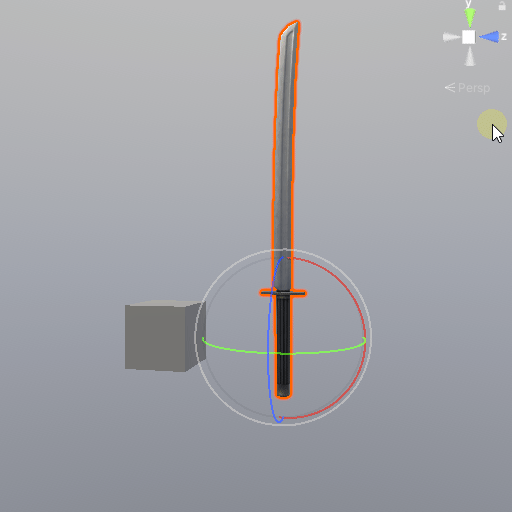
다음과 같은 구조로 만들어 주고

콜라이더를 추가 합니다.
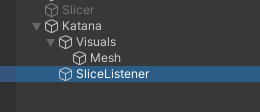
SliceListener스크립트를 만들고 다음과 같이 작성후
using System;
using System.Collections;
using System.Collections.Generic;
using EzySlice;
using UnityEngine;
using UnityEngine.UIElements;

public class SliceListener : MonoBehaviour
{
    public Slicer slicer;

    private void OnTriggerEnter(Collider other)
    {
        Debug.LogFormat("OnTriggerEnter: {0}", other);
    }
}
Collider에 붙여 줍니다.

다음과 같이 수정해줍니다.
물체에 닿았을때 다음과 같이 나오면 됩니다.
SliceListener를 선택후 Slice Listener컴포넌트의 Slicer속성에 Slicer오브젝트를 넣어 줍니다.

스크립트를 수정후
Slicer
public bool isTouch = false;
private void Update()
{
    if (isTouch)
    {
        Slice();
    }
}
SliceListener
using System;
using System.Collections;
using System.Collections.Generic;
using EzySlice;
using UnityEngine;
using UnityEngine.UIElements;

public class SliceListener : MonoBehaviour
{
    public Slicer slicer;

    private void OnTriggerEnter(Collider other)
    {
        if (other.tag == "SliceObject")
        {
            Debug.LogFormat("OnTriggerEnter: {0}", other);
            slicer.isTouch = true;
        }
    }
}
태그 (SliceObject)를 추가 후 Cube에 적용합니다.

HalfExtentsVisualizer 스크립트를 작성후
using UnityEngine;

public class HalfExtentsVisualizer : MonoBehaviour
{
    public Vector3 halfExtents = new Vector3(1, 1, 1);
    public Color boxColor = Color.blue;  // 상자의 색깔을 설정합니다.
    public bool useWireframe = false;    // 상자를 와이어프레임으로 그릴지 여부를 결정합니다.

    void OnDrawGizmos()
    {
        // Gizmo 색상을 설정합니다.
        Gizmos.color = boxColor;

        // 오브젝트의 Collider로부터 중심 위치를 얻습니다.
        Collider collider = GetComponent<Collider>();
        Vector3 center = collider != null ? collider.bounds.center : transform.position;

        // Gizmo의 변환 행렬을 설정합니다. 오브젝트의 회전은 반영하지만, 스케일은 1로 고정합니다.
        Gizmos.matrix = Matrix4x4.TRS(center, transform.rotation, Vector3.one);

        // 상자를 그립니다. useWireframe 값에 따라 와이어프레임 또는 솔리드 상자를 그립니다.
        if (useWireframe)
        {
            Gizmos.DrawWireCube(Vector3.zero, 2.0f * halfExtents);  // 와이어프레임 상자를 그립니다.
        }
        else
        {
            Gizmos.DrawCube(Vector3.zero, 2.0f * halfExtents);  // 솔리드 상자를 그립니다.
        }
    }
}
Slicer를 선택하고

부착 합니다.


Slicer의 다음 부분을 수정 합니다.

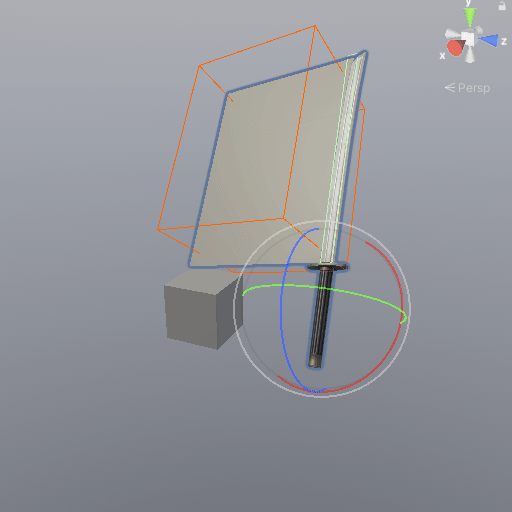
테스트를 위해 카타나를 회전 시키고

실행후 결과를 확인 합니다.
이제 잘려진 단면들이 흩어졌으면 좋겠네요
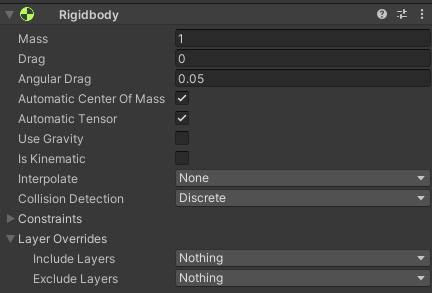
Cube를 선택후 Rigidbody를 추가하고
Slicer스크립트를 다음과 같이 수정 합니다.
using System.Collections;
using System.Collections.Generic;
using EzySlice;
using UnityEngine;

public class Slicer : MonoBehaviour
{
    public Material afterSliceMaterial;
    public LayerMask sliceMask;

    public bool isTouch = false;
    private void Update()
    {
        if (isTouch)
        {
            Slice();
        }
    }

    public void Slice()
    {
        Collider[] objectsToSlice = Physics.OverlapBox(transform.position, new Vector3(1.8f, 1.2f, 1.3f),
            transform.rotation, sliceMask);

        //Debug.LogFormat("objectsToSlice.Length: {0}", objectsToSlice.Length);

        foreach (Collider col in objectsToSlice)
        {
            SlicedHull slicedObject = SliceObject(col.gameObject);

            Debug.LogFormat("slicedObject: {0}", slicedObject);

            var upperHullGo = slicedObject.CreateUpperHull(col.gameObject, afterSliceMaterial);
            var lowerHullGo = slicedObject.CreateLowerHull(col.gameObject, afterSliceMaterial);

            Debug.LogFormat("upperHullGo: {0}", upperHullGo);
            Debug.LogFormat("lowerHullGo: {0}", lowerHullGo);

            upperHullGo.transform.position = col.transform.position;
            lowerHullGo.transform.position = col.transform.position;

            var velocity = col.GetComponent<Rigidbody>().velocity;

            ApplyPhysical(upperHullGo, velocity);
            ApplyPhysical(lowerHullGo, velocity);

            Destroy(col.gameObject);
        }
    }

    private void ApplyPhysical(GameObject go, Vector3 velocity)
    {
        go.AddComponent<MeshCollider>().convex = true;
        var rbody = go.AddComponent<Rigidbody>();
        rbody.velocity = -velocity;

        int randX = UnityEngine.Random.Range(0, 3);
        int randY = UnityEngine.Random.Range(0, 3);
        int randZ = UnityEngine.Random.Range(0, 3);

        rbody.AddForce(1.5f * new Vector3(randX, randY, randZ), ForceMode.Impulse);

        go.AddComponent<DestroyAfterSeconds>();
    }

    private SlicedHull SliceObject(GameObject go)
    {
        return go.Slice(transform.position, transform.up, afterSliceMaterial);
    }
}
실행후 결과를 확인 합니다.

이제 모든 연구가 끝났습니다.
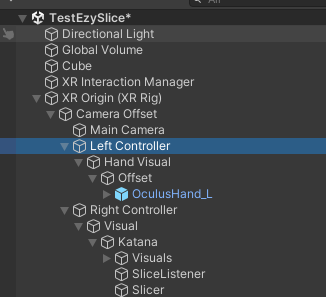
메인 카메라를 제거하고
XR Origin을 생성후 Left, Right Controller를 선택해 XR Controller를 제외한 나머지 컴포넌트들을 지웁니다.

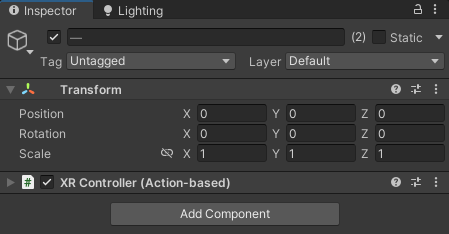
XR Controller의 Model Prefab을 None으로 설정후

Right Controller에 카타나를 넣어줍니다.
Left Controller에는 핸드 모델을 넣어 줍시다
Slicer를 선택하고

Extents값을 수정후

using System;
using System.Collections;
using System.Collections.Generic;
using EzySlice;
using UnityEngine;

[RequireComponent(typeof(HalfExtentsVisualizer))]
public class Slicer : MonoBehaviour
{
    public Material afterSliceMaterial;
    public LayerMask sliceMask;
    private HalfExtentsVisualizer visualizer;
    public bool isTouch = false;

    private void Awake()
    {
        visualizer = GetComponent<HalfExtentsVisualizer>();
    }

    private void Update()
    {
        if (isTouch)
        {
            Slice();
        }
    }

    public void Slice()
    {
        Collider[] objectsToSlice = Physics.OverlapBox(transform.position, visualizer.halfExtents,
            transform.rotation, sliceMask);

        //Debug.LogFormat("objectsToSlice.Length: {0}", objectsToSlice.Length);

        foreach (Collider col in objectsToSlice)
        {
            SlicedHull slicedObject = SliceObject(col.gameObject);

            Debug.LogFormat("slicedObject: {0}", slicedObject);

            var upperHullGo = slicedObject.CreateUpperHull(col.gameObject, afterSliceMaterial);
            var lowerHullGo = slicedObject.CreateLowerHull(col.gameObject, afterSliceMaterial);

            Debug.LogFormat("upperHullGo: {0}", upperHullGo);
            Debug.LogFormat("lowerHullGo: {0}", lowerHullGo);

            upperHullGo.transform.position = col.transform.position;
            lowerHullGo.transform.position = col.transform.position;

            var velocity = col.GetComponent<Rigidbody>().velocity;

            ApplyPhysical(upperHullGo, velocity);
            ApplyPhysical(lowerHullGo, velocity);

            Destroy(col.gameObject);
        }
    }

    private void ApplyPhysical(GameObject go, Vector3 velocity)
    {
        go.AddComponent<MeshCollider>().convex = true;
        var rbody = go.AddComponent<Rigidbody>();
        rbody.velocity = -velocity;

        int randX = UnityEngine.Random.Range(0, 3);
        int randY = UnityEngine.Random.Range(0, 3);
        int randZ = UnityEngine.Random.Range(0, 3);

        rbody.AddForce(1.5f * new Vector3(randX, randY, randZ), ForceMode.Impulse);

        go.AddComponent<DestroyAfterSeconds>();
    }

    private SlicedHull SliceObject(GameObject go)
    {
        return go.Slice(transform.position, transform.up, afterSliceMaterial);
    }
}
실행후 결과를 확인 합니다.
이제 큐브를 활성화 후 앞으로 가져옵니다.
실행후 결과를 확인 합니다.
이제 왼손 X 버튼을 누르면 해당 위치에 다시 큐브가 생겨나도록 하고 칼에 붙어 있는 SlicerPlane의 메쉬 랜더러를 비활성화 합니다.
PrimaryButtonWatcher스크립트를 다음과 같이 작성후
using System.Collections.Generic;
using UnityEngine;
using UnityEngine.Events;
using UnityEngine.XR;

[System.Serializable]
public class PrimaryButtonEvent : UnityEvent<bool> { }

public class PrimaryButtonWatcher : MonoBehaviour
{
    public PrimaryButtonEvent primaryButtonPress;

    private bool lastButtonState = false;
    private List<InputDevice> devicesWithPrimaryButton;

    private void Awake()
    {
        if (primaryButtonPress == null)
        {
            primaryButtonPress = new PrimaryButtonEvent();
        }

        devicesWithPrimaryButton = new List<InputDevice>();
    }

    void OnEnable()
    {
        List<InputDevice> allDevices = new List<InputDevice>();
        InputDevices.GetDevices(allDevices);
        foreach(InputDevice device in allDevices)
            InputDevices_deviceConnected(device);

        InputDevices.deviceConnected += InputDevices_deviceConnected;
        InputDevices.deviceDisconnected += InputDevices_deviceDisconnected;
    }

    private void OnDisable()
    {
        InputDevices.deviceConnected -= InputDevices_deviceConnected;
        InputDevices.deviceDisconnected -= InputDevices_deviceDisconnected;
        devicesWithPrimaryButton.Clear();
    }

    private void InputDevices_deviceConnected(InputDevice device)
    {
        bool discardedValue;
        if (device.TryGetFeatureValue(CommonUsages.primaryButton, out discardedValue))
        {
            devicesWithPrimaryButton.Add(device); // Add any devices that have a primary button.
        }
    }

    private void InputDevices_deviceDisconnected(InputDevice device)
    {
        if (devicesWithPrimaryButton.Contains(device))
            devicesWithPrimaryButton.Remove(device);
    }

    void Update()
    {
        bool tempState = false;
        foreach (var device in devicesWithPrimaryButton)
        {
            bool primaryButtonState = false;
            tempState = device.TryGetFeatureValue(CommonUsages.primaryButton, out primaryButtonState) // did get a value
                        && primaryButtonState // the value we got
                        || tempState; // cumulative result from other controllers
        }

        if (tempState != lastButtonState) // Button state changed since last frame
        {
            primaryButtonPress.Invoke(tempState);
            lastButtonState = tempState;
        }
    }
}
Left Controller를 선택후
부착 합니다.

Main오브젝트를 생성하고

Main 스크립트를 생성후 다음과 같이 작성후 부착 합니다.
using System.Collections;
using System.Collections.Generic;
using UnityEngine;

public class Main : MonoBehaviour
{
    [SerializeField] private GameObject cubePrefab;
    [SerializeField] private Transform initPoint;

    public void CreateCube(bool press)
    {
        if (press)
        {
            var go = Instantiate(cubePrefab);
            go.transform.position = initPoint.position;
        }
    }
}
큐브를 프리팹화 시키고 Main에 넣어 줍니다.
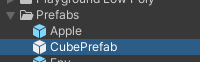
씬에 있던 큐브는 제거 하고 원래 큐브가 있던 자리에 빈 오브젝트를 만들어 준후 메인에 InitPoint에 넣어줍니다.


이제 Left Controller를 선택후

다음과 같이 Primary Button Watcher컴포넌트의 Button Press이벤트를 추가 후 Main을 넣고 Function을 선택 합니다.

Slicer를 선택후 Mesh Renderer를 비활성화 합니다.

using UnityEngine;

public class DestroyAfterSeconds : MonoBehaviour
{
    // duration 속성을 public으로 설정하여 Inspector에서 수정 가능하게 함
    public float duration = 2.0f;

    // Start is called before the first frame update
    void Start()
    {
        // duration 시간 후에 현재 게임 오브젝트를 파괴
        Destroy(gameObject, duration);
    }
}
모든 작업이 완료 되었습니다.
실행후 결과를 확인 합니다.

'VR > XR Interaction Toolkit' 카테고리의 다른 글
| Oculus Locomotion Environment Package (0) | 2024.01.19 |
|---|---|
| XR Origin (Action-based) 오큘러스 입력 받기 (0) | 2024.01.18 |
| Move, Turn, Teleport, Climb (1월 3주차 방송 예정) (0) | 2024.01.15 |
| XR Interaction Toolkit 2.4.3 환경 설정 OpenXR (0) | 2024.01.15 |
| 가상 현실 환경을 위한 인터페이스 설계 (0) | 2024.01.14 |