


인생 유니티 AR/VR 교과서 02 (VR360)
카테고리 없음 2023. 9. 18. 18:03VR360 영상 플레이어 제작
- 유니티 비디오 플레이어로 영상을 제어
- VR360 영상을 위한 환경 셋팅
- Gaze Point 구현
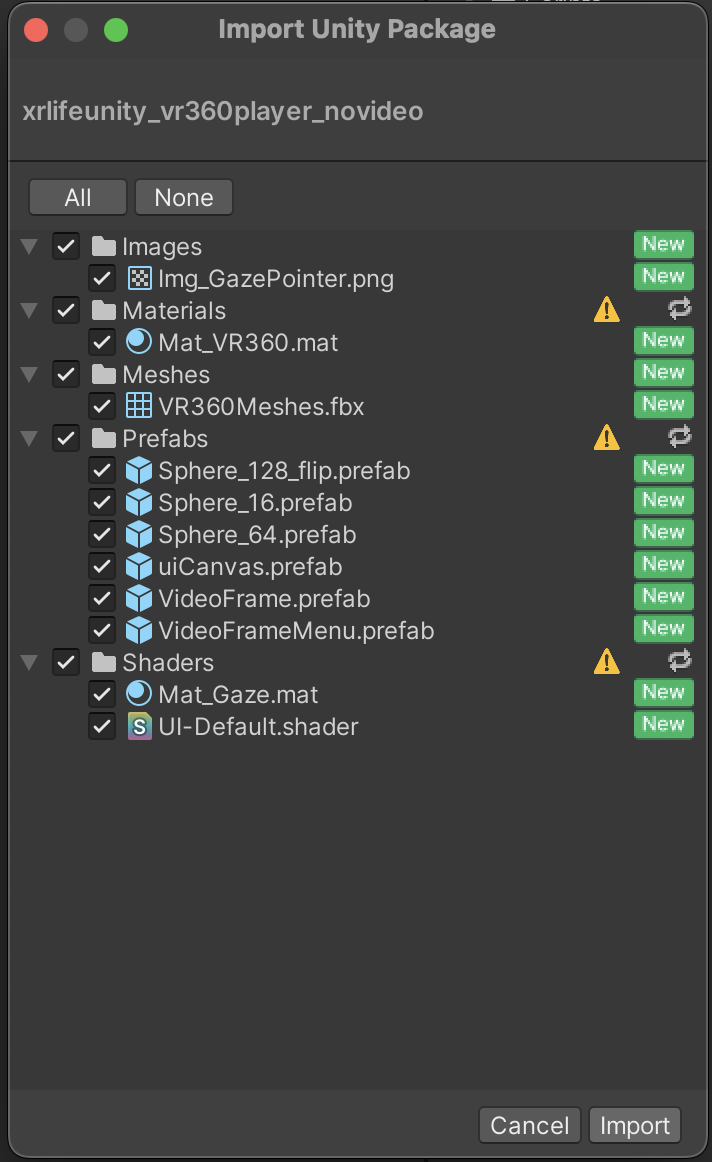
리소스 : https://github.com/araxrlab/lifeunity
GitHub - araxrlab/lifeunity: 인생유니타교과서 공유
인생유니타교과서 공유. Contribute to araxrlab/lifeunity development by creating an account on GitHub.
github.com
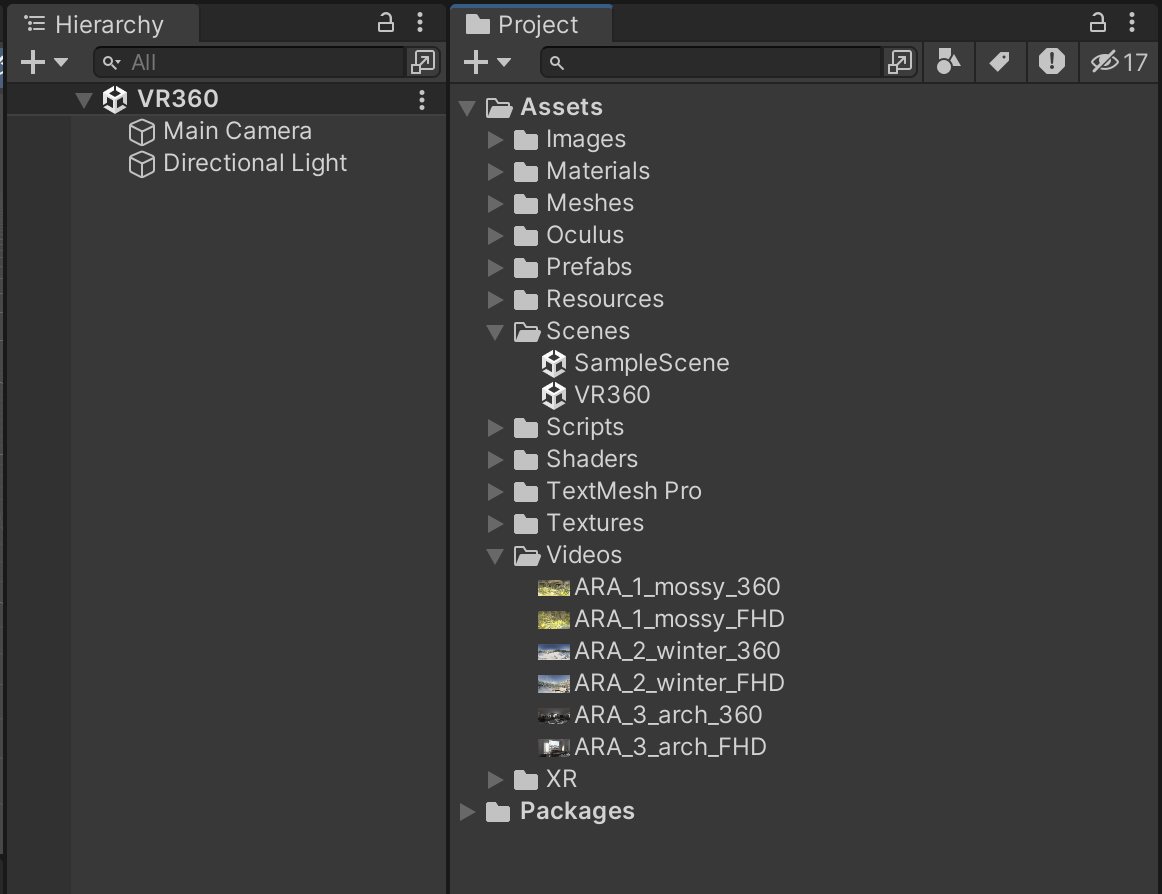
씬 저장
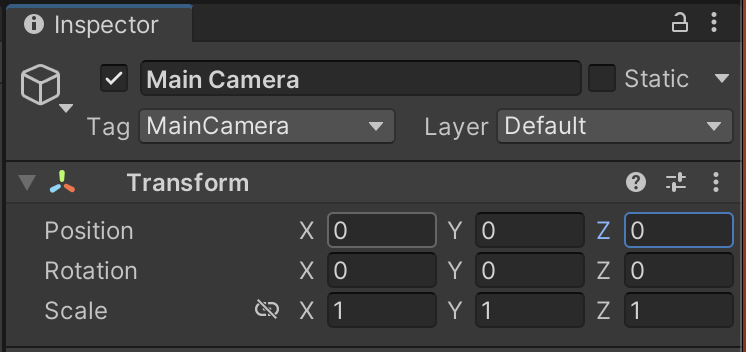
메인카메라 위치 원점으로 설정
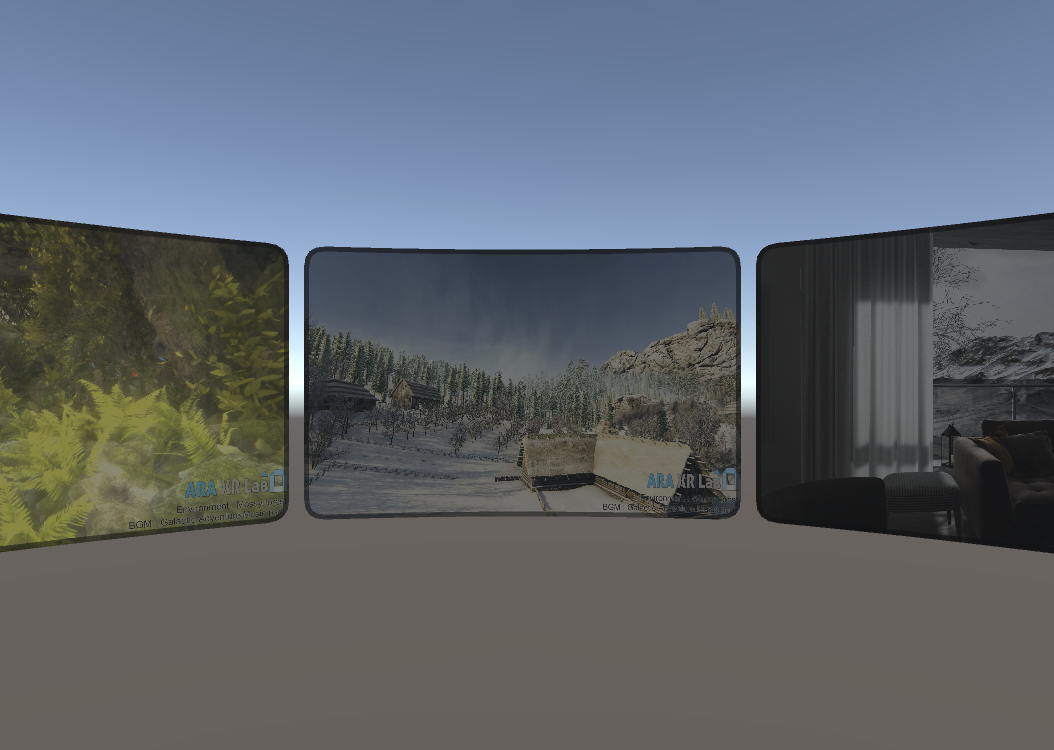
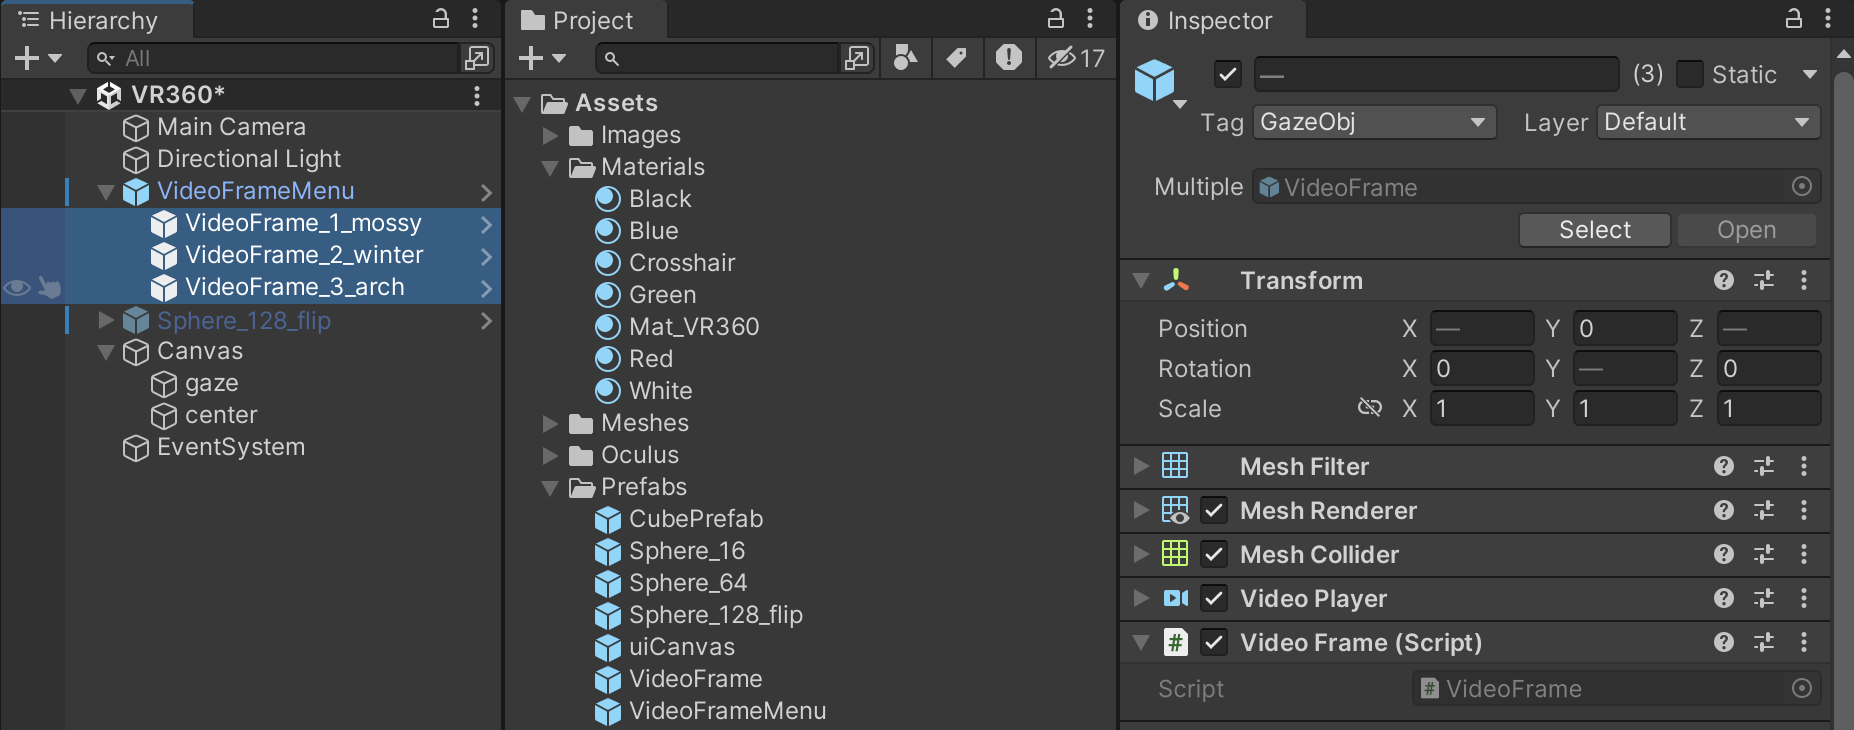
VideoFrameMenu오브젝트 하이어라키로 가져오기
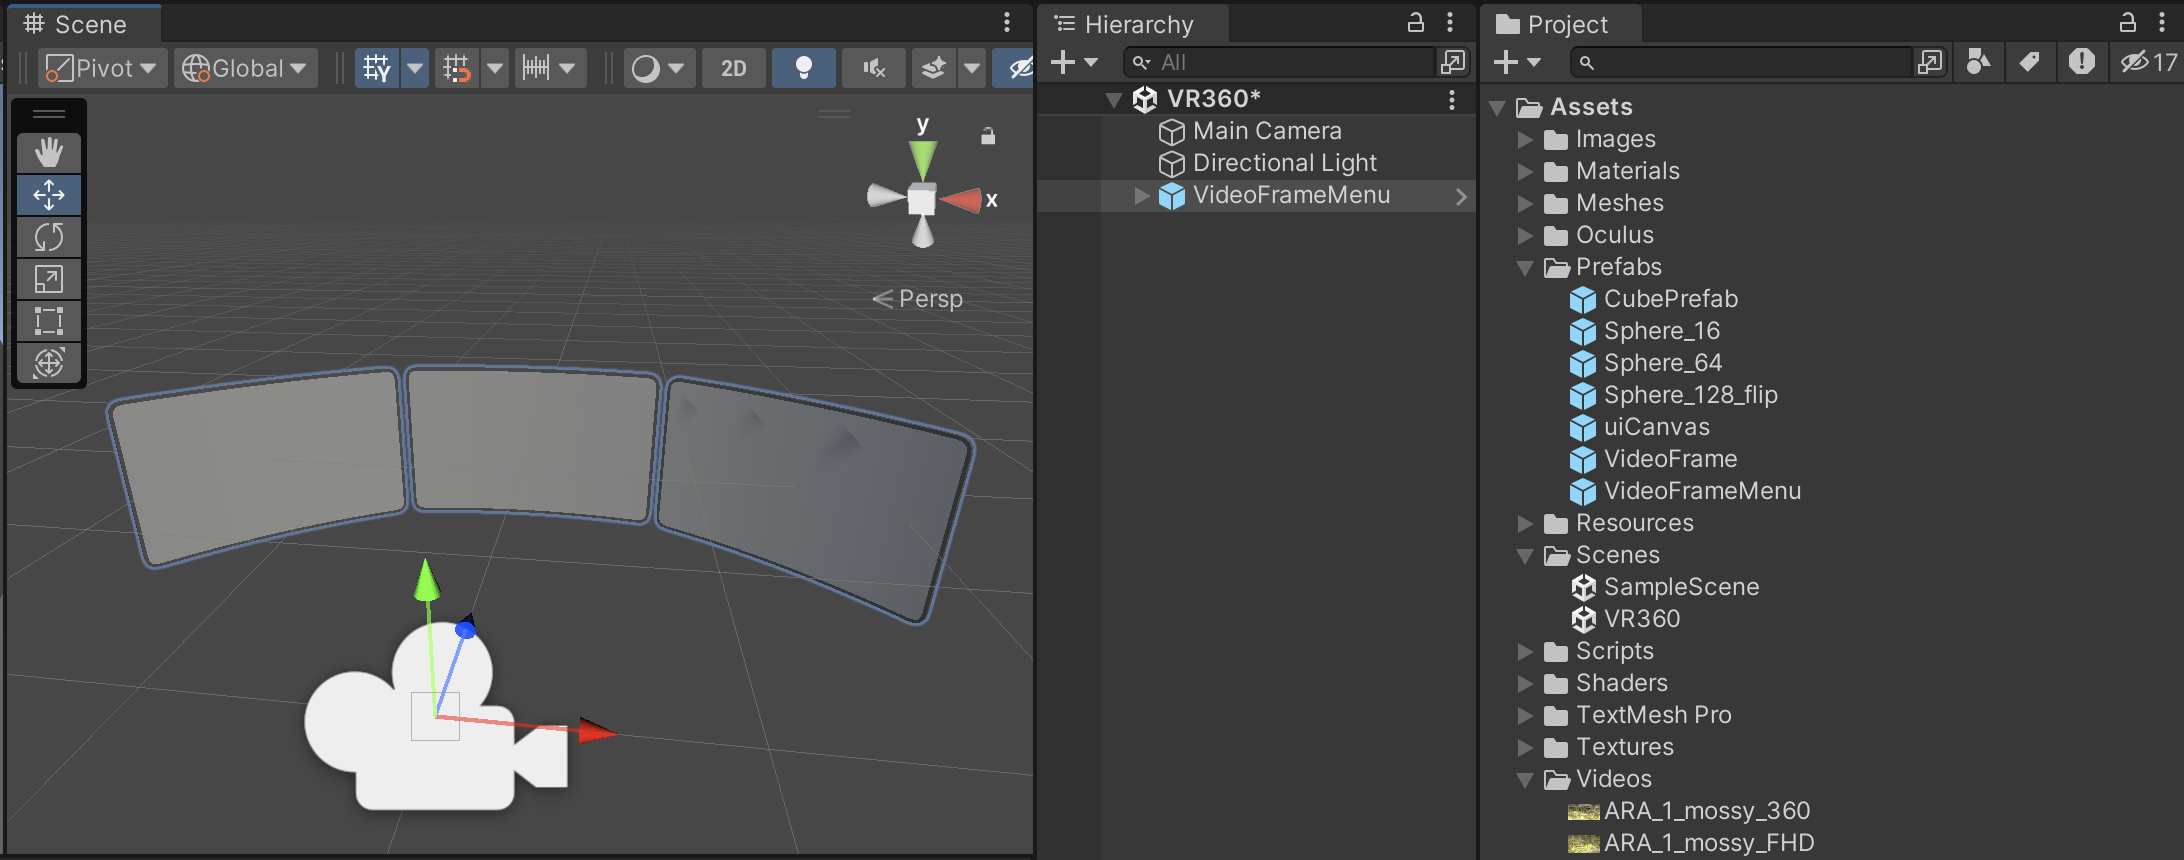
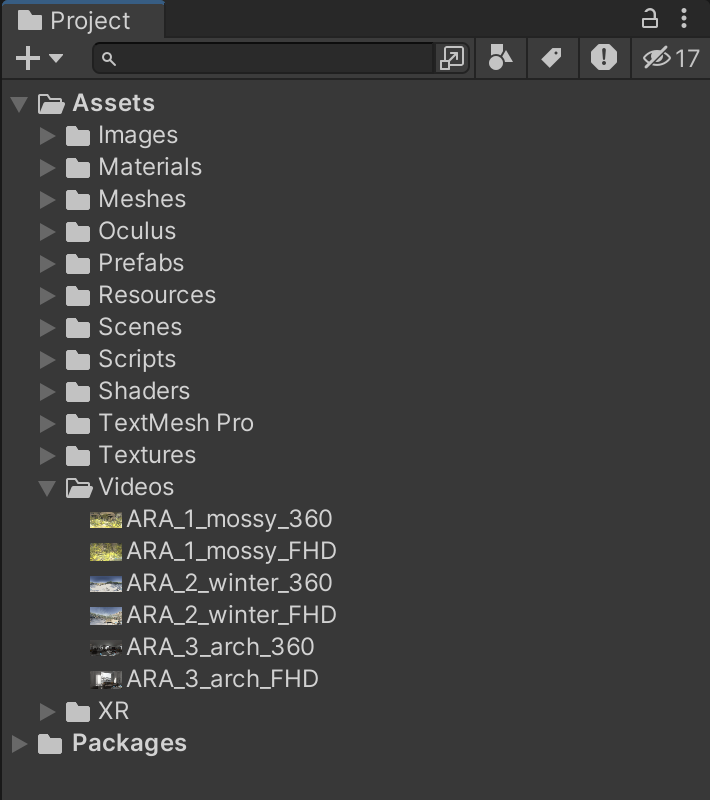
비디오 클립 넣기
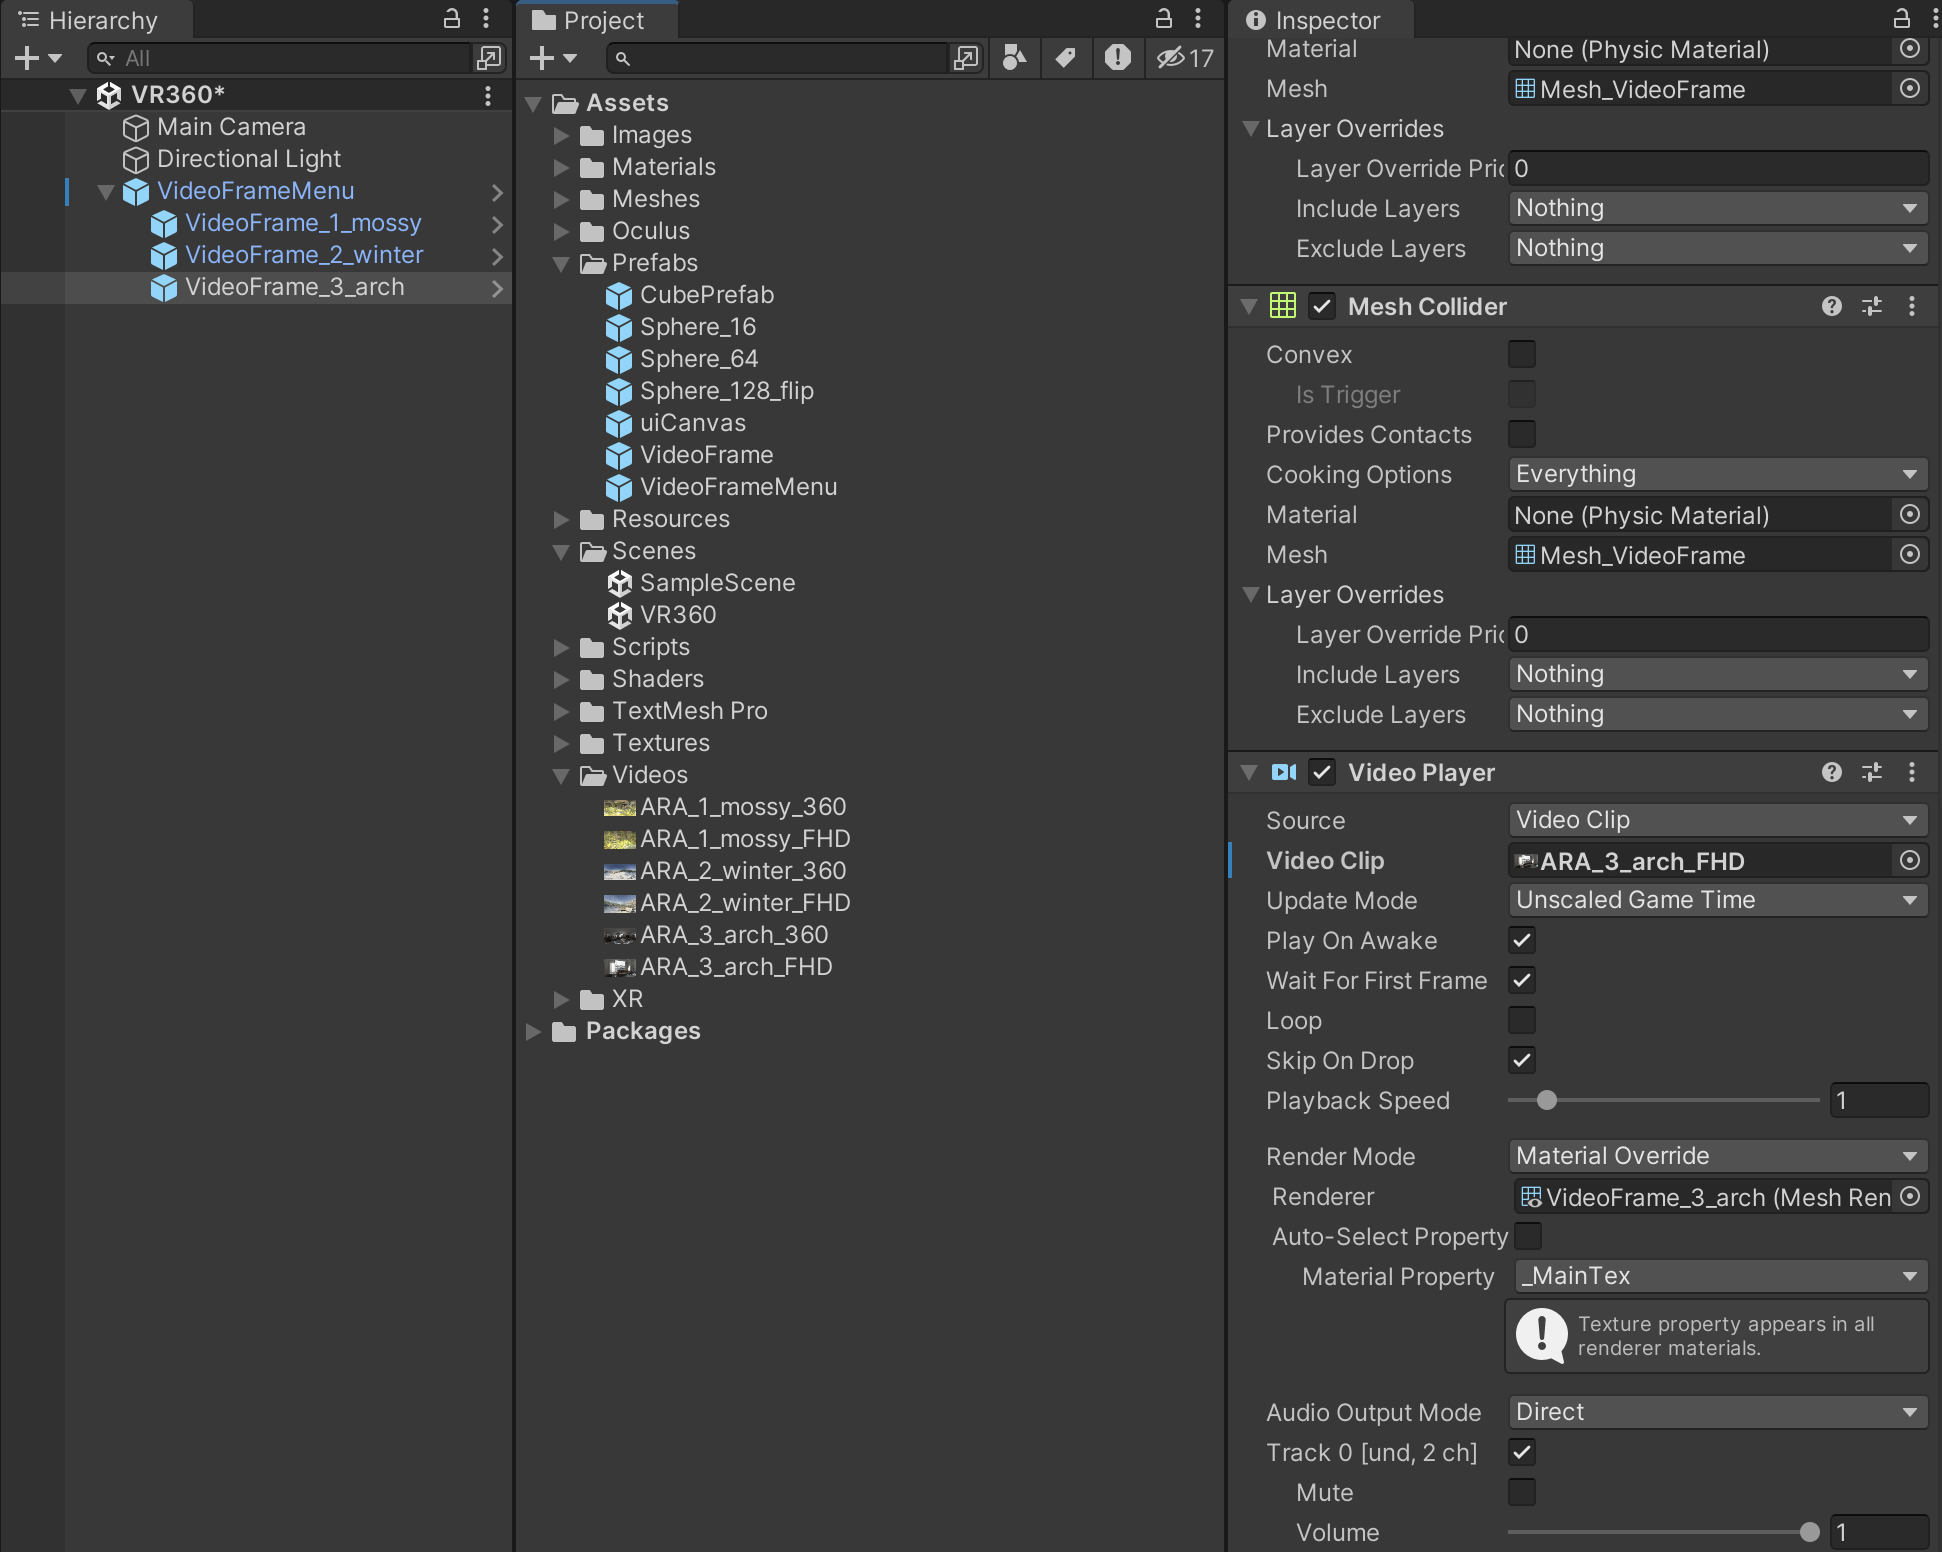
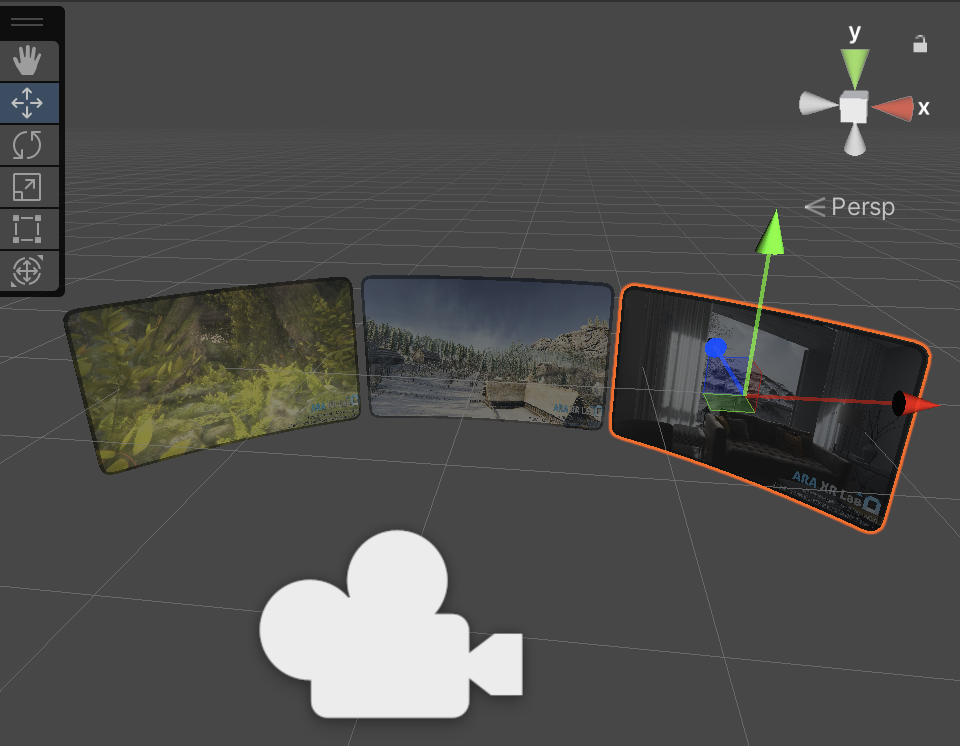
플레이 하면 영상이 자동으로 플레이 됨
VideoFrame 스크립트 작성
using System.Collections;
using System.Collections.Generic;
using UnityEngine;
using UnityEngine.Video;

public class VideoFrame : MonoBehaviour
{
    private VideoPlayer video;

    void Start()
    {
        this.video = this.GetComponent<VideoPlayer>();
        this.video.Stop();

        if (Input.GetKeyDown("space"))
        {
            if (video.isPlaying)
            {
                video.Pause();
            }
            else
            {
                video.Play();
            }
        }
    }

}
VideoFrame 컴포넌트 부착 하기
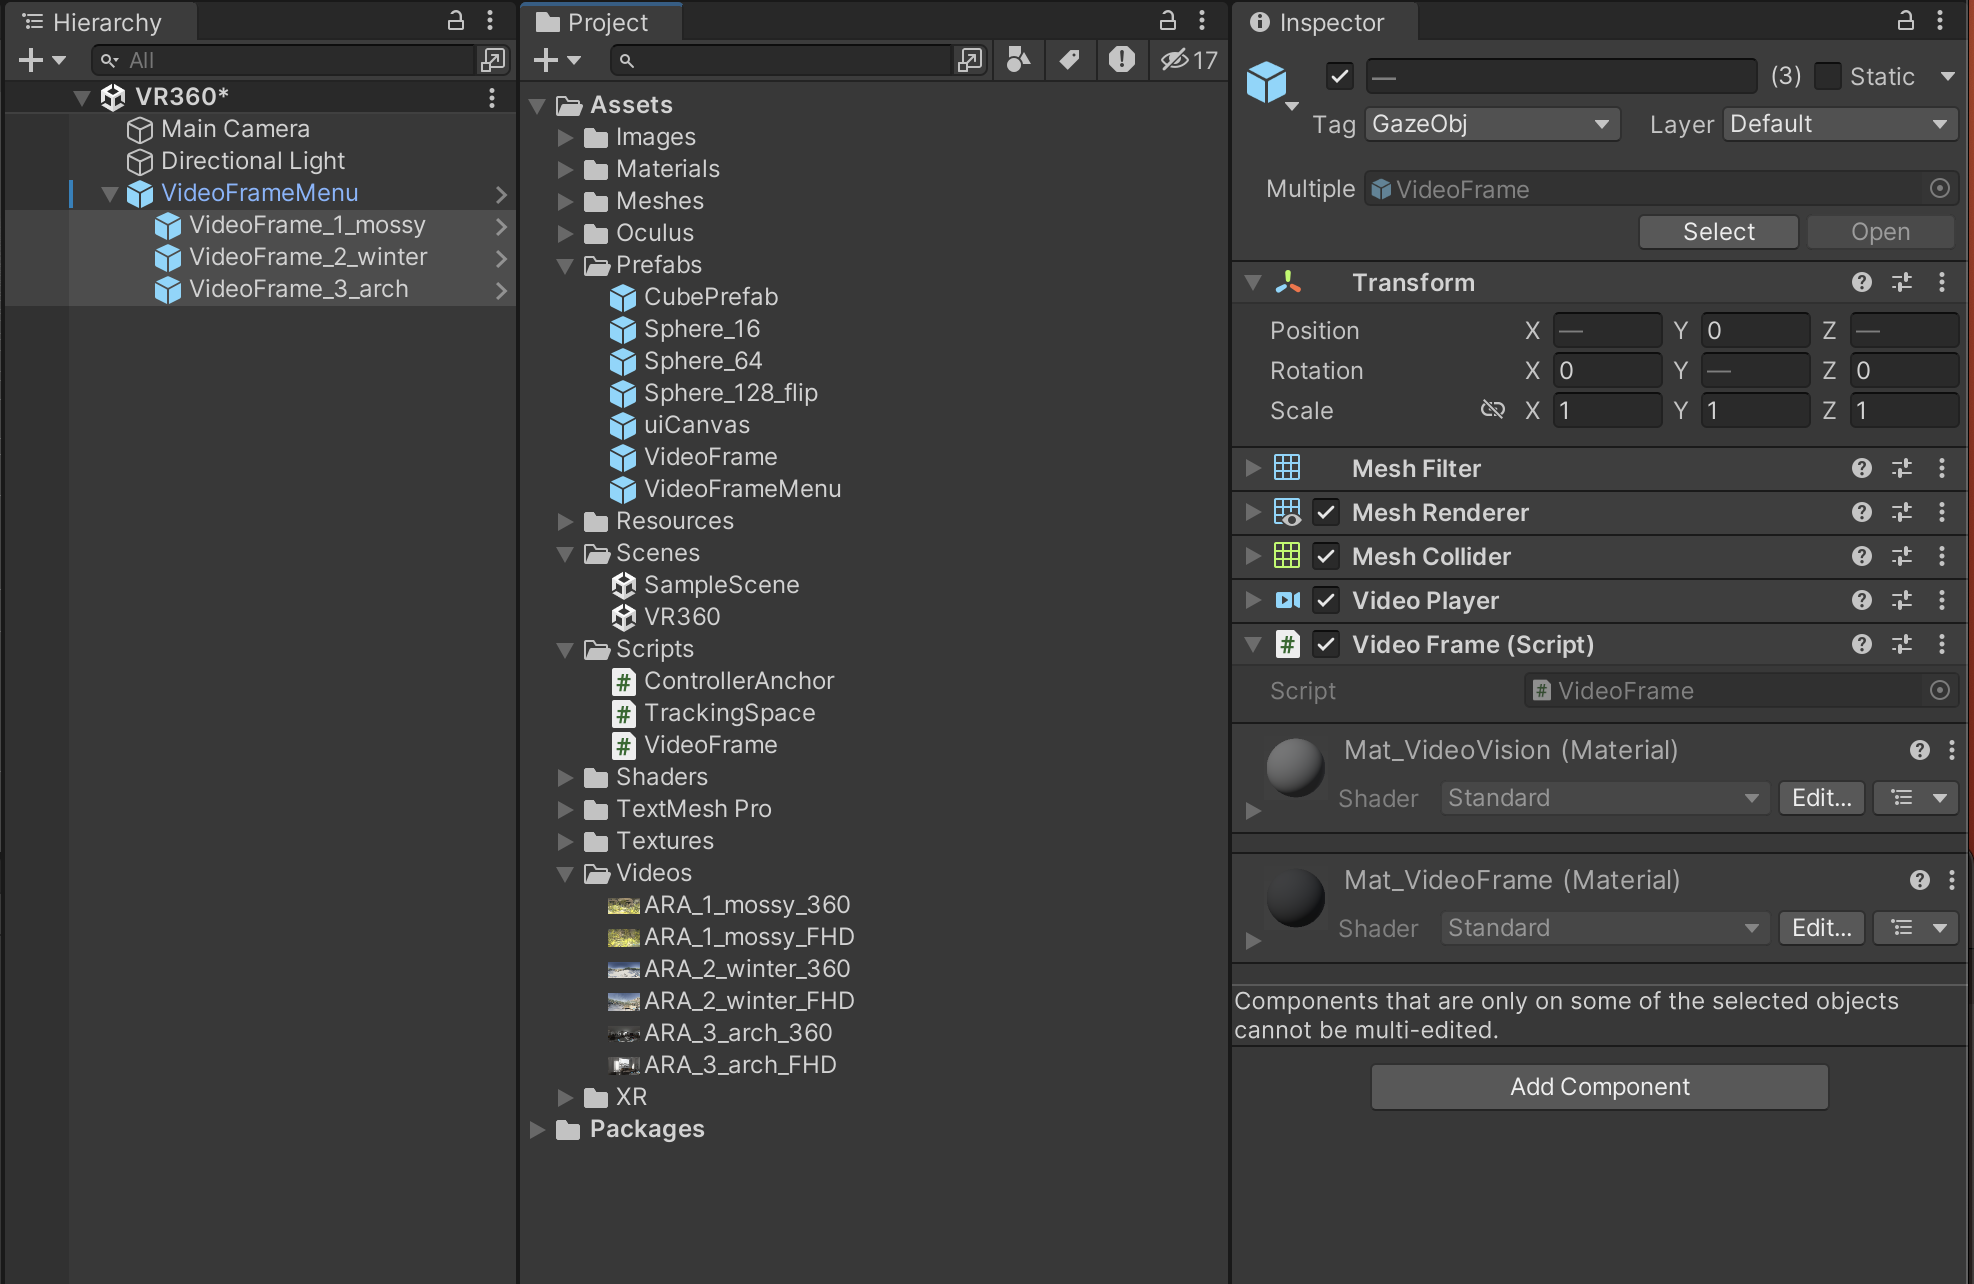
실행후 스페이스바를 누르면 영상이 나오는지 확인 한다
스크립트를 작성 한다
using System.Collections;
using System.Collections.Generic;
using UnityEngine;
using UnityEngine.Video;

public class Video360Play : MonoBehaviour
{
    private VideoPlayer videoPlayer;

    public VideoClip[] videoClips;
    private int index;


    void Start()
    {
        this.videoPlayer = this.GetComponent<VideoPlayer>();
        this.index = 0;
        this.videoPlayer.clip = this.videoClips[this.index];
        this.videoPlayer.Stop();
    }

    // Update is called once per frame
    void Update()
    {
        if (Input.GetKeyDown(KeyCode.LeftBracket))
        {
            this.videoPlayer.clip = this.videoClips[0];
        }else if (Input.GetKeyDown(KeyCode.RightBracket))
        {
            this.videoPlayer.clip = this.videoClips[1];
        }
    }
}
Gaze Pointer 구현하기
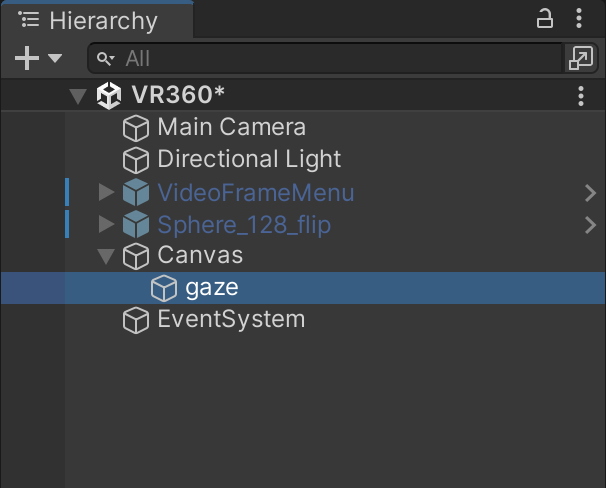
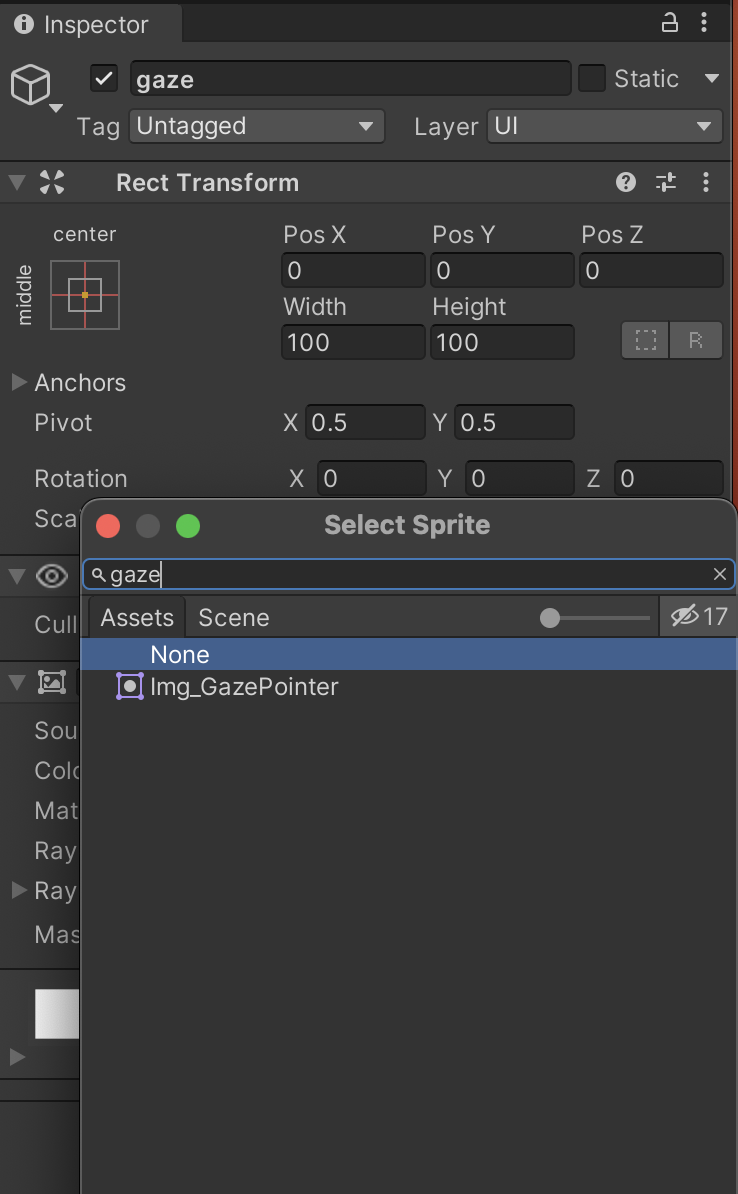
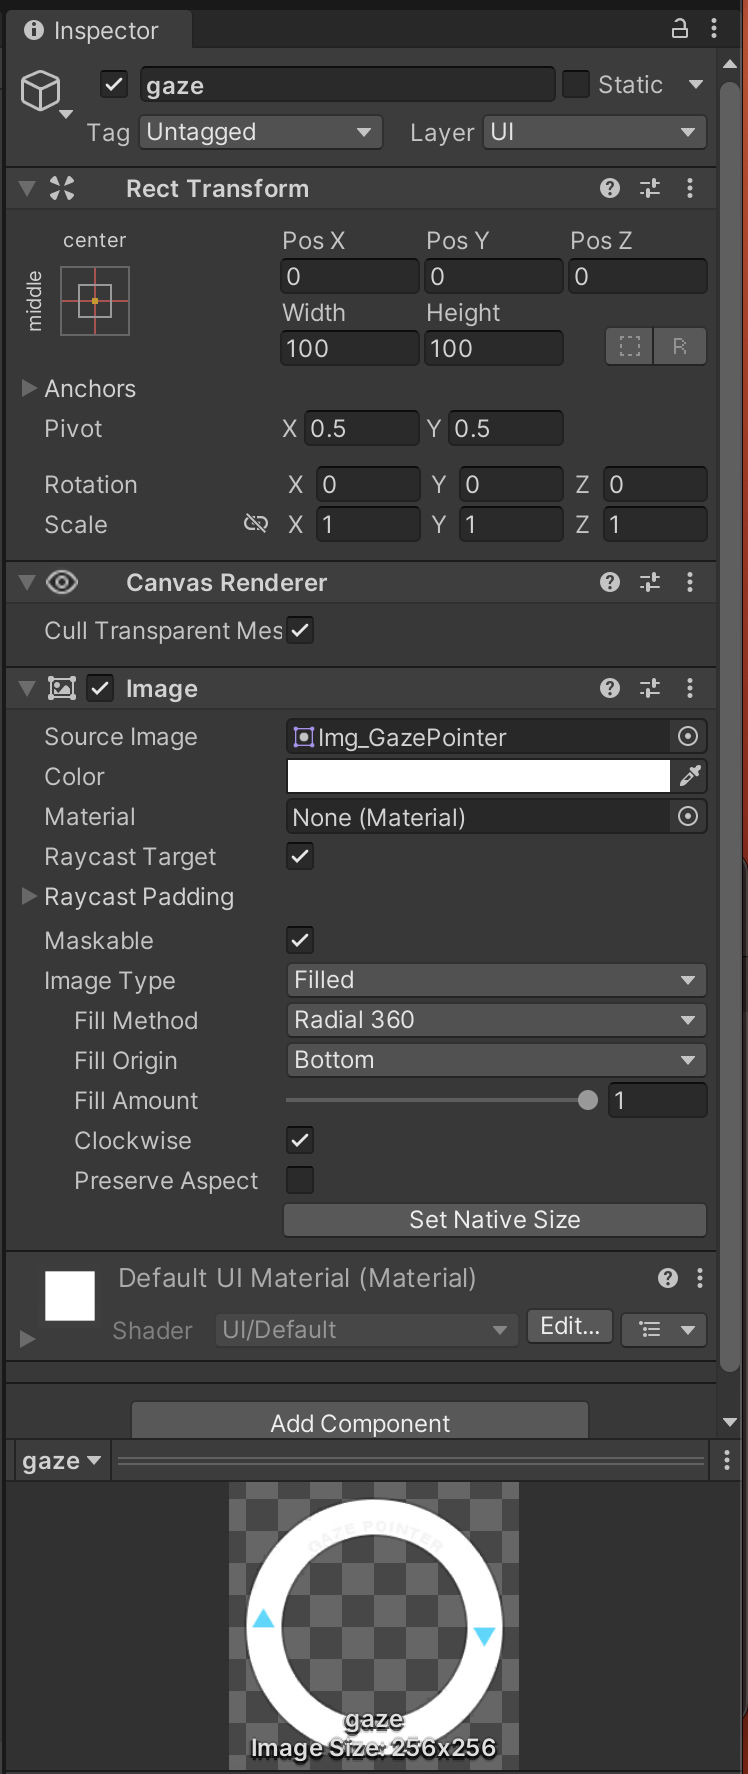
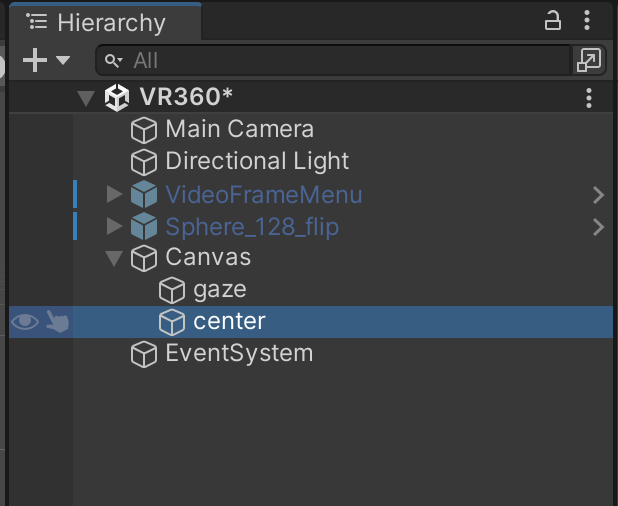

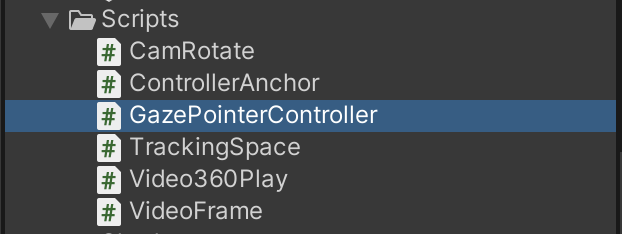
GazePointer를 제어할 스크립트를 만든다
using System.Collections;
using System.Collections.Generic;
using UnityEngine;

using UnityEngine.UI;
using UnityEngine.Video;

public class GazePointerController : MonoBehaviour
{

    [SerializeField]private Transform uiCanvas;
    [SerializeField]private Image gazeImg;

    void Start()
    {

    }

    // Update is called once per frame
    void Update()
    {
        //카메라 기준 전방 좌표 구하기
        Vector3 dir = transform.forward;

        //카메라 기준 전방 레이 설정
        Ray ray = new Ray(transform.position, dir);

        Debug.DrawRay(ray.origin, ray.direction * 200f, Color.red);

        RaycastHit hit;
        //충돌 검사
        if (Physics.Raycast(ray, out hit, 200f))
        {
            uiCanvas.position = transform.forward * hit.distance;
        }
        else
        {
            uiCanvas.position = transform.position + dir;
        }

        //uiCanvas가 항상 카메라 오브젝트를 바라보게
        uiCanvas.forward = transform.forward * -1;
    }
}
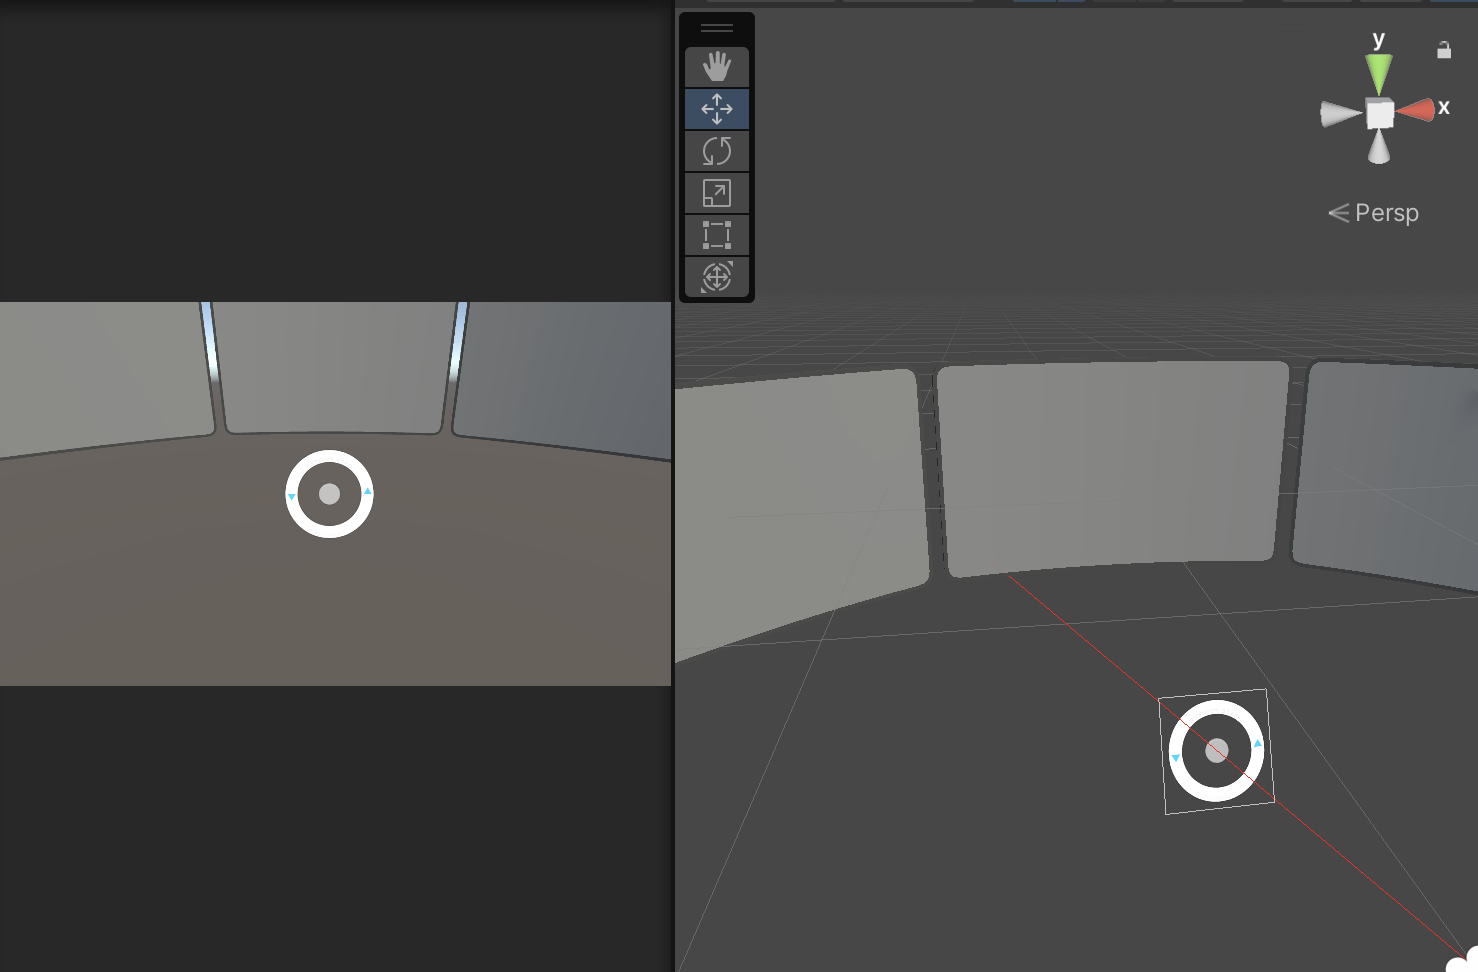
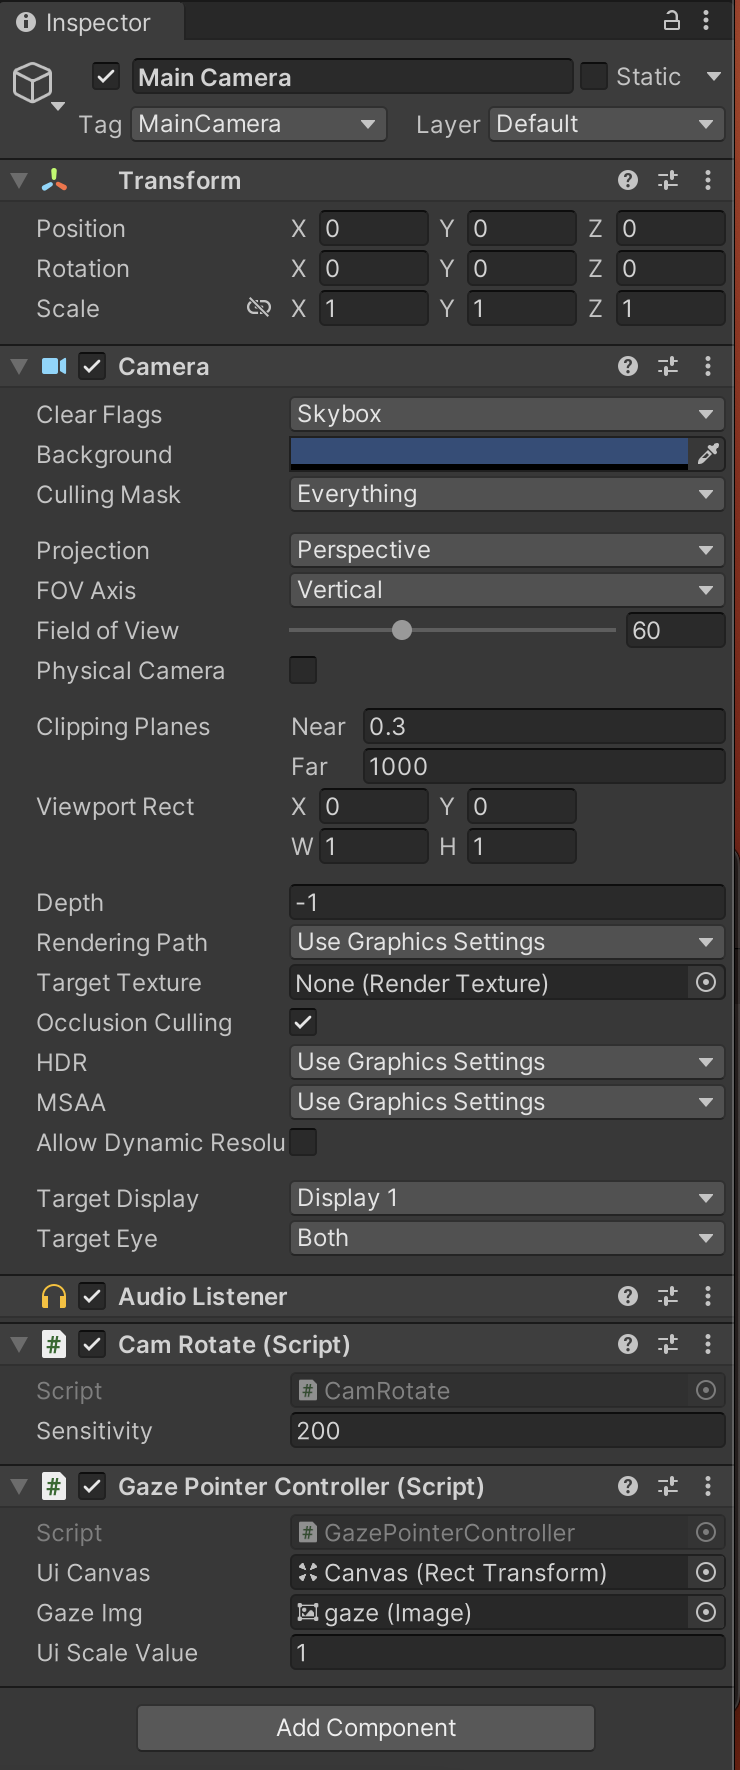
GazePointerController스크립트를 MainCamera에 연결한다
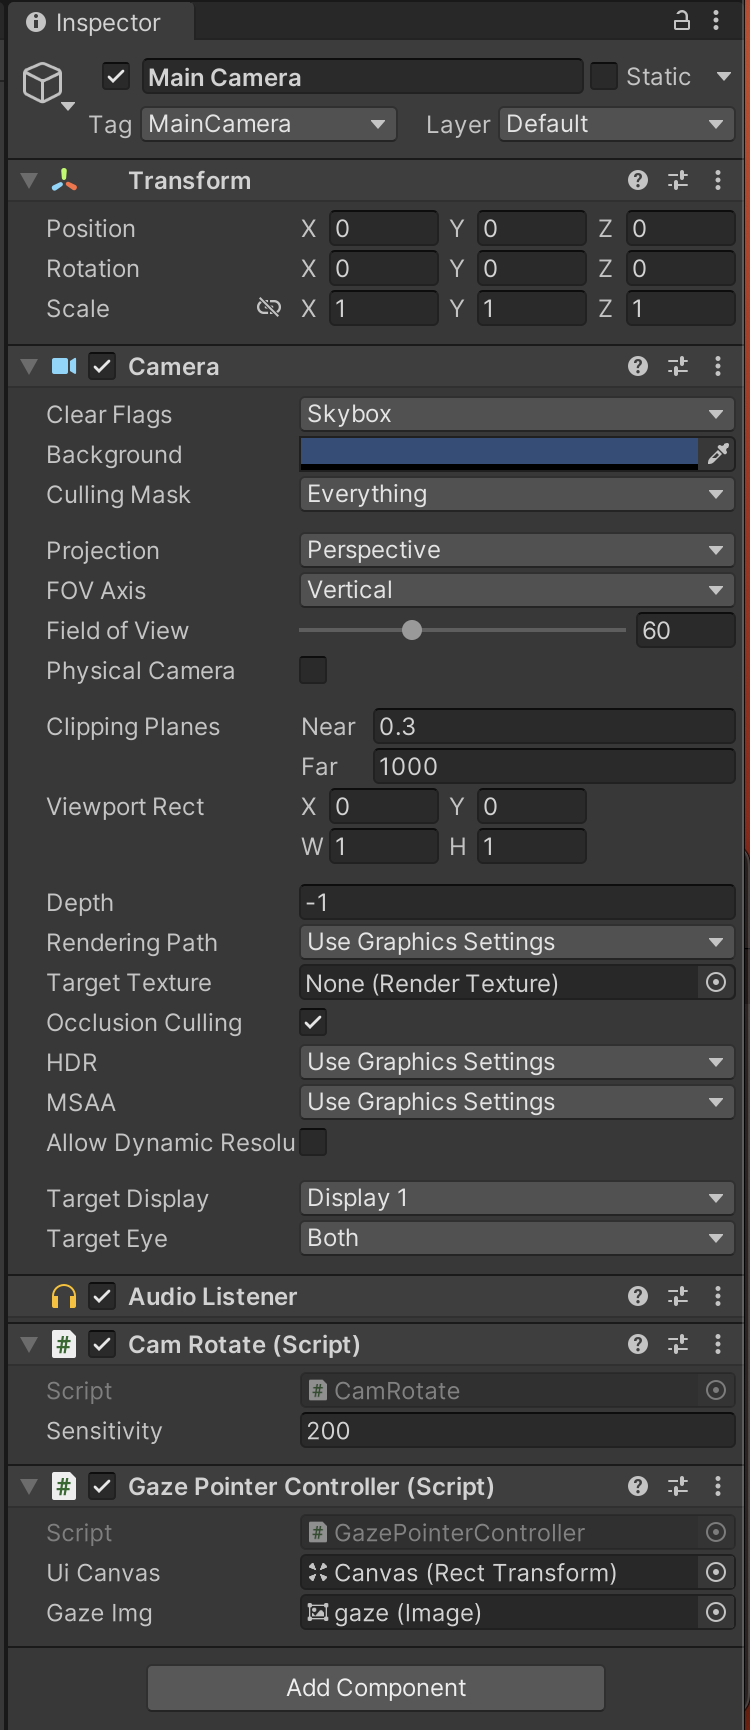
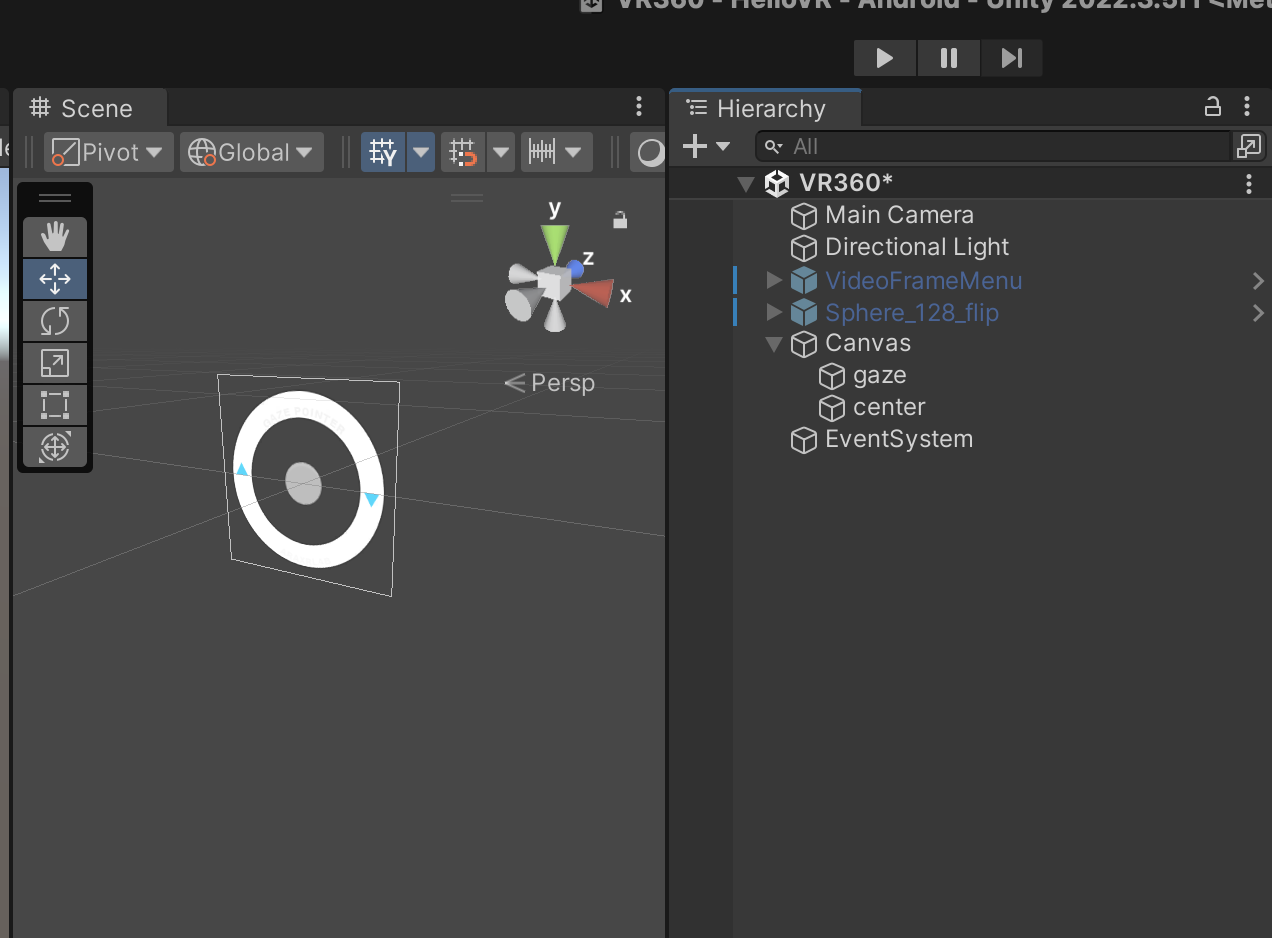
실행하고 확인
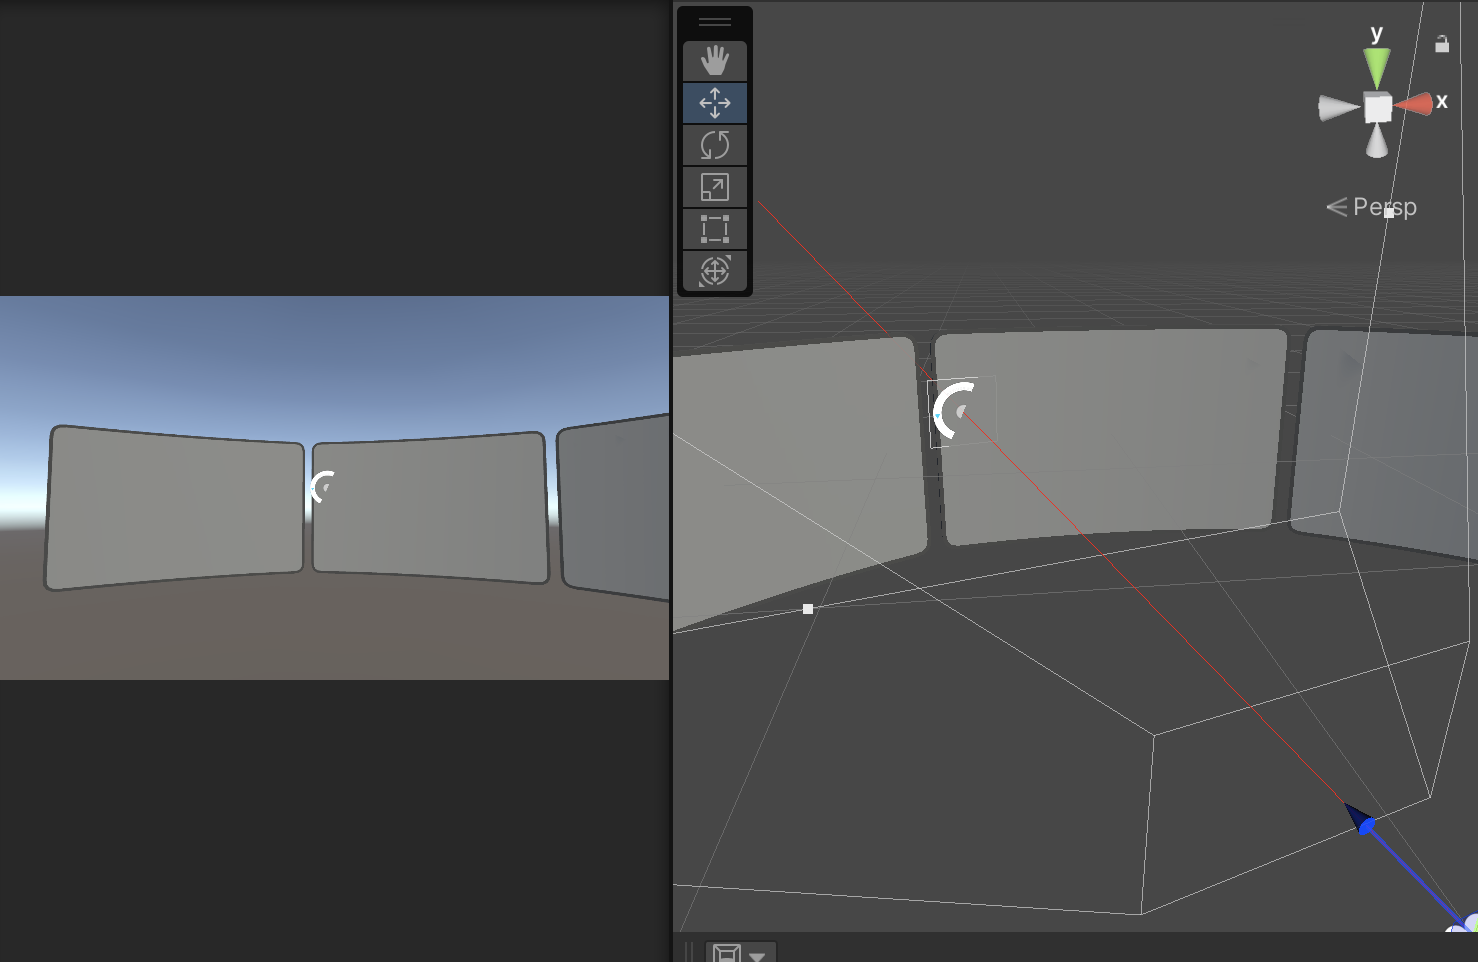
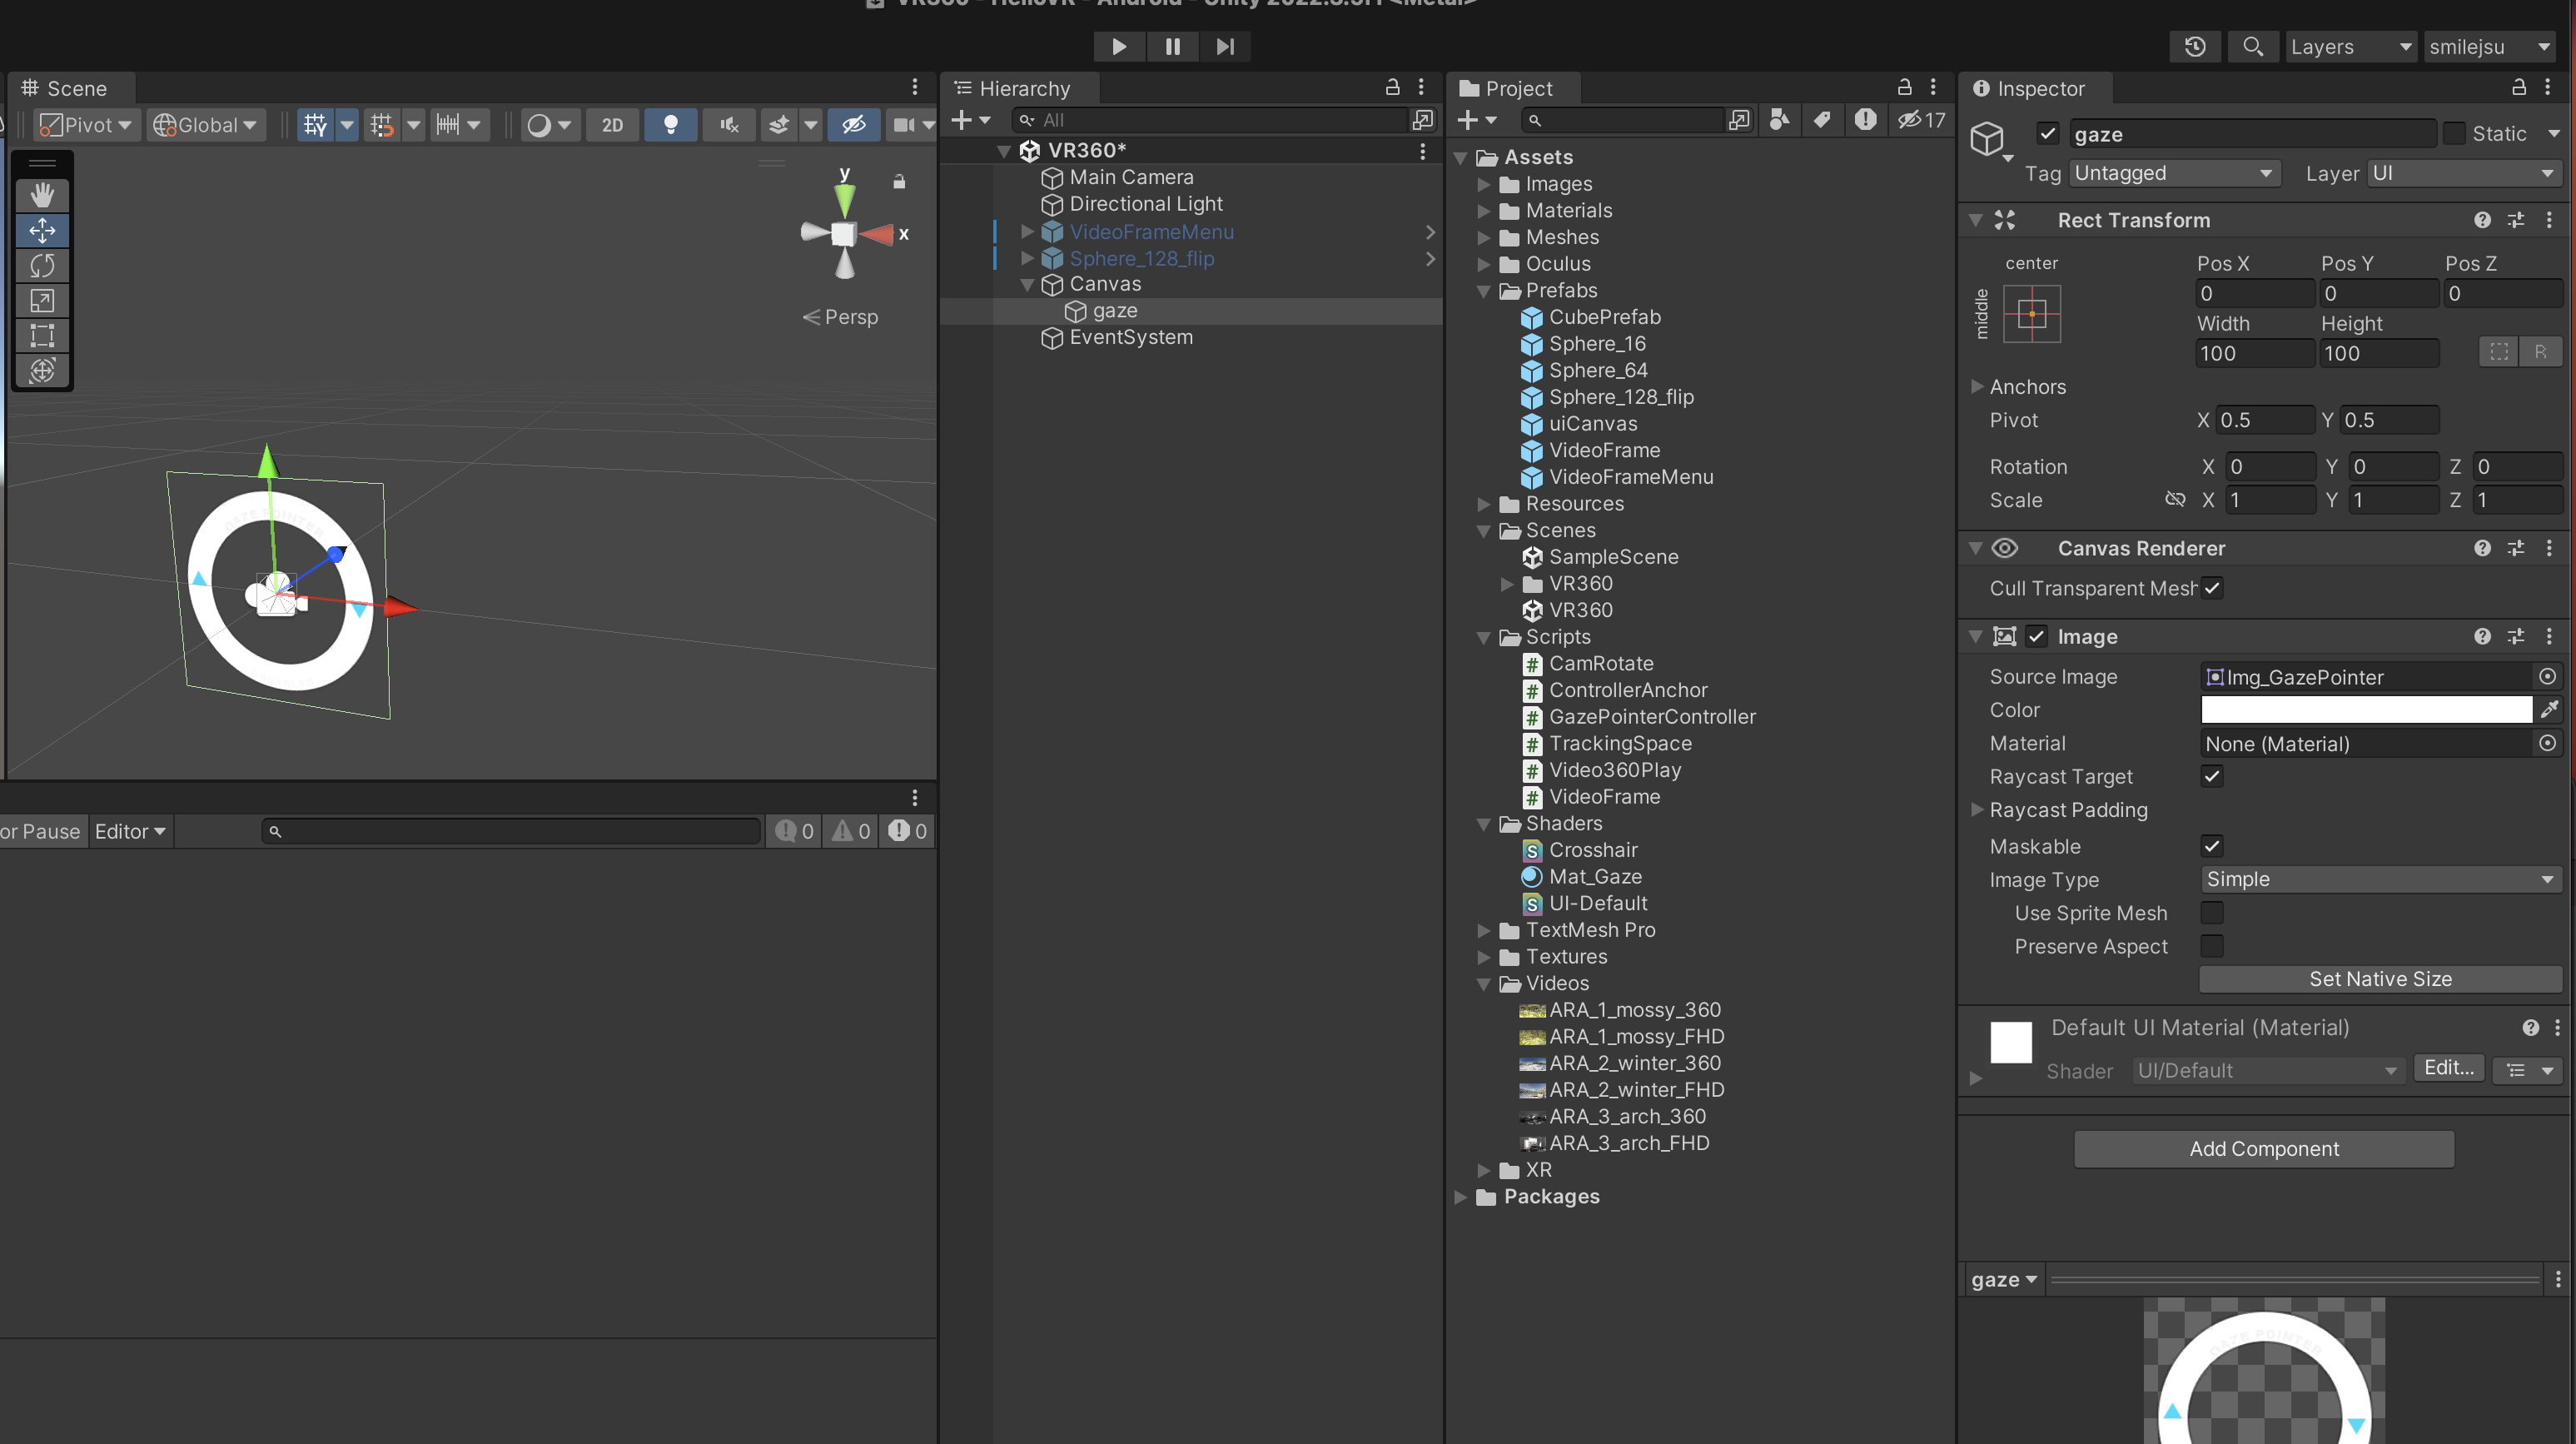
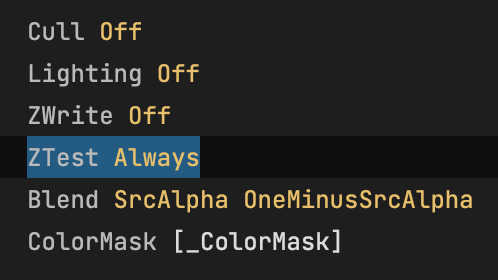
Gaze이미지가 가려지는데 ui-default쉐이더를 검색해 새로운 쉐이더를 만들고 Z-Test 옵션을 Always로 변경 하면된다
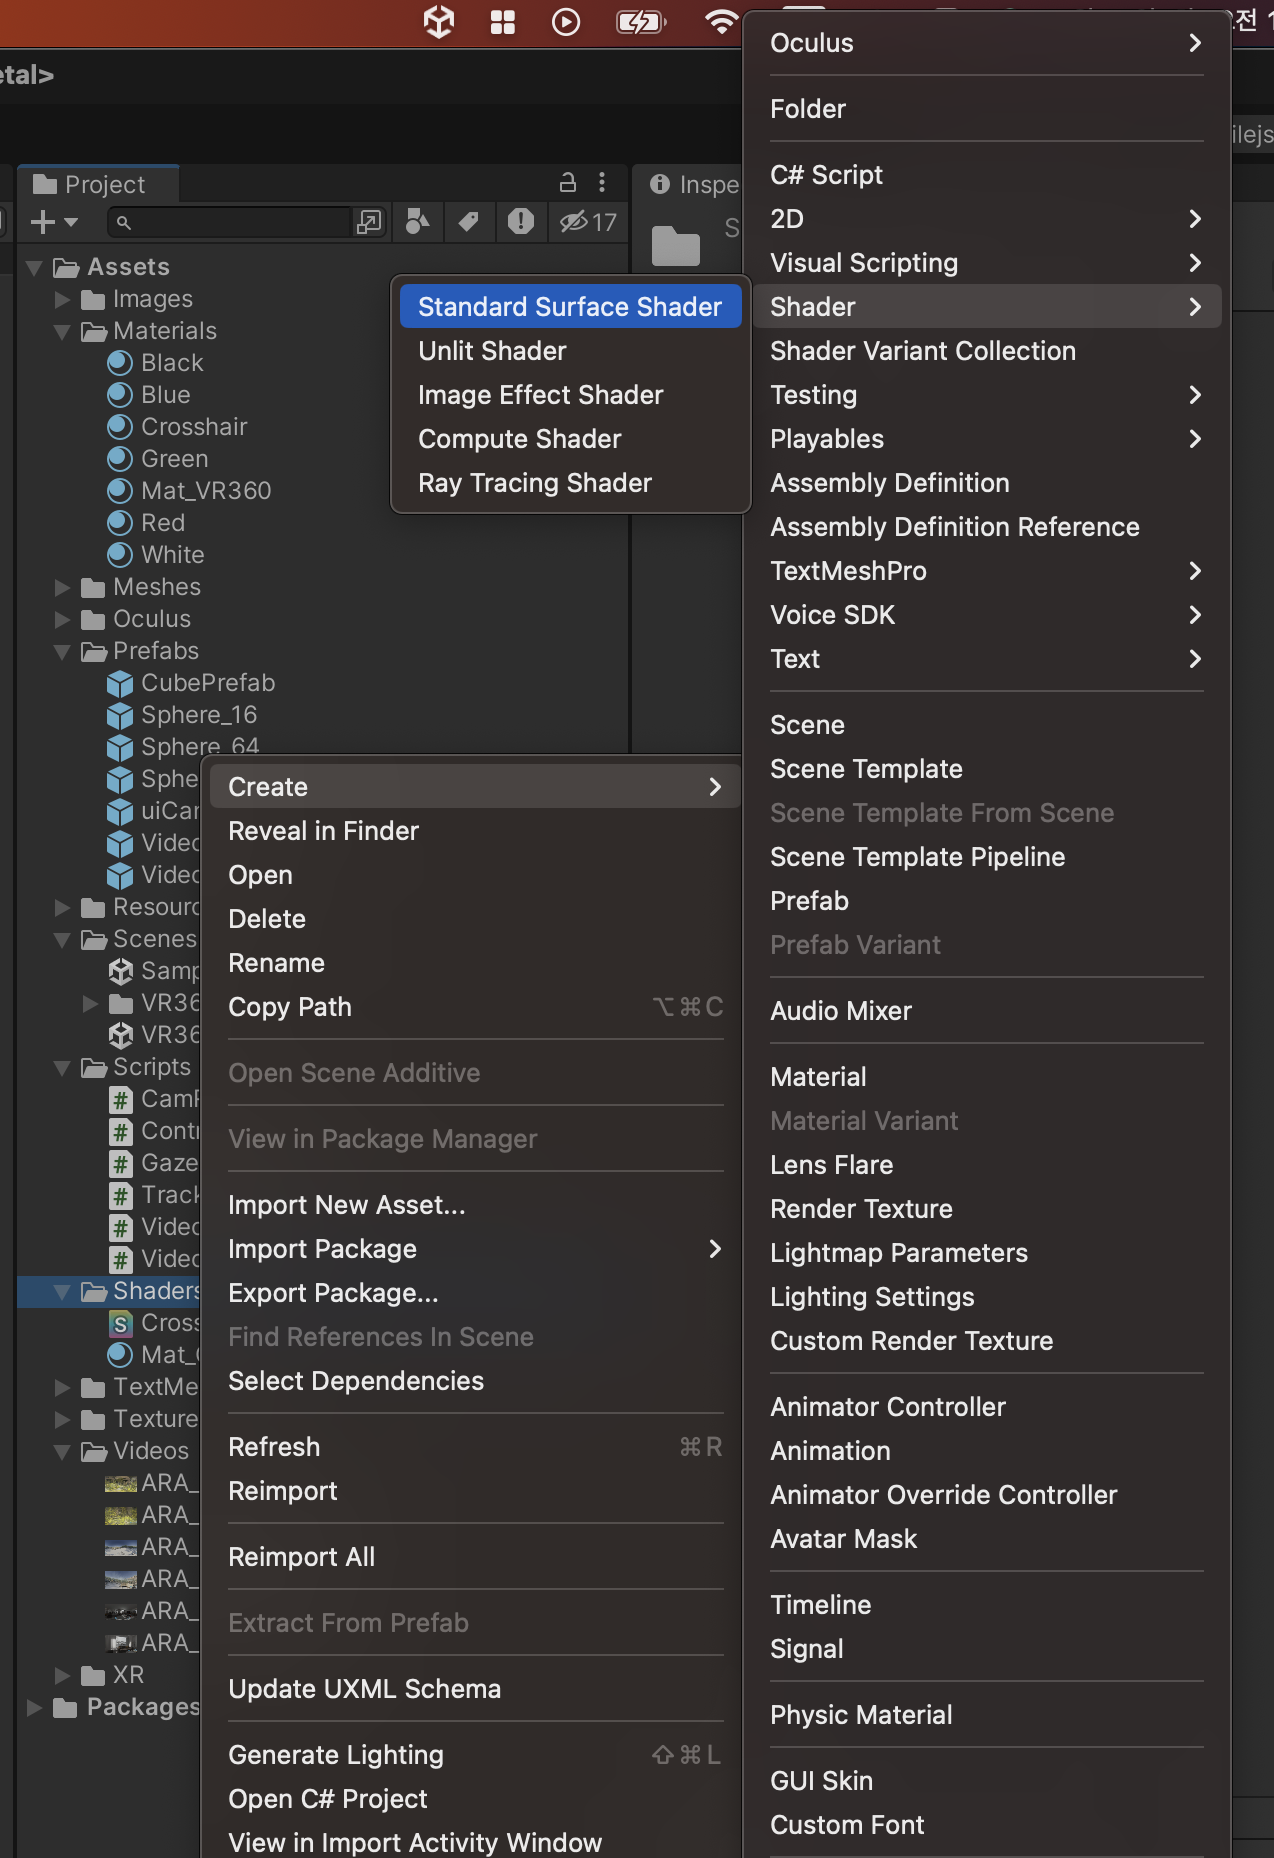
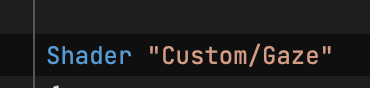
Gaze쉐이더를 열고 아까 ui-default쉐이더를 검색했던 코드를 붙여 넣고 아래 부분만 수정
https://docs.unity3d.com/kr/2021.3/Manual/SL-ZTest.html
ShaderLab 커맨드: ZTest - Unity 매뉴얼
지오메트리가 뎁스 테스트를 통과하거나 이에 실패하는 조건을 설정합니다.
docs.unity3d.com
ZTest 옵션을 Always로 설정 하면 뎁스 테스트를 하지 않으며 거리와 관계없이 모든 지오메트리를 드로우 한다
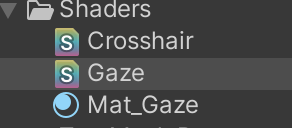
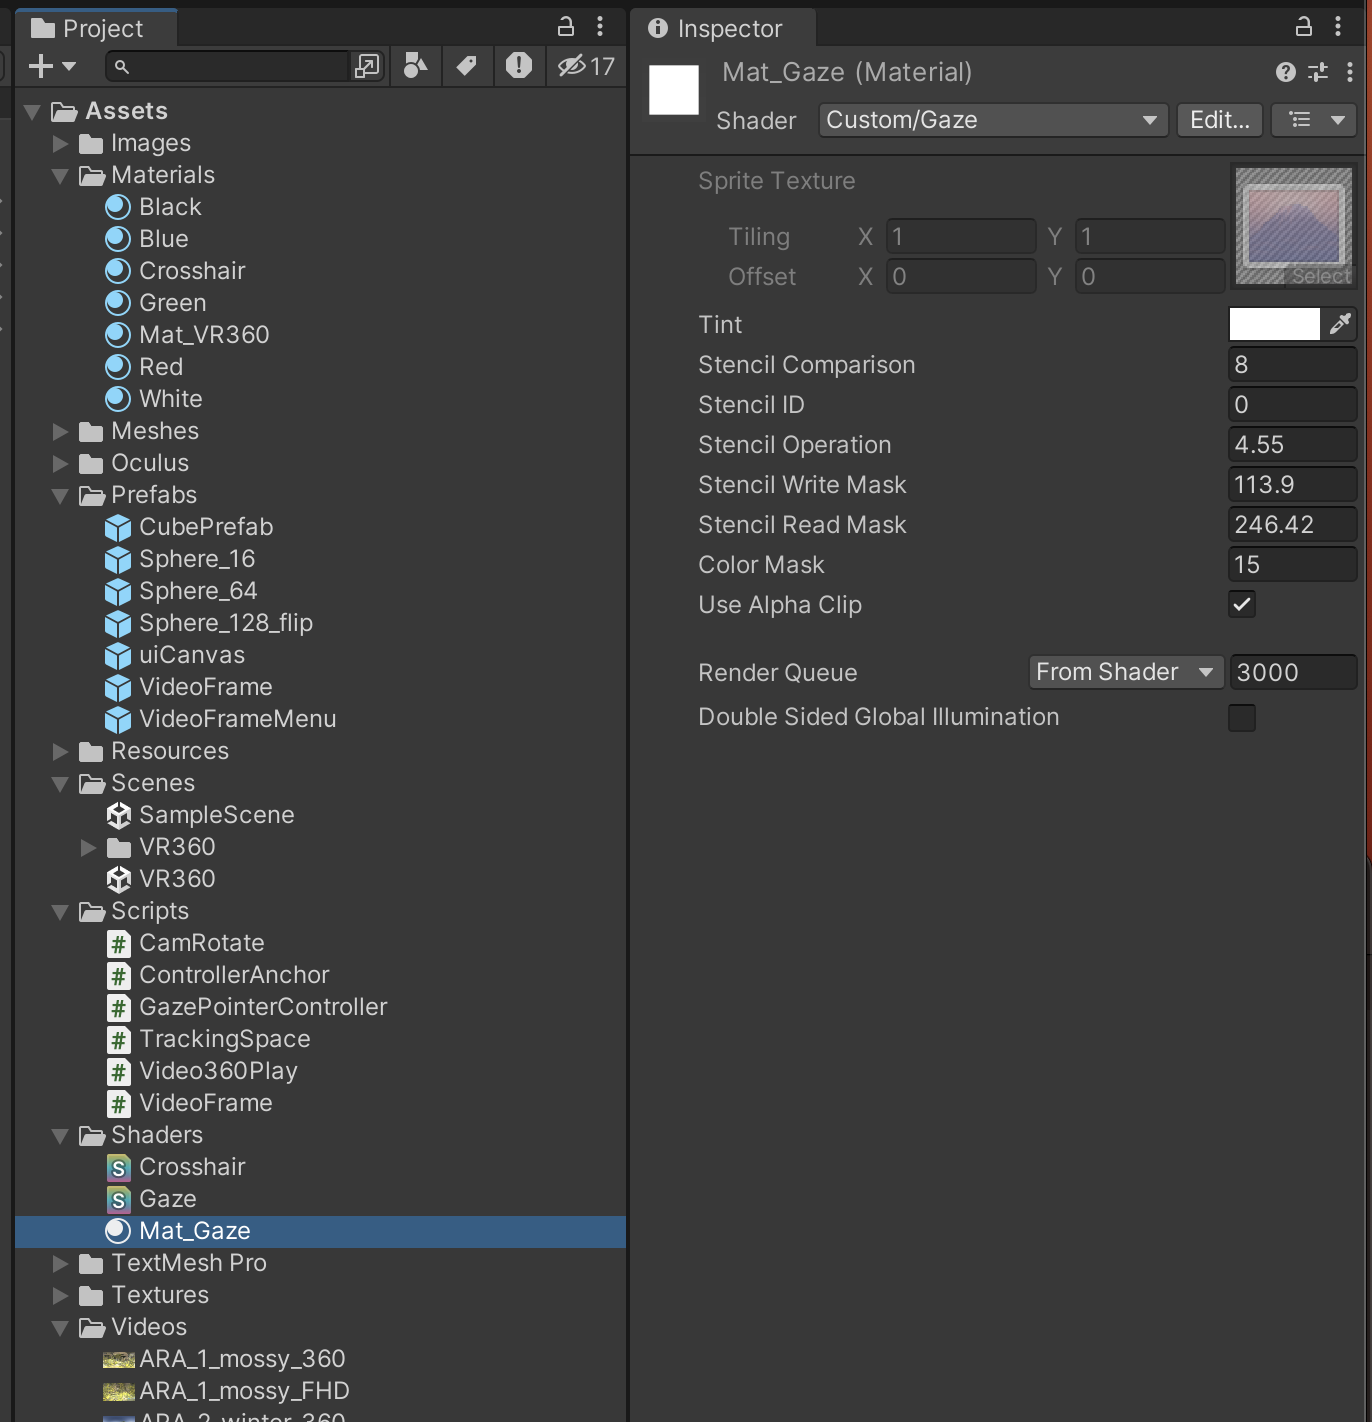
이름도 변경해주고 메터리얼에 적용하자
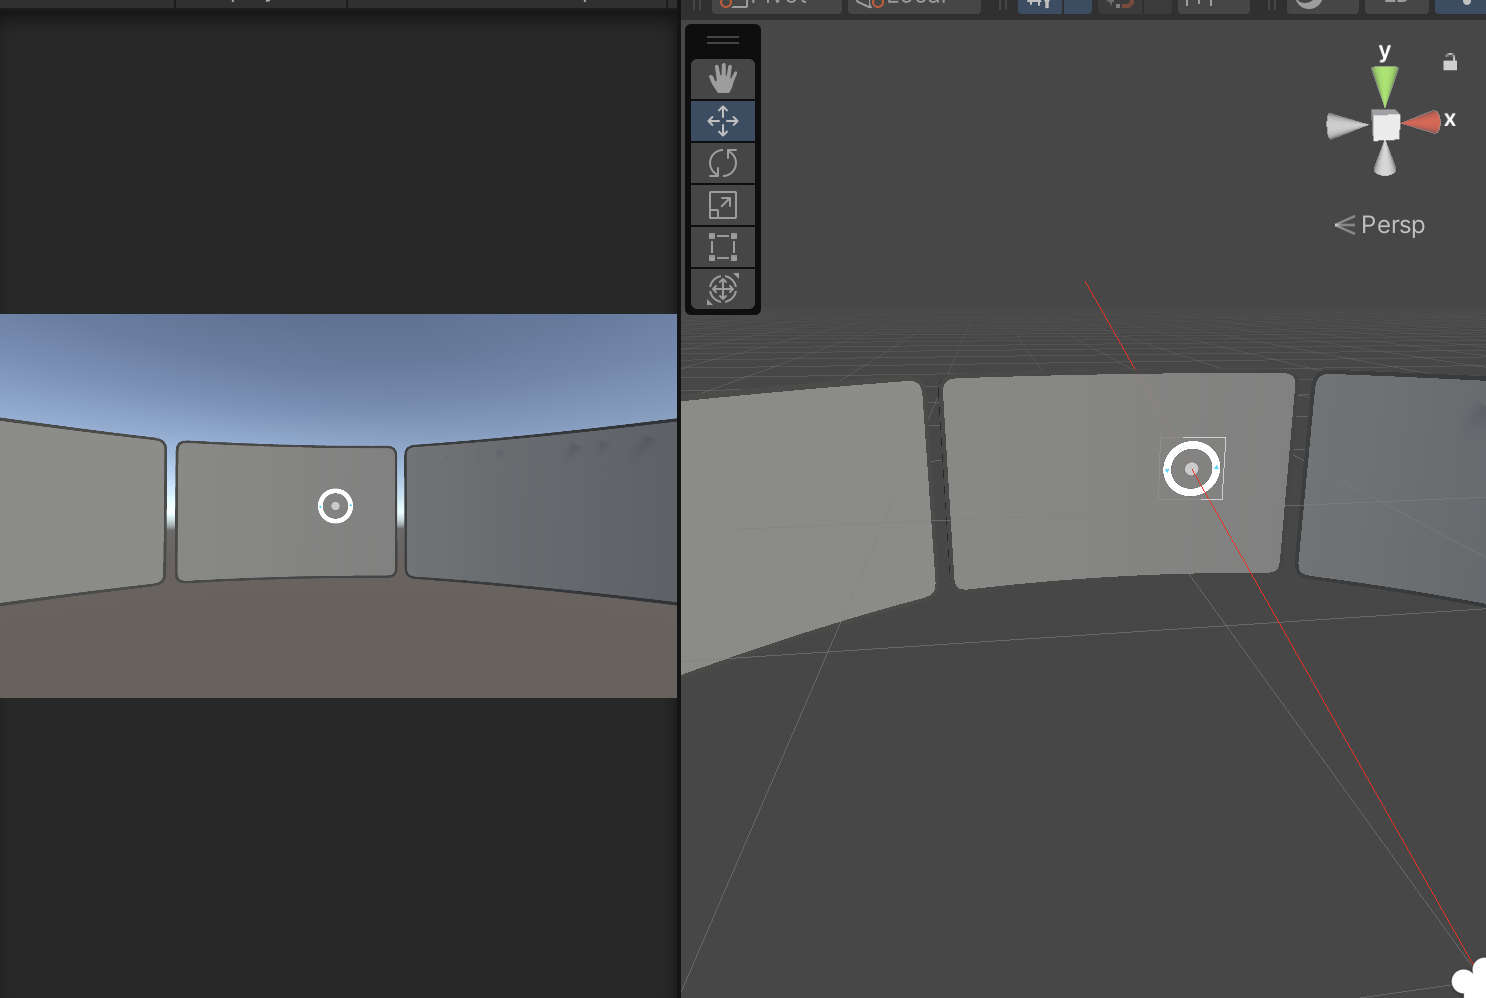
다시 실행후 확인 하기
Gaze의 크기 같게 만들기
using System.Collections;
using System.Collections.Generic;
using UnityEngine;

using UnityEngine.UI;
using UnityEngine.Video;

public class GazePointerController : MonoBehaviour
{

    [SerializeField]private Transform uiCanvas;
    [SerializeField]private Image gazeImg;
    [SerializeField] private float uiScaleValue = 1f;
    private Vector3 defaultScale;

    void Start()
    {
        this.defaultScale = uiCanvas.localScale;
    }

    // Update is called once per frame
    void Update()
    {
        //카메라 기준 전방 좌표 구하기
        Vector3 dir = transform.forward;

        //카메라 기준 전방 레이 설정
        Ray ray = new Ray(transform.position, dir);

        Debug.DrawRay(ray.origin, ray.direction * 200f, Color.red);

        RaycastHit hit;
        //충돌 검사
        if (Physics.Raycast(ray, out hit, 200f))
        {
            uiCanvas.localScale = defaultScale * uiScaleValue * hit.distance;
            uiCanvas.position = transform.forward * hit.distance;
        }
        else
        {
            uiCanvas.localScale = defaultScale * uiScaleValue;
            uiCanvas.position = transform.position + dir;
        }

        //uiCanvas가 항상 카메라 오브젝트를 바라보게
        uiCanvas.forward = transform.forward * -1;
    }
}
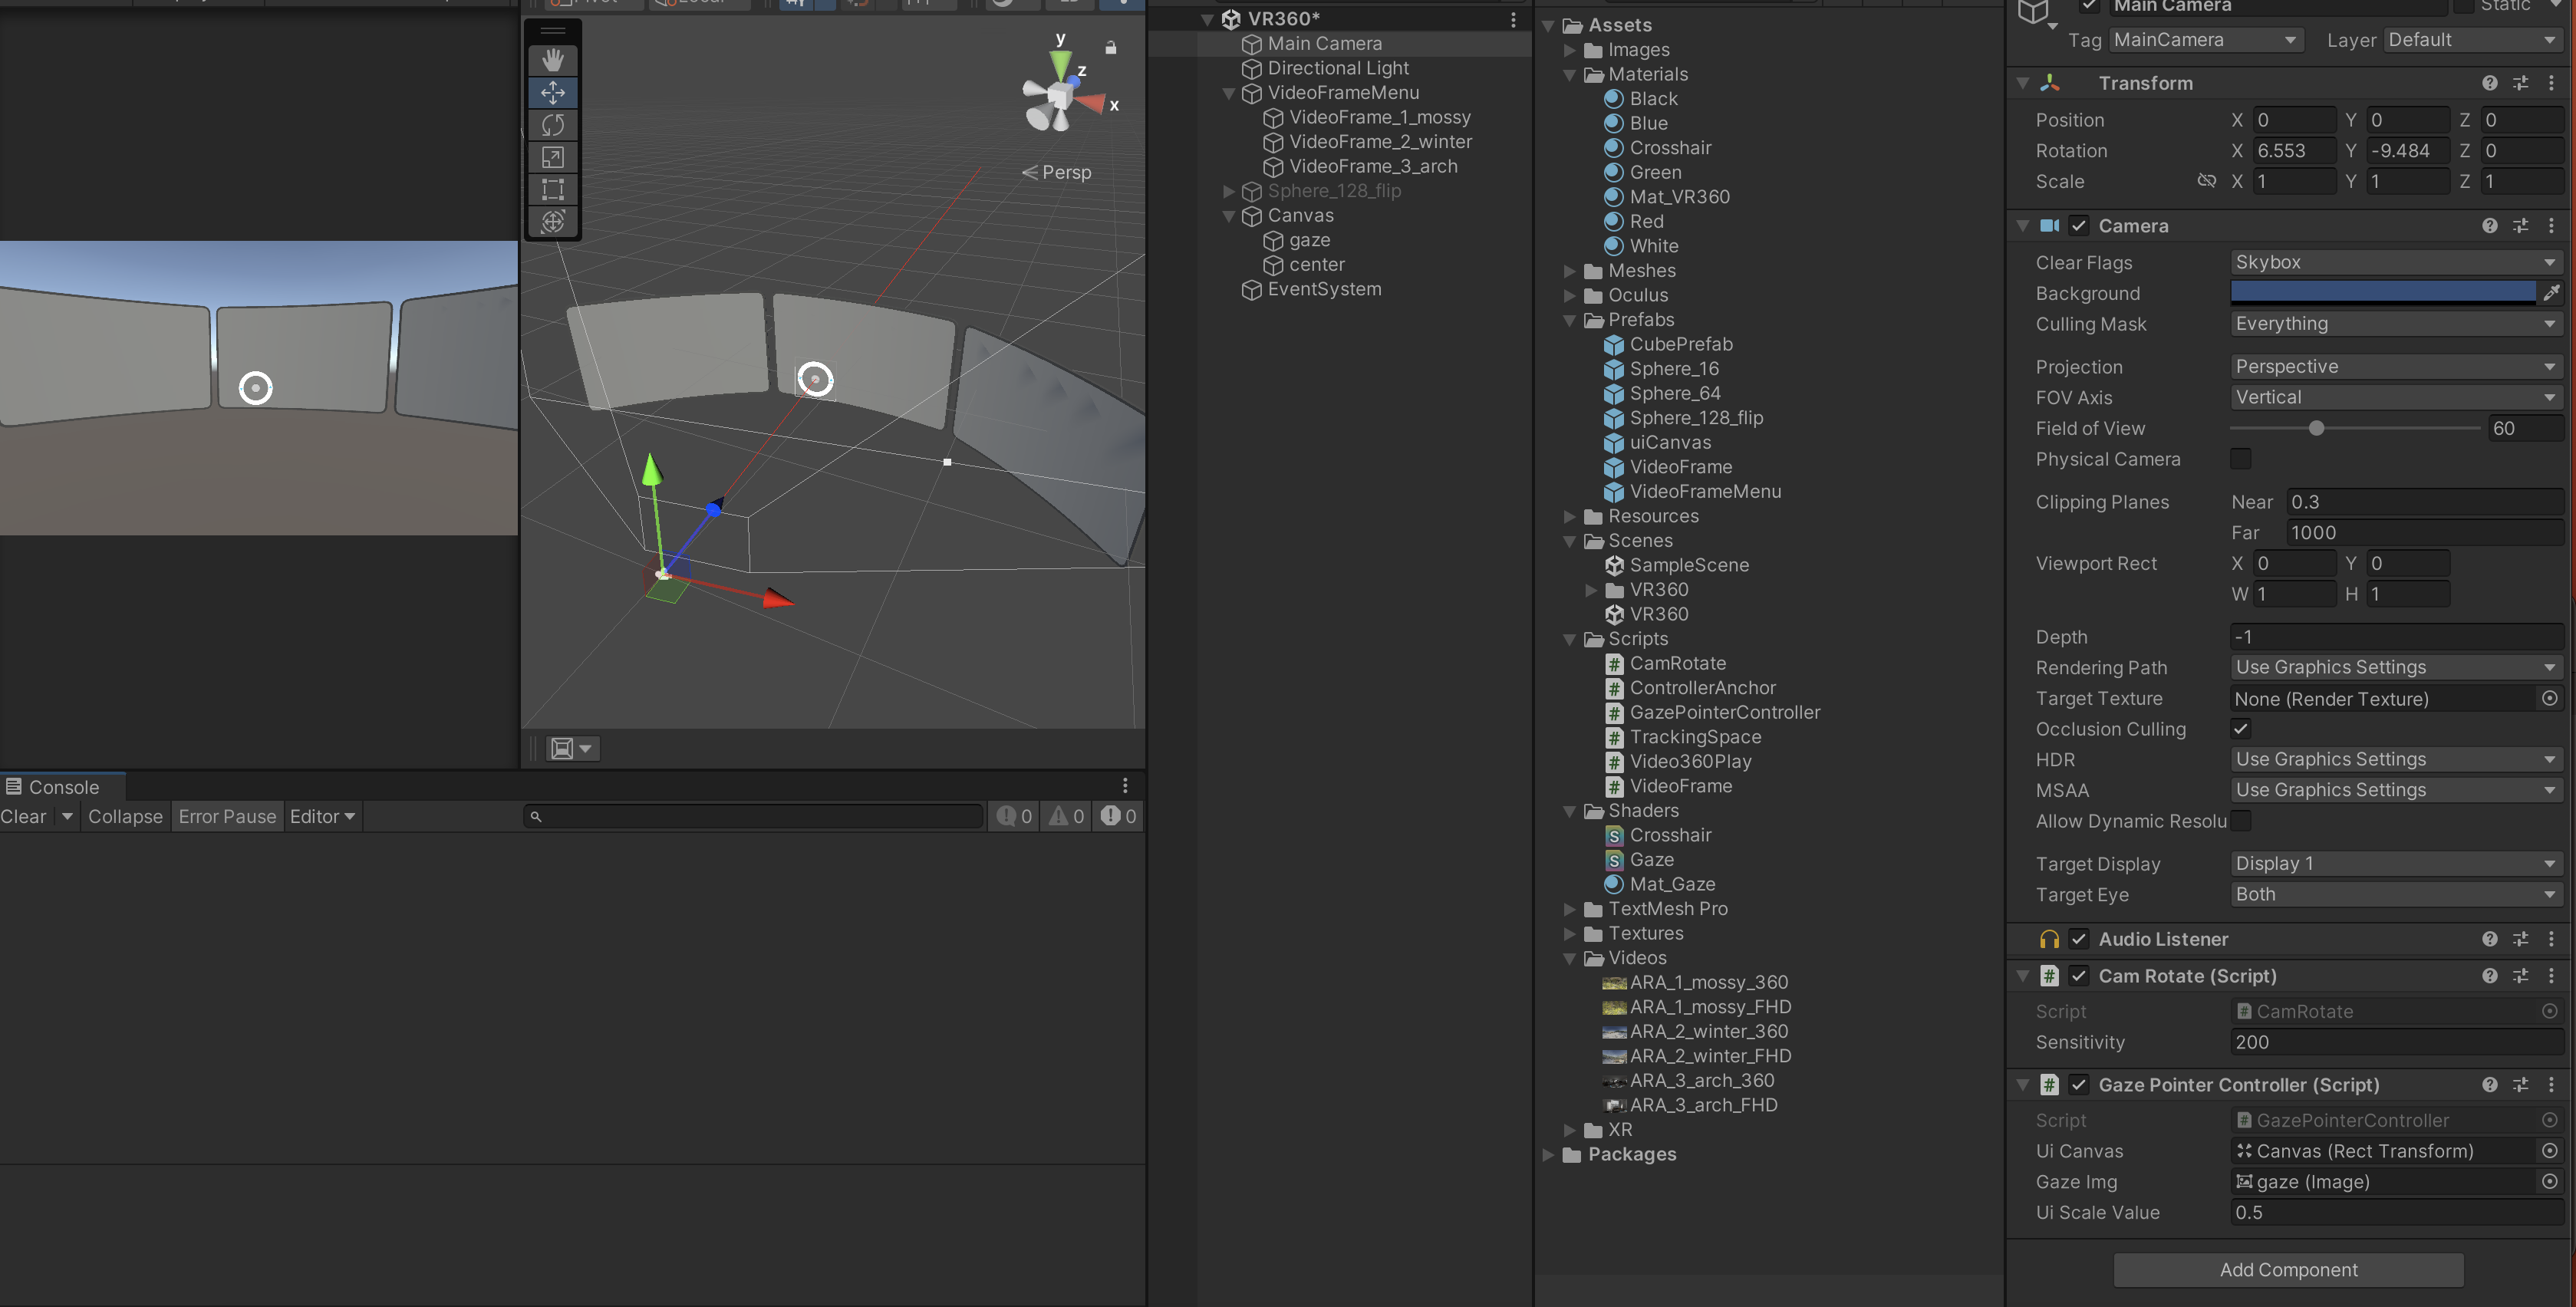
실행후 결과 확인
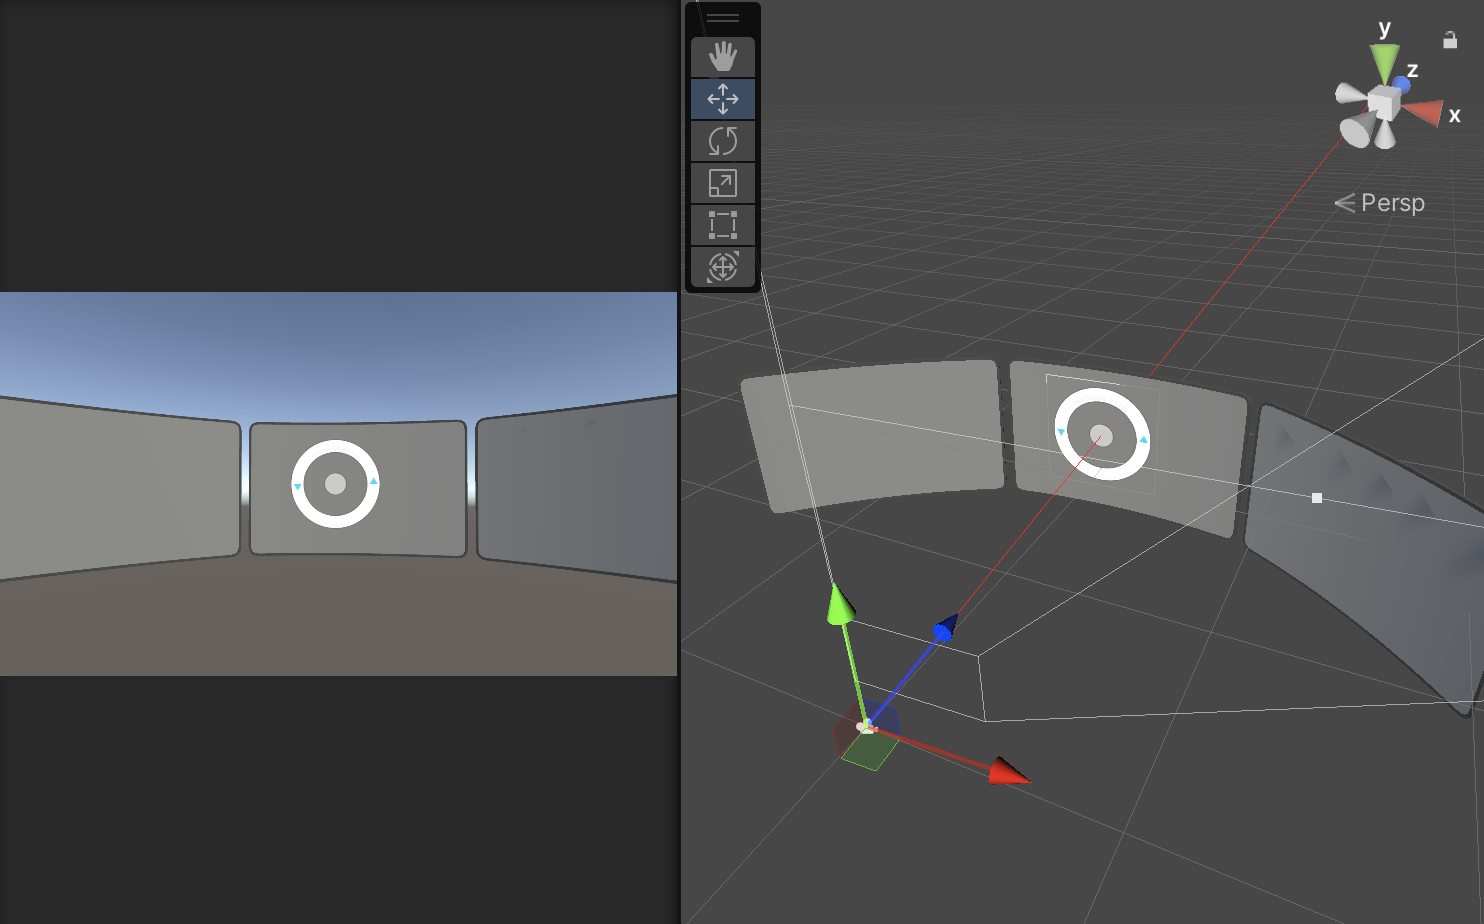
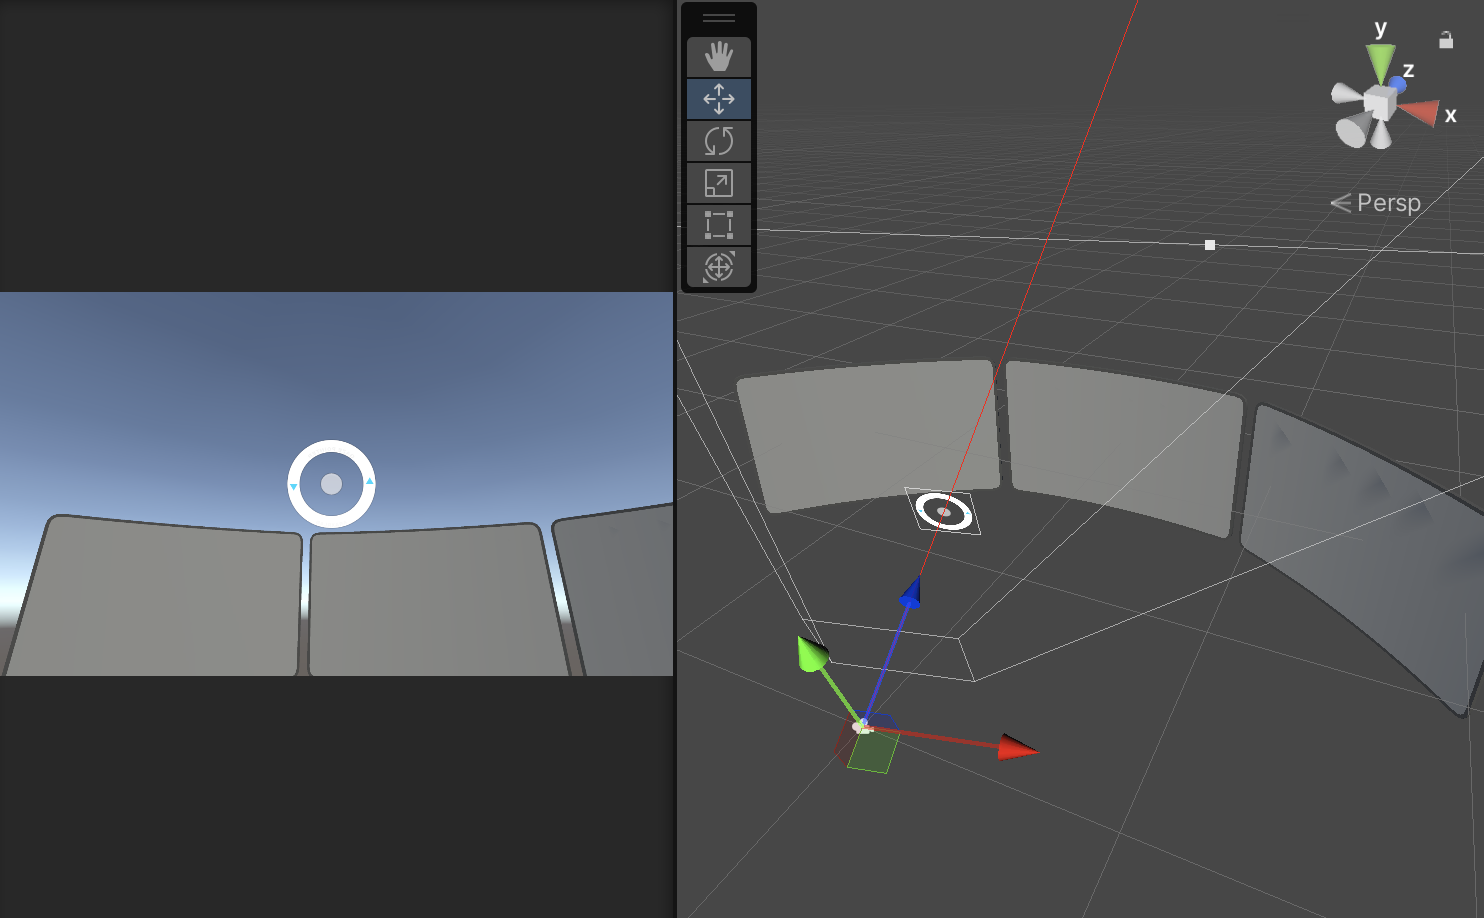
GazePointerController컴포넌트의 uiScaleValue의 값을 0.5로 설정 하면 항상 0.5 비율을 유지 함
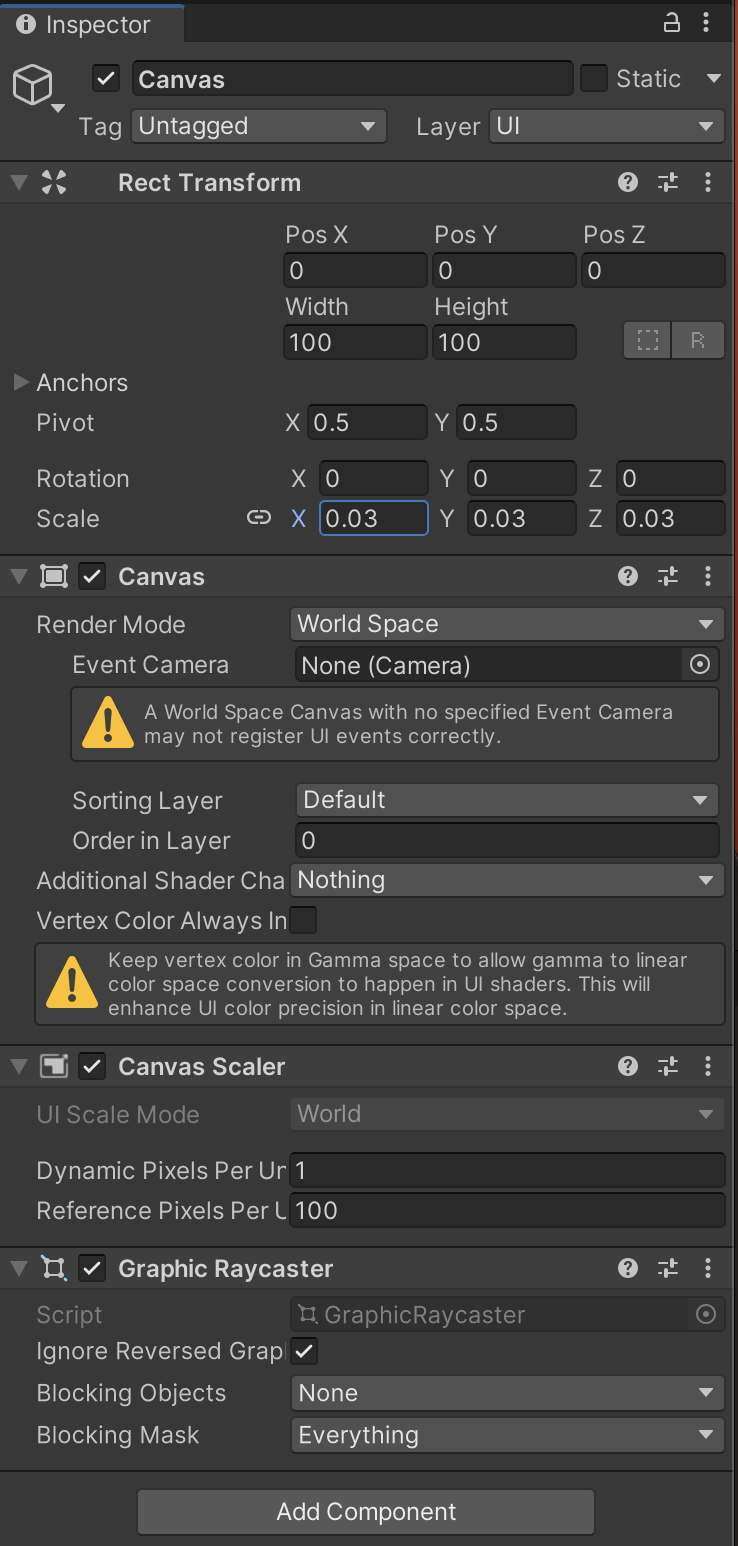
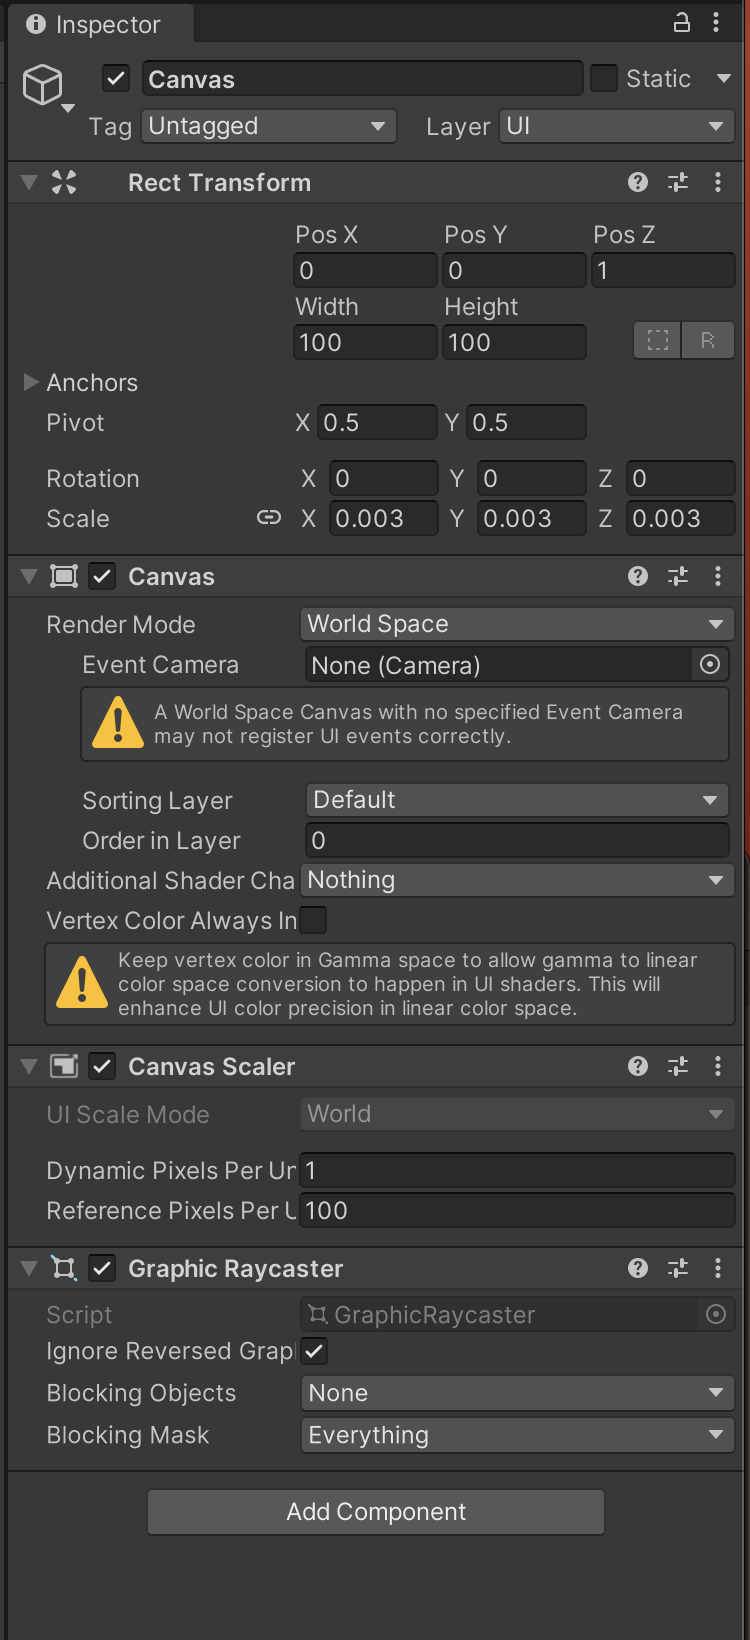
카메라의 거리에 따라 uiCanvas 오브젝트의 스케일을 증감 시키면 항상 일정한 간격을 유지 할수 있다.
최초 스케일 (프리팹 기준 x,y,z를 모두 0.003)을 defaultScale에 저장해 두었다가 이 값을 기본으로 거리를 곱해 증감 시키면 사용자 화면에 항상 일정한 크기로 Gaze Point가 보이게 된다
VideoFrame 오브젝트에 시선이 닿을 경우 , 시선이 닿는 동안 시간을 재는 기능
- 시선이 닿자 마자 기능을 동작 시키면 사용자가 의도 하지 않는 상황에 실행 될수도 있기 때문
using System.Collections;
using System.Collections.Generic;
using UnityEngine;

using UnityEngine.UI;
using UnityEngine.Video;

public class GazePointerController : MonoBehaviour
{

    [SerializeField]private Transform uiCanvas;
    [SerializeField]private Image gazeImg;
    [SerializeField] private float uiScaleValue = 1f;
    private Vector3 defaultScale;

    private bool isHitObj; //인터렉션이 일어나는 오브젝트에 시선이 닿으면 true
    private GameObject prevHitObj;  //이전 프레이믜 시서니 머물렀던 오브젝트
    private GameObject curHitObj;//현재 프레임의 시선이 머물렀던 오브젝트
    private float curGazeTime = 0;//시선이 머무르는 시간
    public float gazeChargeTime = 3f;//시선이 머문 시간을 체크하기 위한 기준


    void Start()
    {
        this.defaultScale = uiCanvas.localScale;
        this.curGazeTime = 0;   //시선 유지 체크변수 초기화
    }

    // Update is called once per frame
    void Update()
    {
        //카메라 기준 전방 좌표 구하기
        Vector3 dir = transform.forward;

        //카메라 기준 전방 레이 설정
        Ray ray = new Ray(transform.position, dir);

        Debug.DrawRay(ray.origin, ray.direction * 200f, Color.red);

        RaycastHit hit;
        //충돌 검사
        if (Physics.Raycast(ray, out hit, 200f))
        {
            uiCanvas.localScale = defaultScale * uiScaleValue * hit.distance;
            uiCanvas.position = transform.forward * hit.distance;

            if (hit.transform.CompareTag("GazeObj"))
            {
                this.isHitObj = true;
            }

            this.curHitObj = hit.transform.gameObject;
        }
        else
        {
            uiCanvas.localScale = defaultScale * uiScaleValue;
            uiCanvas.position = transform.position + dir;
        }

        //uiCanvas가 항상 카메라 오브젝트를 바라보게
        uiCanvas.forward = transform.forward * -1;


        //GazeObject에 레이가 닿았을 경우
        if (this.isHitObj)
        {
            if (this.curHitObj == this.prevHitObj)
            {
                this.curGazeTime += Time.deltaTime;
            }
            else
            {
                this.prevHitObj = this.curHitObj;
            }
        }
        else
        {
            this.curGazeTime = 0;
            this.prevHitObj = null;
        }

        this.curGazeTime = Mathf.Clamp(this.curGazeTime, 0, this.gazeChargeTime);
        this.gazeImg.fillAmount = this.curGazeTime / this.gazeChargeTime;
        this.isHitObj = false;
        this.curHitObj = null;
    }
}
실행후 결과를 확인
게이지가 다 차면 영상 실행 하기
using System.Collections;
using System.Collections.Generic;
using UnityEngine;
using UnityEngine.Video;

public class VideoFrame : MonoBehaviour
{
    private VideoPlayer video;

    void Start()
    {
        this.video = this.GetComponent<VideoPlayer>();
        this.video.Stop();
    }

    void Update()
    {
        if (Input.GetKeyDown(KeyCode.Space))
        {
            Debug.Log("space");

            if (video.isPlaying)
            {
                video.Pause();
            }
            else
            {
                video.Play();
            }
        }
    }

    public void CheckVideoFrame(bool check)
    {
        if (check)
        {
            if (!this.video.isPlaying)
            {
                this.video.Play();
            }
        }
        else
        {
            this.video.Stop();
        }
    }

}
using System.Collections;
using System.Collections.Generic;
using UnityEngine;
using UnityEngine.UI;
using UnityEngine.Video;
public class GazePointerController : MonoBehaviour
{
[SerializeField]private Transform uiCanvas;
[SerializeField]private Image gazeImg;
[SerializeField] private float uiScaleValue = 1f;
private Vector3 defaultScale;
private bool isHitObj; //인터렉션이 일어나는 오브젝트에 시선이 닿으면 true
private GameObject prevHitObj; //이전 프레이믜 시서니 머물렀던 오브젝트
private GameObject curHitObj;//현재 프레임의 시선이 머물렀던 오브젝트
private float curGazeTime = 0;//시선이 머무르는 시간
public float gazeChargeTime = 3f;//시선이 머문 시간을 체크하기 위한 기준
void Start()
{
this.defaultScale = uiCanvas.localScale;
this.curGazeTime = 0; //시선 유지 체크변수 초기화
}
// Update is called once per frame
void Update()
{
//카메라 기준 전방 좌표 구하기
Vector3 dir = transform.forward;
//카메라 기준 전방 레이 설정
Ray ray = new Ray(transform.position, dir);
Debug.DrawRay(ray.origin, ray.direction * 200f, Color.red);
RaycastHit hit;
//충돌 검사
if (Physics.Raycast(ray, out hit, 200f))
{
uiCanvas.localScale = defaultScale * uiScaleValue * hit.distance;
uiCanvas.position = transform.forward * hit.distance;
if (hit.transform.CompareTag("GazeObj"))
{
this.isHitObj = true;
}
this.curHitObj = hit.transform.gameObject;
}
else
{
uiCanvas.localScale = defaultScale * uiScaleValue;
uiCanvas.position = transform.position + dir;
}
//uiCanvas가 항상 카메라 오브젝트를 바라보게
uiCanvas.forward = transform.forward * -1;
//GazeObject에 레이가 닿았을 경우
if (this.isHitObj)
{
if (this.curHitObj == this.prevHitObj)
{
this.curGazeTime += Time.deltaTime;
}
else
{
this.prevHitObj = this.curHitObj;
}
HitObjChecker(this.curHitObj, true);
}
else
{
if (this.prevHitObj != null)
{
HitObjChecker(this.prevHitObj, false);
prevHitObj = null;
}
this.curGazeTime = 0;
}
this.curGazeTime = Mathf.Clamp(this.curGazeTime, 0, this.gazeChargeTime);
this.gazeImg.fillAmount = this.curGazeTime / this.gazeChargeTime;
this.isHitObj = false;
this.curHitObj = null;
}
void HitObjChecker(GameObject hitObj, bool isActive)
{
if (hitObj.GetComponent<VideoPlayer>())
{
if (isActive)
{
hitObj.GetComponent<VideoFrame>().CheckVideoFrame(true);
}
else
{
hitObj.GetComponent<VideoFrame>().CheckVideoFrame(false);
}
}
}
}실행후 결과 확인
시선이 닿은 직후 앞으로 재생될 영상을 미리 보는 용도로 사용
넷플릭스와 같은 OTT서비스에서 많이 볼수 있는 방식임
VR360 오큘러스에 적용하기
Gaze pointer로 VR360 영상 제어 하기
- VR 360영상을 제어 하기 위해 2가지 작업이 필요
- 응시 하는 시간이 다 되었는지 체크
- 다 되었다면 360 스핑어에 추가한 영상을 재생
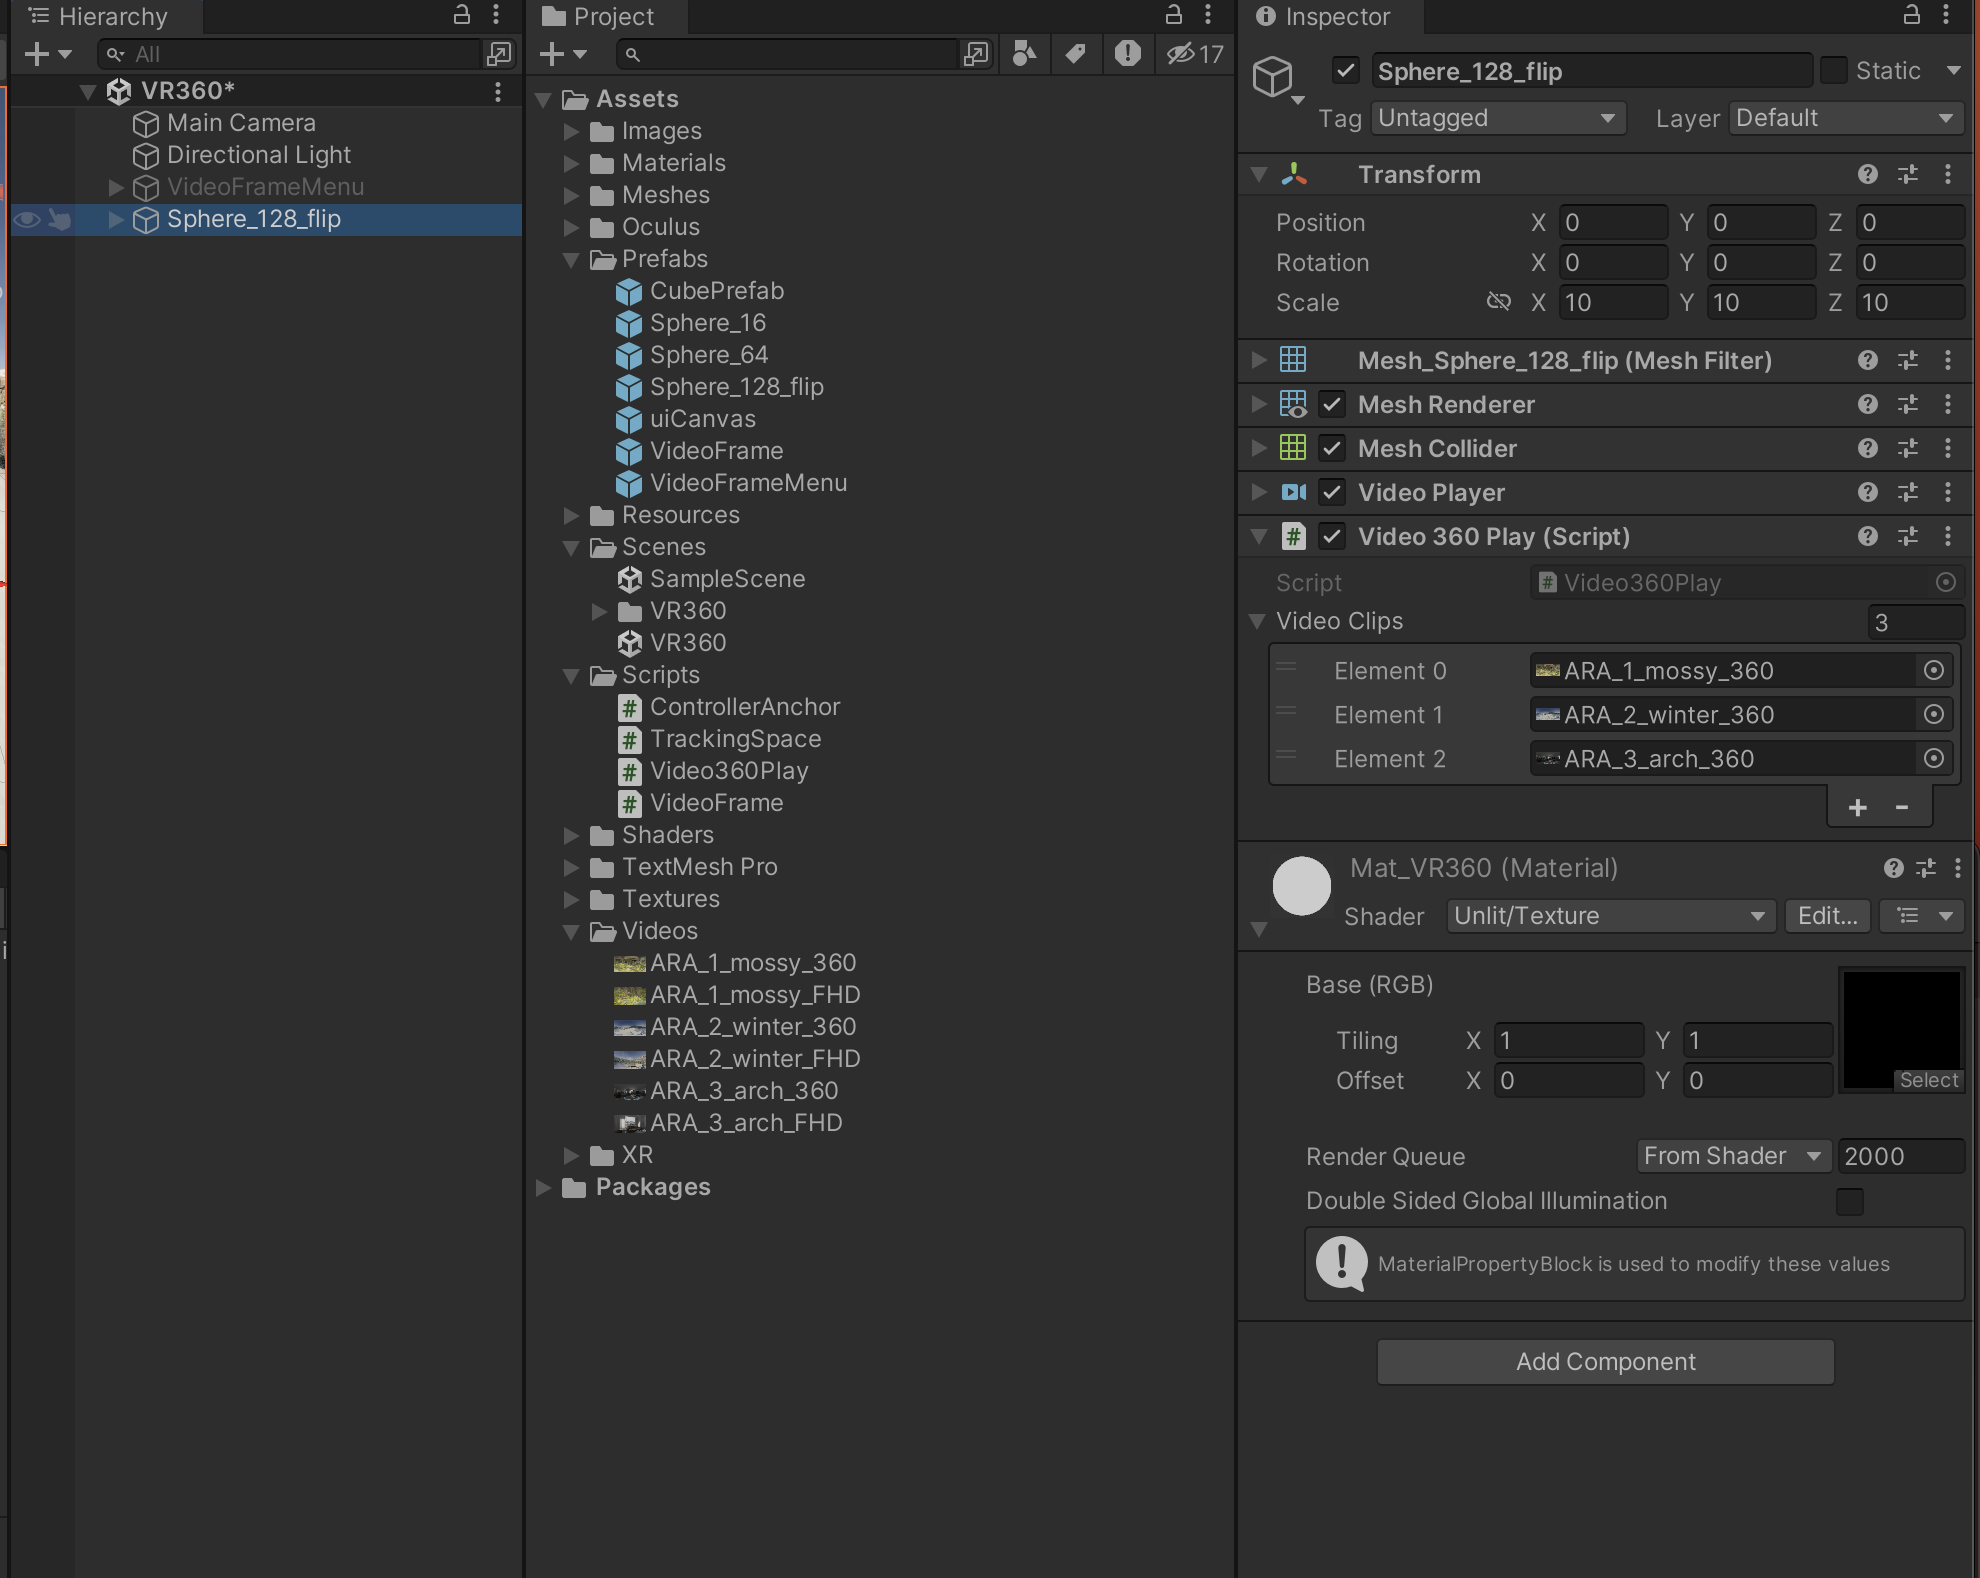
Video360Play스크립트를 수정
using System.Collections;
using System.Collections.Generic;
using UnityEngine;
using UnityEngine.Video;

public class Video360Play : MonoBehaviour
{
    private VideoPlayer videoPlayer;

    public VideoClip[] videoClips;
    private int index;


    void Start()
    {
        this.videoPlayer = this.GetComponent<VideoPlayer>();
        this.index = 0;
        this.videoPlayer.clip = this.videoClips[this.index];
        this.videoPlayer.Stop();
    }

    // Update is called once per frame
    void Update()
    {
        if (Input.GetKeyDown(KeyCode.LeftBracket))
        {
            //this.videoPlayer.clip = this.videoClips[0];
            this.SwapVideoClip(false);
        }else if (Input.GetKeyDown(KeyCode.RightBracket))
        {
            //this.videoPlayer.clip = this.videoClips[1];
            this.SwapVideoClip(true);
        }
    }

    public void SwapVideoClip(bool isNext)
    {
        int num = this.index;
        this.videoPlayer.Stop();

        if (isNext)
        {
            // num++;
            // if (num >= this.videoClips.Length)
            // {
            //     this.videoPlayer.clip = videoClips[0];
            // }
            // else
            // {
            //     this.videoPlayer.clip = this.videoClips[num];
            // }
            num = (num + 1) % this.videoClips.Length;
        }
        else
        {
            //이전 영상 재생
            num = ((num - 1) + videoClips.Length) % this.videoClips.Length;
        }

        videoPlayer.clip = videoClips[num];
        videoPlayer.Play();
        this.index = num;
    }

    public void SetVideoPlay(int num)
    {
        if (this.index != num)
        {
            this.videoPlayer.Stop();
            this.videoPlayer.clip = videoClips[num];
            this.index = num;
            this.videoPlayer.Play();
        }
    }
}
VR환경 설정 하기
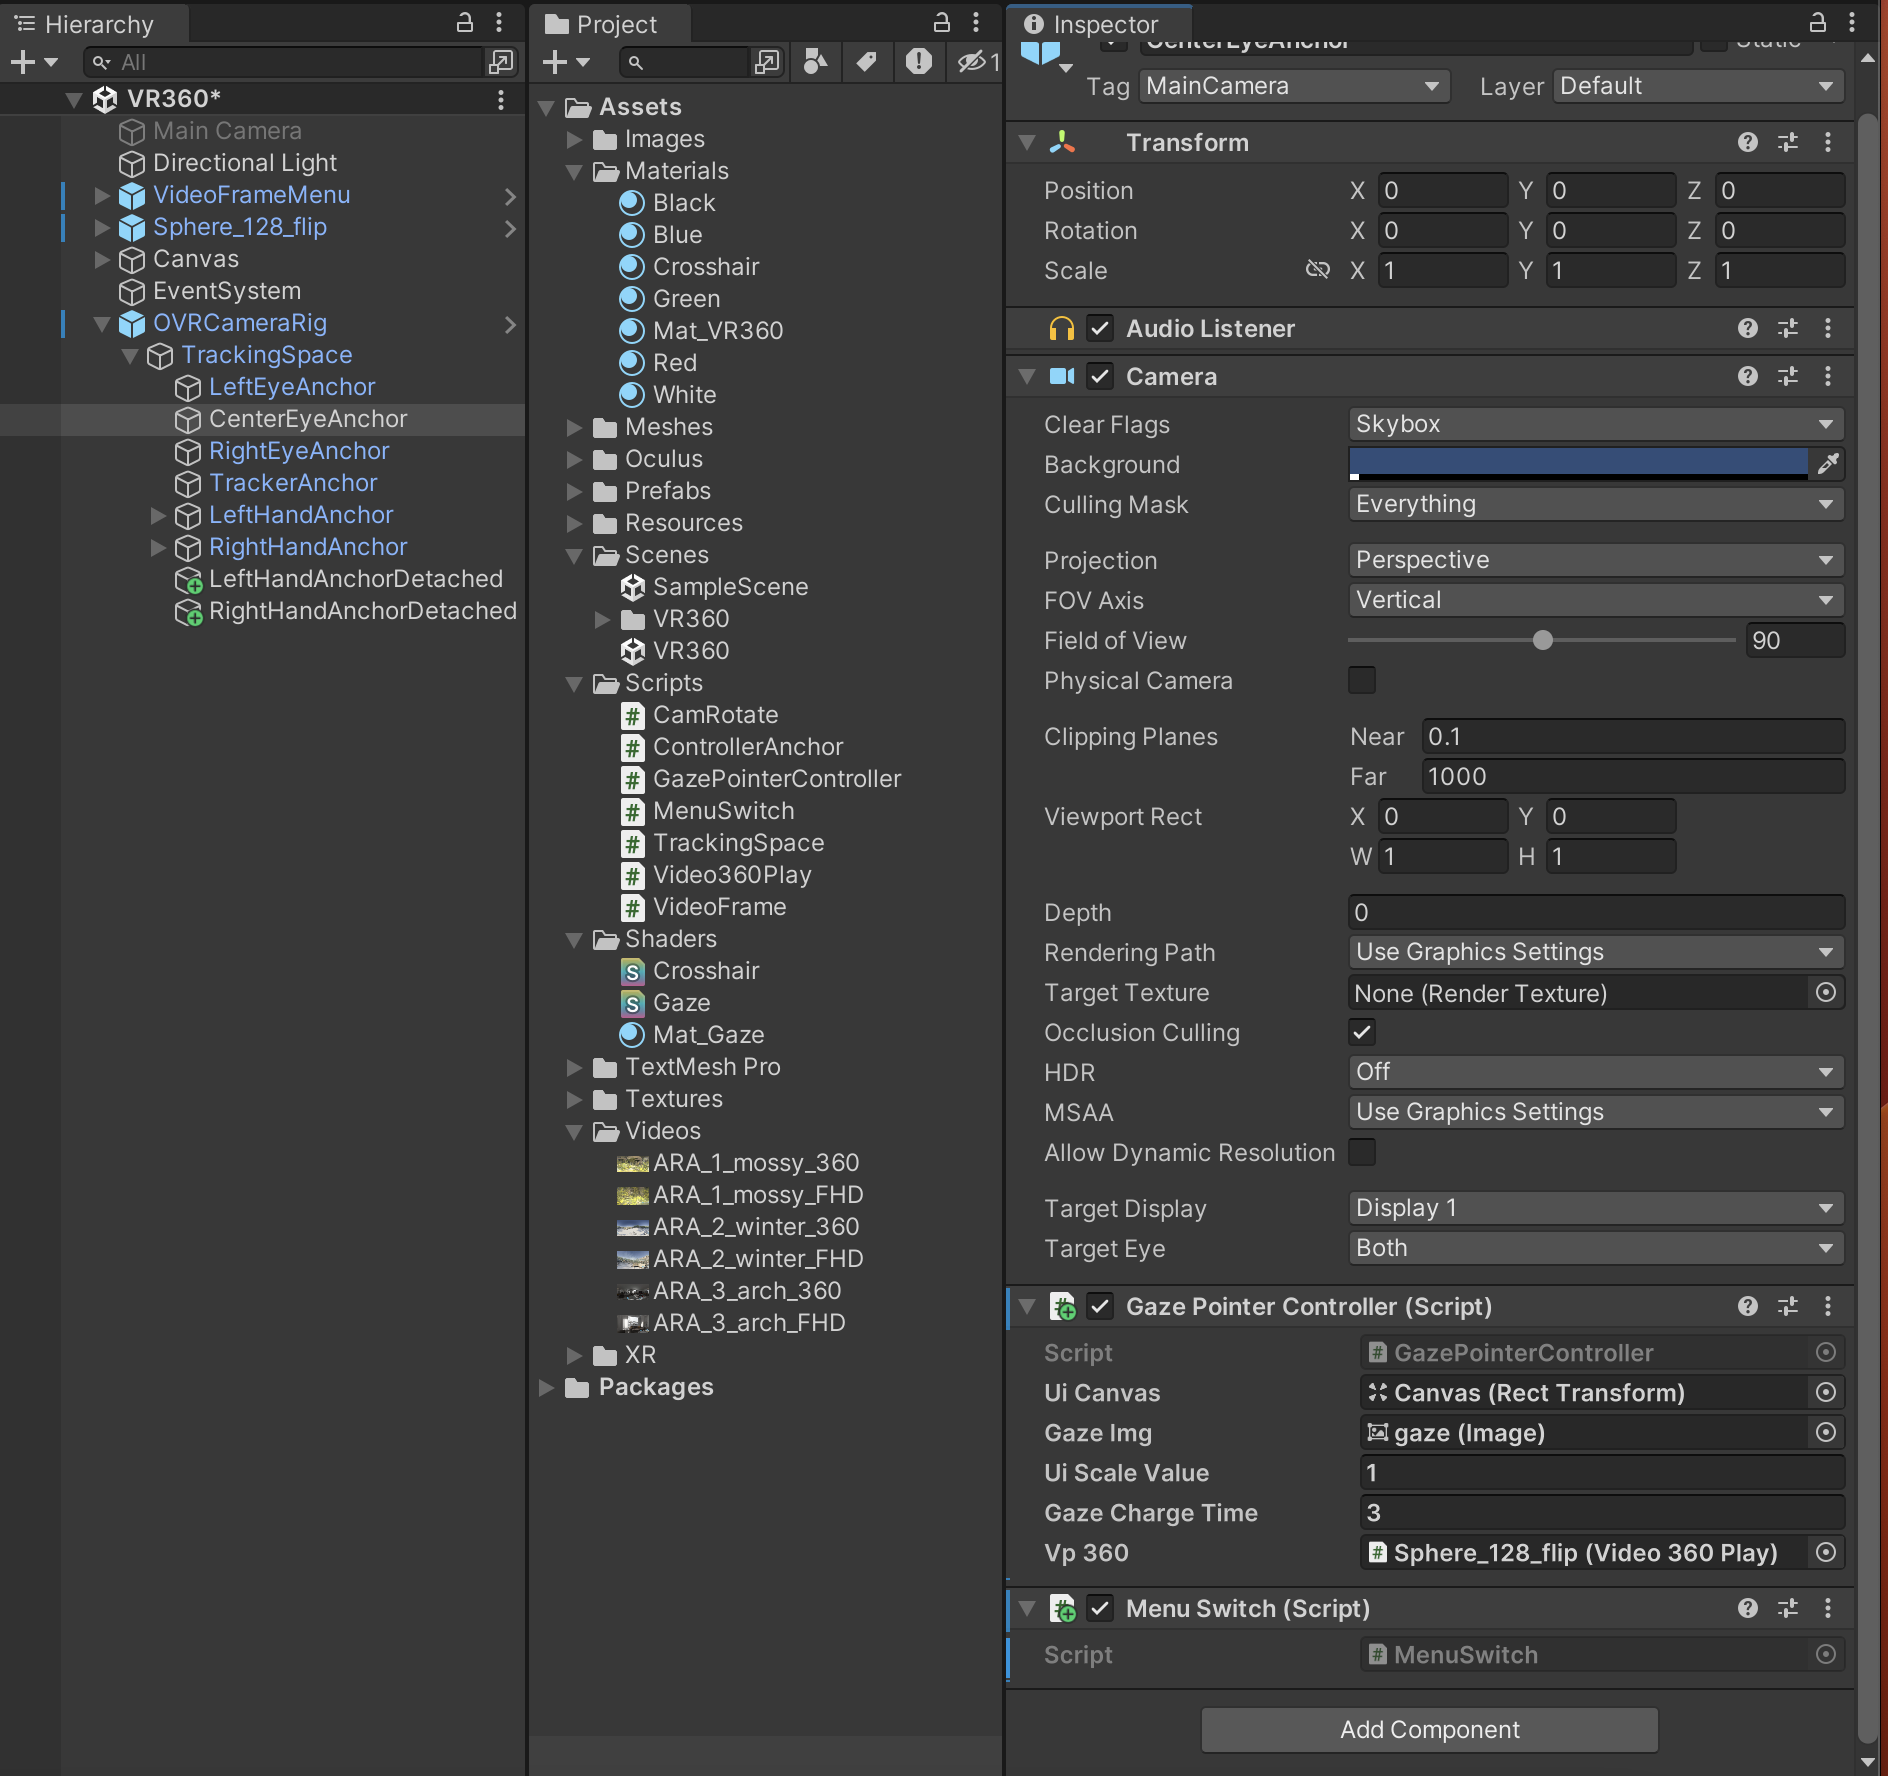
OVRCameraRig를 하이어라키에 놓고 자식오브젝트인 CenterEyeAnchor에 GazePointerController를 부착 한다

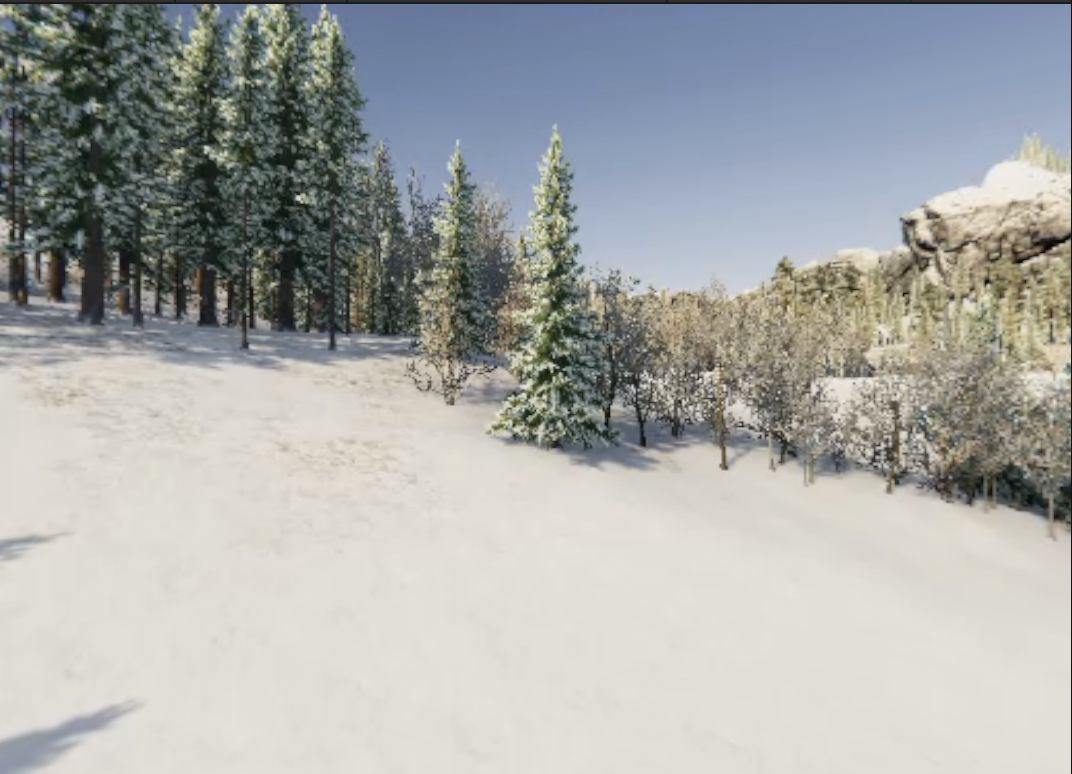
실행후 결과를 확인해보자
사용자편의 기능 추가
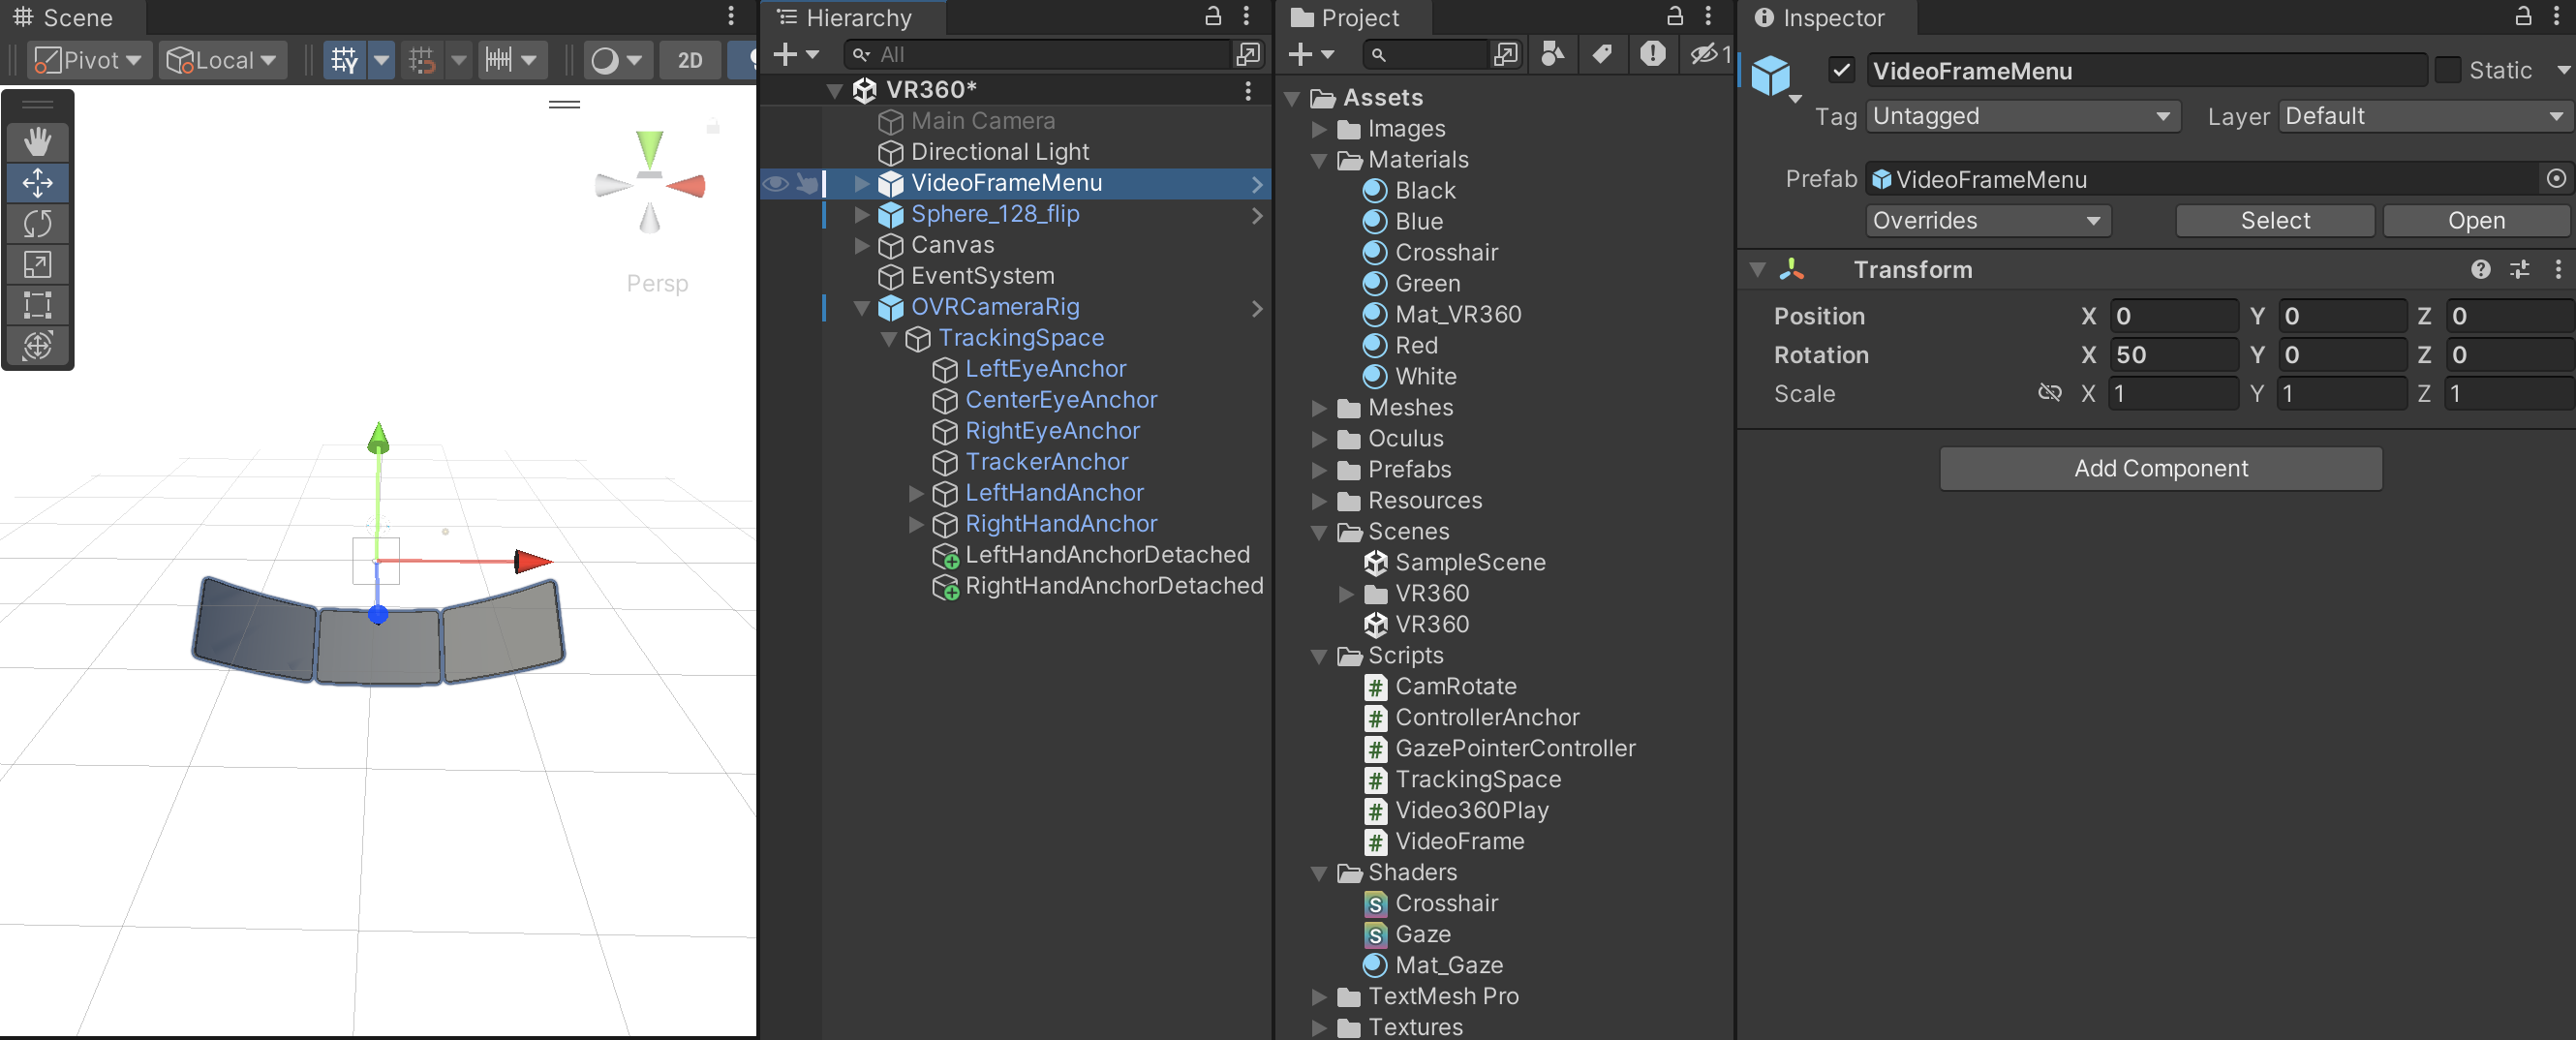
메뉴가 눈 앞을 가리는 형태를 수정한다
VideoFrameMenu 오브젝트를 Ratate X 50으로 설정
MenuSwitch 스크립트를 생성후 MainCamera에 부착
using System.Collections;
using System.Collections.Generic;
using UnityEngine;

public class MenuSwitch : MonoBehaviour
{
    public GameObject videoFrameMenu;
    public float minAngle = 65;
    public float maxAngle = 90;

    void Update()
    {
        if (this.transform.eulerAngles.x >= minAngle && transform.eulerAngles.x < maxAngle)
        {
            videoFrameMenu.SetActive(true);
        }
        else
        {
            videoFrameMenu.SetActive(false);
        }
    }
}
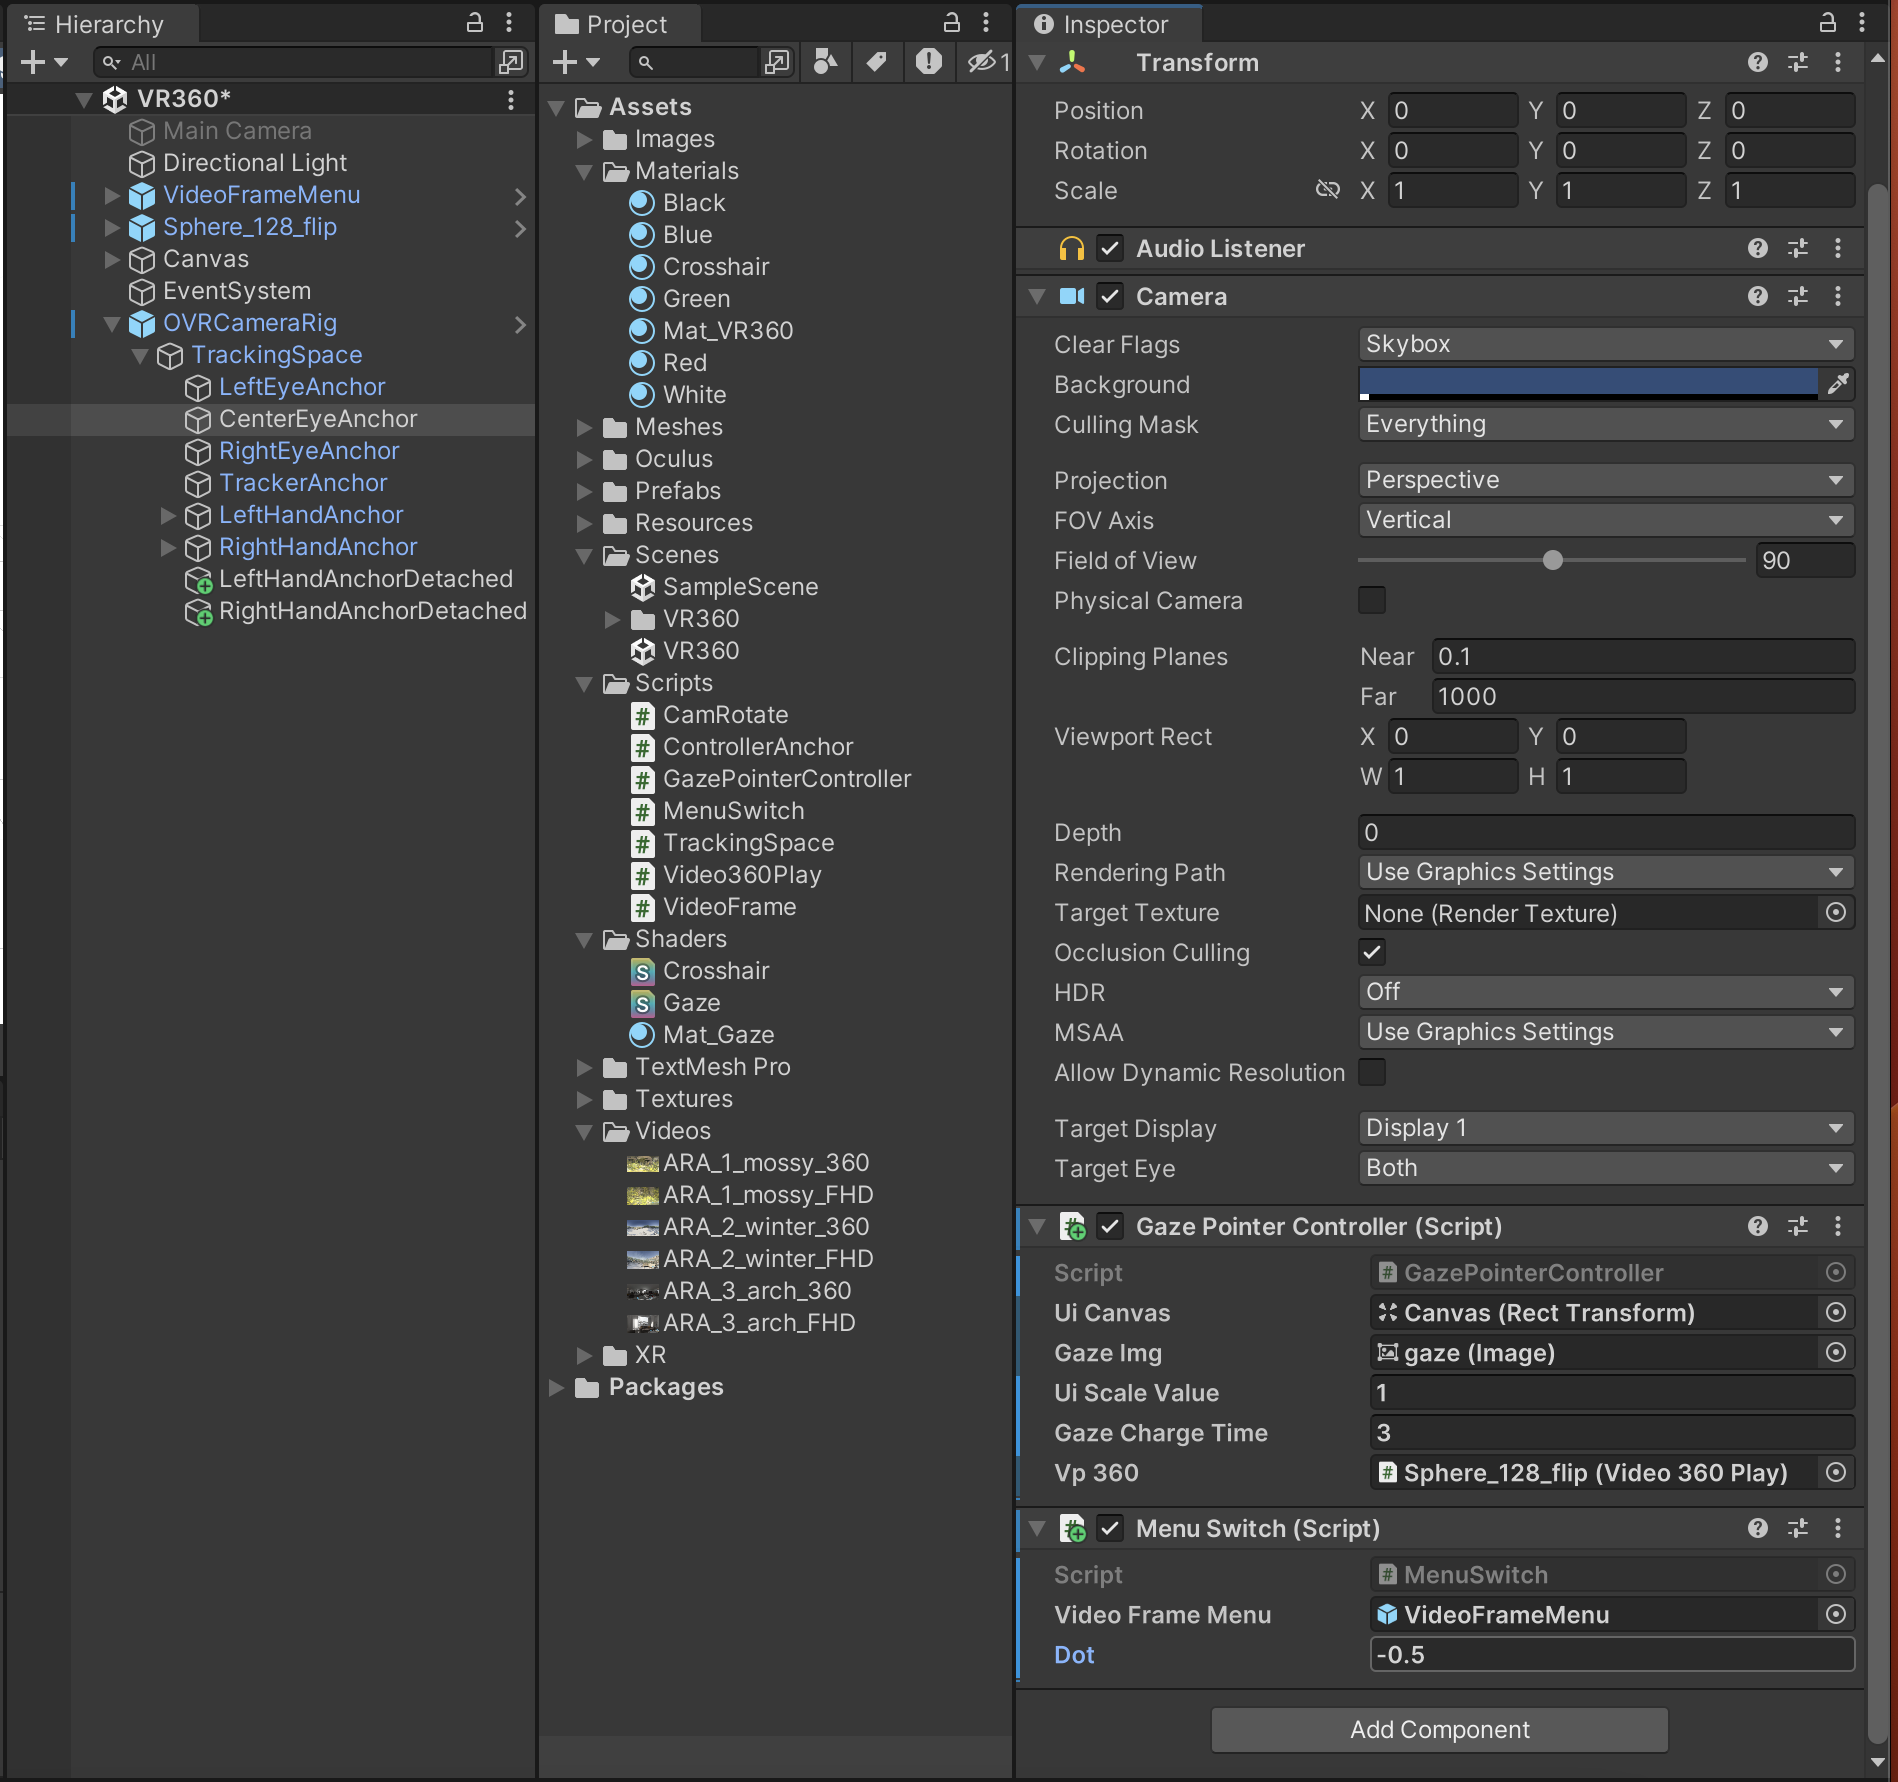
Dot(내적)사용해보기
using System.Collections;
using System.Collections.Generic;
using UnityEngine;

public class MenuSwitch : MonoBehaviour
{
    public GameObject videoFrameMenu;
    public float dot;

    void Update()
    {
        dot = Vector3.Dot(transform.forward, Vector3.up);
        if (dot < -0.5f)
        {
            videoFrameMenu.SetActive(true);
        }
        else
        {
            videoFrameMenu.SetActive(false);
        }
    }
}
자동 재생 방지
using System.Collections;
using System.Collections.Generic;
using UnityEngine;
using UnityEngine.Video;

public class VideoFrame : MonoBehaviour
{
    private VideoPlayer video;

    void Start()
    {
        this.video = this.GetComponent<VideoPlayer>();
        this.video.Stop();
    }

    void Update()
    {
        if (Input.GetKeyDown(KeyCode.Space))
        {
            Debug.Log("space");

            if (video.isPlaying)
            {
                video.Pause();
            }
            else
            {
                video.Play();
            }
        }
    }

    public void CheckVideoFrame(bool check)
    {
        if (check)
        {
            if (!this.video.isPlaying)
            {
                this.video.Play();
            }
        }
        else
        {
            this.video.Stop();
        }
    }


    void OnEnable()
    {
        if (this.video != null)
        {
            this.video.Stop();
        }
    }

}
스크립트연결
실행후 결과를 확인 해보자